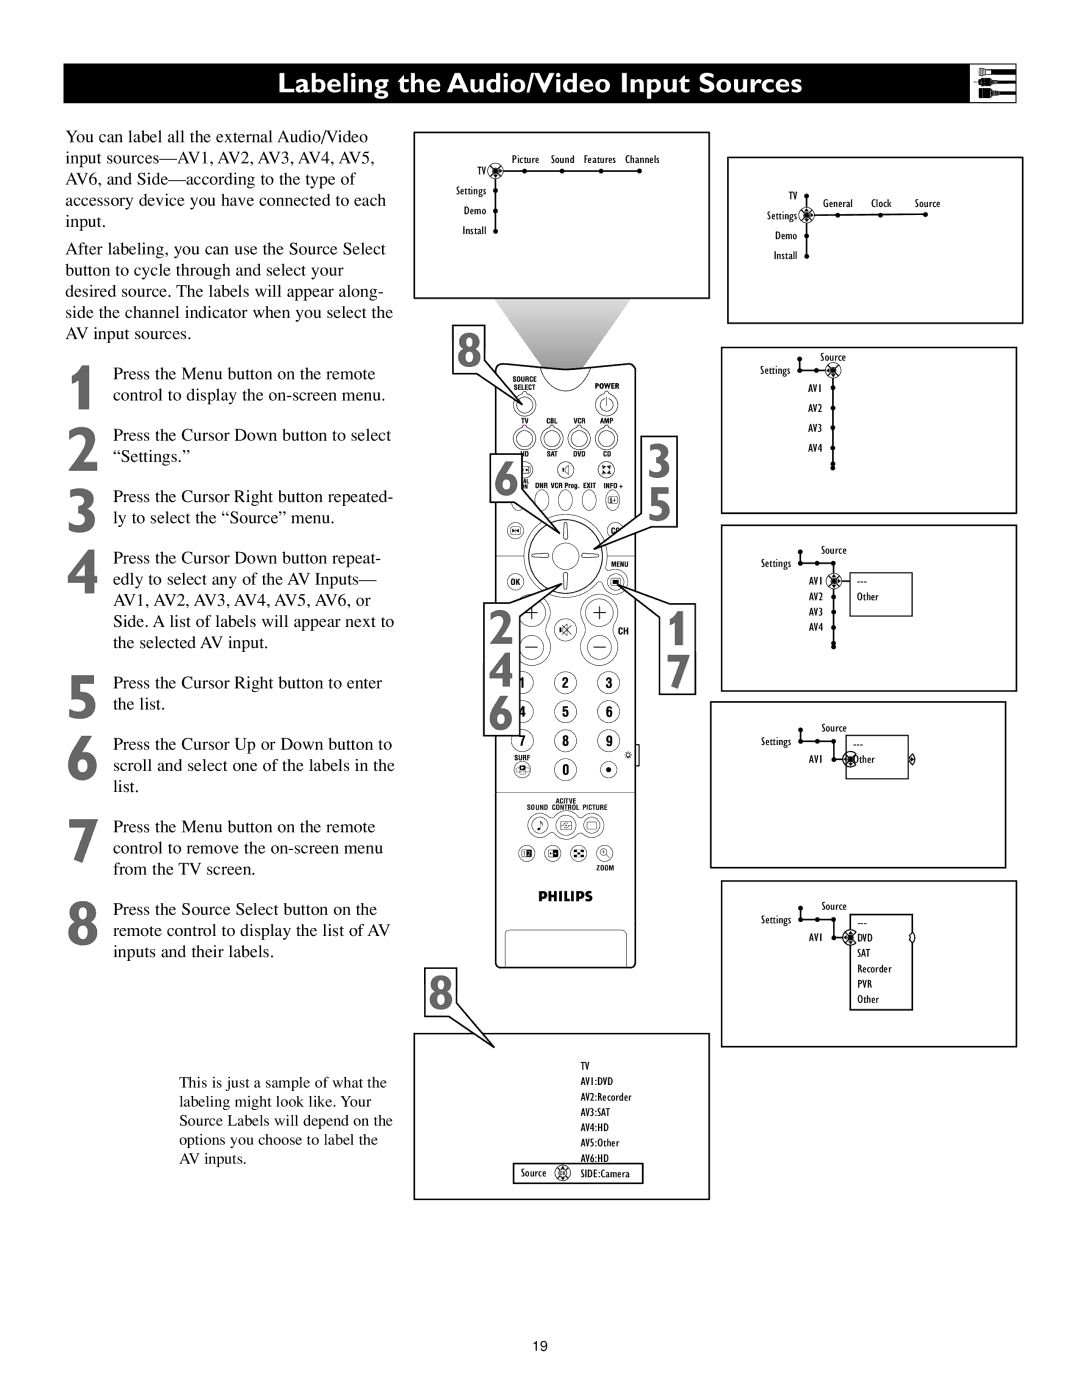
Labeling the Audio/Video Input Sources
You can label all the external Audio/Video input
After labeling, you can use the Source Select button to cycle through and select your desired source. The labels will appear along- side the channel indicator when you select the AV input sources.
1 Press the Menu button on the remote
TV ![]()
Settings
Demo
Install
8
Picture Sound Features Channels
TV
General Clock Source
Settings ![]()
Demo
Install
Source
Settings
control to display the
2 Press the Cursor Down button to select “Settings.”
3 Press the Cursor Right button repeated- ly to select the “Source” menu.
4 Press the Cursor Down button repeat- edly to select any of the AV Inputs— AV1, AV2, AV3, AV4, AV5, AV6, or Side. A list of labels will appear next to the selected AV input.
5 Press the Cursor Right button to enter the list.
6 Press the Cursor Up or Down button to scroll and select one of the labels in the list.
7 Press the Menu button on the remote control to remove the
8 Press the Source Select button on the remote control to display the list of AV inputs and their labels.
This is just a sample of what the labeling might look like. Your Source Labels will depend on the options you choose to label the AV inputs.
6
![]()
![]()
![]()
![]()
![]()
![]()
![]()
![]()
![]()
![]()
![]()
![]() 3 5
3 5
2![]()
![]()
![]()
![]()
![]()
![]() 1
1
4![]()
![]()
![]() 7
7
6![]()
ACITVE
SOUND CONTROL PICTURE
1 2
ZOOM
8
TV
AV1:DVD
AV2:Recorder
AV3:SAT
AV4:HD
AV5:Other
AV6:HD
Source ![]() OK
OK![]() SIDE:Camera
SIDE:Camera
AV1
AV2
AV3
AV4
Source |
|
Settings |
|
AV1 | |
AV2 | Other |
AV3 |
|
AV4 |
|
Source |
|
Settings | |
AV1 | Other |
Source |
|
Settings | |
AV1 | DVD |
| SAT |
| Recorder |
| PVR |
| Other |
19