11 Telephone Lines and Additional Devices
Configuring Telephone Lines and | analogue terminals. Details for ISDN connections can be |
Services | found in the instructions provided with the terminal |
| adapter or the |
EN
Private Branch Exchange / PABX
Private branch exchanges (PABX) are typical in many of- fices and some households. You must dial an outside line access code in order to get a connection to the public tele- phone network (PSTN) from a PABX.
1Press OK, 15 and OK.
2Using [ select NETWORK TYPE.
3Confirm with OK.
4Using [ select PSTN or PABX.
5Confirm with OK.
Connecting Additional Devices
You can operate additional devices on a telephone line, such as cordless telephones, answering machines, modems or charge counters.
If you are using a cordless telephone with SMS func- tion on the same line, then the specific device at which you will receive an SMS message will depend on the specific manufacturer. Only one of the devices will receive the SMS message. Try to turn off the SMS reception on your cordless telephone.
Setting Up an Extension
If you are operating the device within a PABX, use func- tion 15 to set the device to the appropriate length for in- ternal numbers and to set the code that must be dialled in order to access a public telephone line (= Outside Line Ac- cess Code).
1Press OK, 15 and OK.
2Using [ select PREFIX.
3Confirm with OK.
4Enter the appropriate length for internal numbers. Use C to delete individual characters. Assume the longest internal number, then add one digit to that. If your di- rect dial numbers consist of four digits, then you should input5.
5Confirm with OK.
6Enter the outside line access code with which you reach the public telephone network. This is usually 0.
In rare cases, the outside line access code may be a different number or a
7Confirm with OK.
Once these settings are in place, you will no longer need to prefix the outside line access code every time you enter an external number. The device will auto- matically add the outside line access code in front of numbers that are the same length or longer than the configured direct dial numbers.
DSL Connection
In the event that you use a DSL modem: Connect the ma- chine after the modem. For additional information, please consult the operating manual of your DSL system.
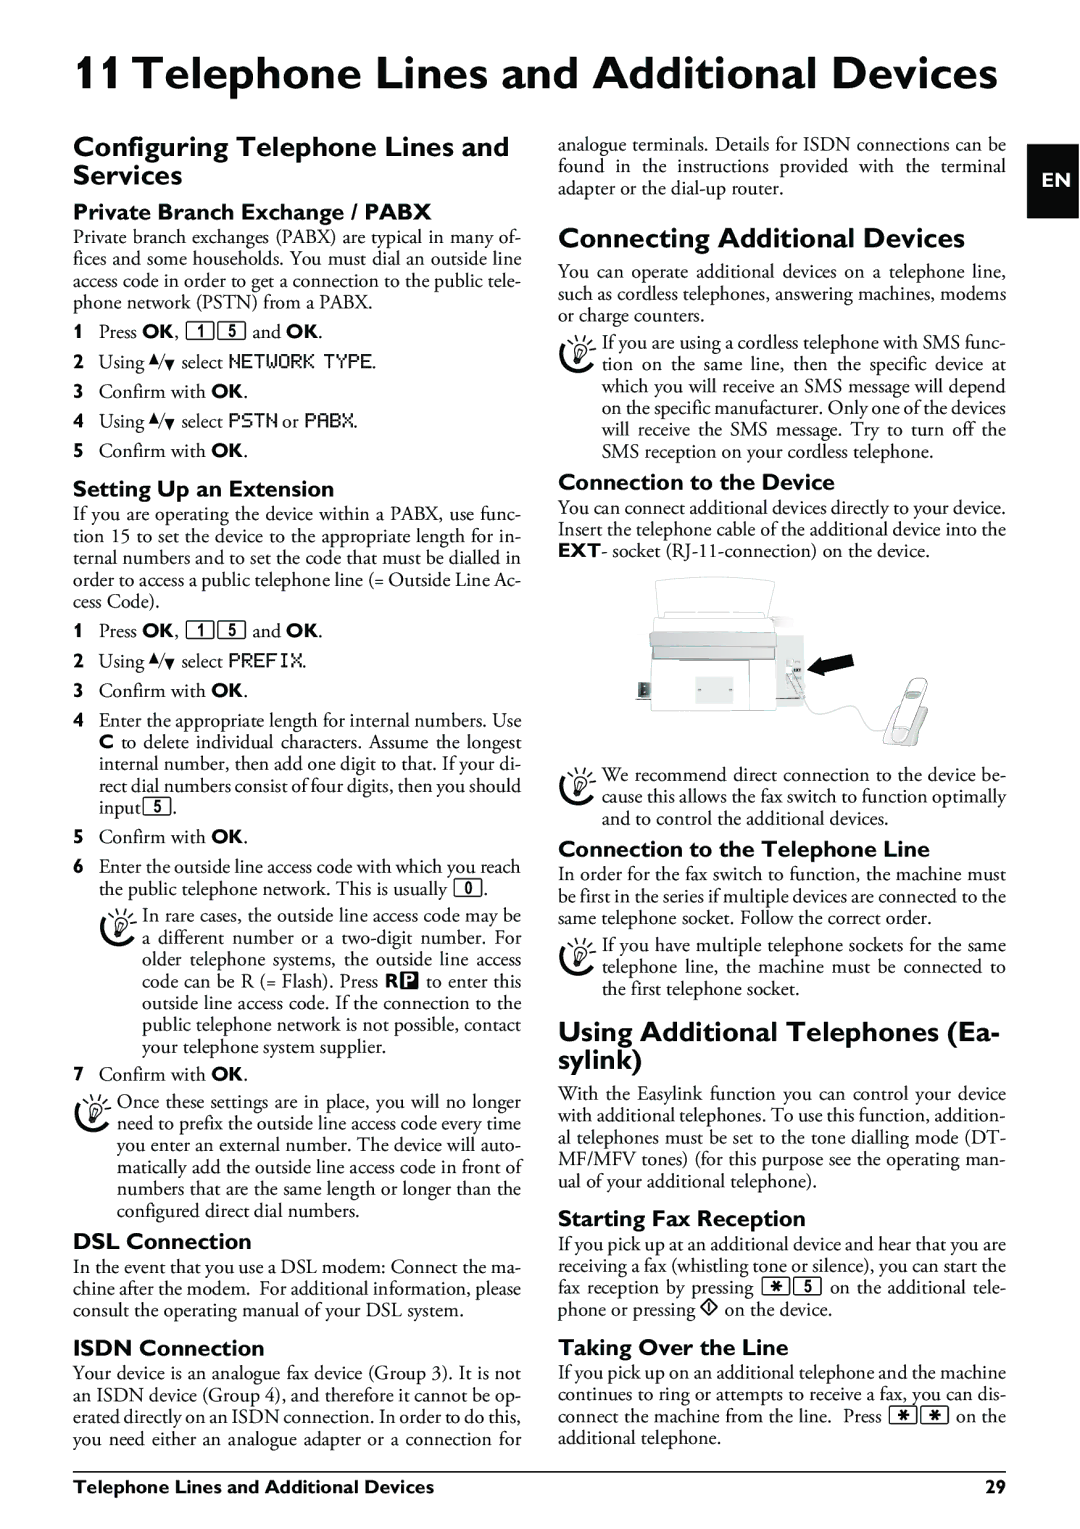
Connection to the Device
You can connect additional devices directly to your device. Insert the telephone cable of the additional device into the EXT- socket
We recommend direct connection to the device be- cause this allows the fax switch to function optimally and to control the additional devices.
Connection to the Telephone Line
In order for the fax switch to function, the machine must be first in the series if multiple devices are connected to the same telephone socket. Follow the correct order.
If you have multiple telephone sockets for the same telephone line, the machine must be connected to the first telephone socket.
Using Additional Telephones (Ea- sylink)
With the Easylink function you can control your device with additional telephones. To use this function, addition- al telephones must be set to the tone dialling mode (DT- MF/MFV tones) (for this purpose see the operating man- ual of your additional telephone).
Starting Fax Reception
If you pick up at an additional device and hear that you are receiving a fax (whistling tone or silence), you can start the fax reception by pressing *5 on the additional tele- phone or pressing o on the device.
ISDN Connection | Taking Over the Line |
Your device is an analogue fax device (Group 3). It is not | If you pick up on an additional telephone and the machine |
an ISDN device (Group 4), and therefore it cannot be op- | continues to ring or attempts to receive a fax, you can dis- |
erated directly on an ISDN connection. In order to do this, | connect the machine from the line. Press ** on the |
you need either an analogue adapter or a connection for | additional telephone. |
Telephone Lines and Additional Devices | 29 |