Castile Pellet Insert |
| R | |
7Appliance | B. Outside Air Kit Instructions | ||
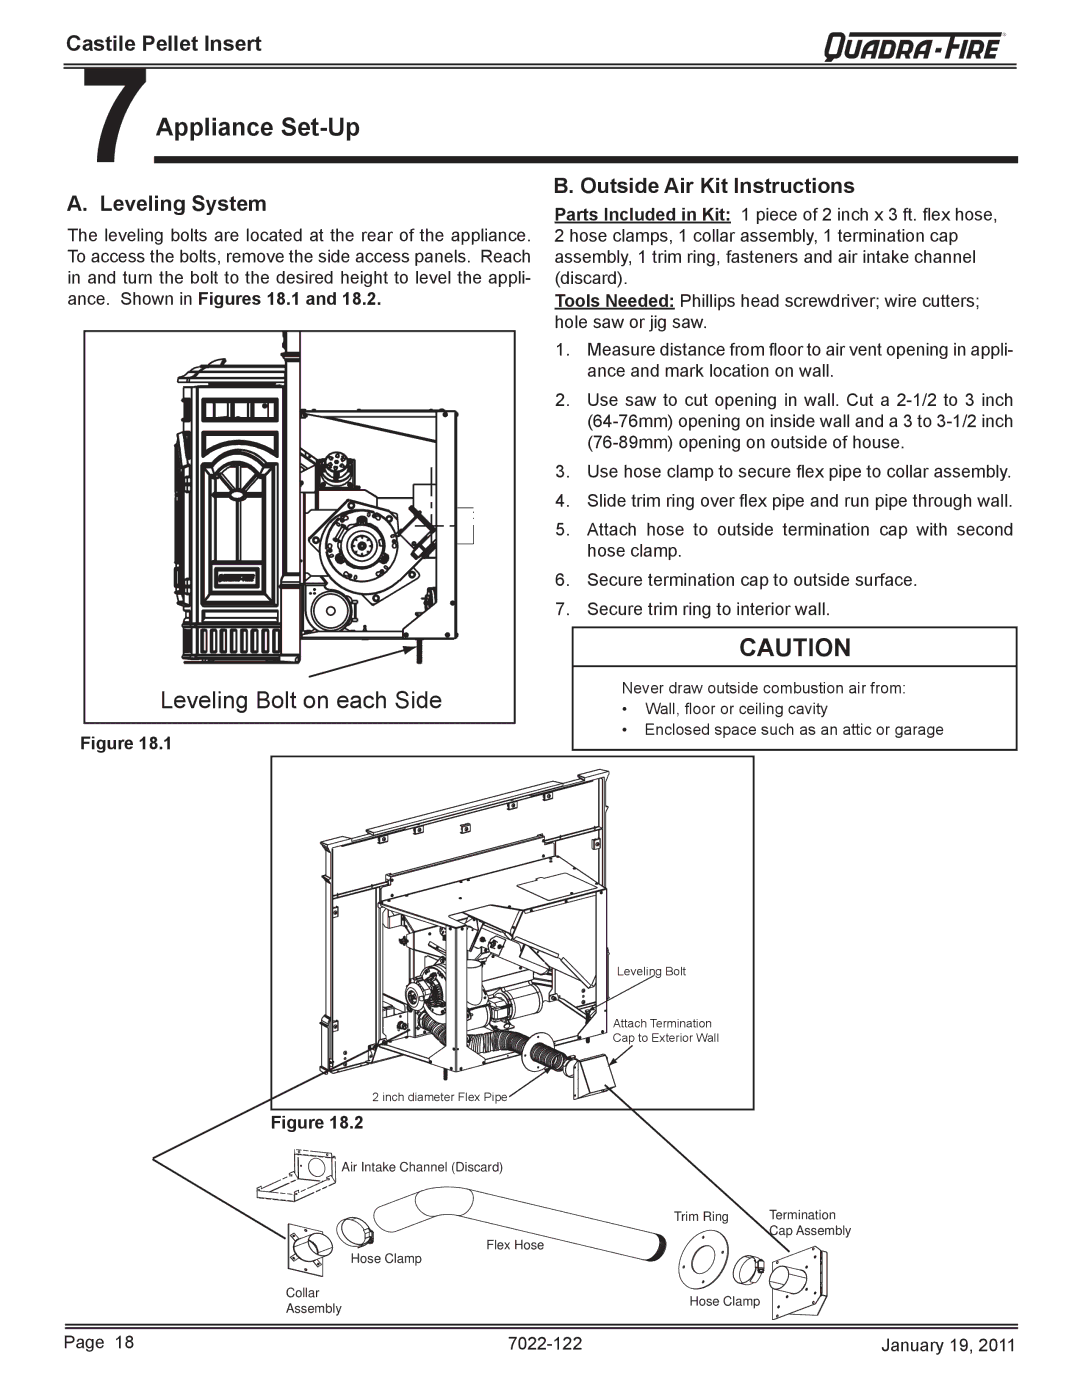
A. Leveling System | Parts Included in Kit: 1 piece of 2 inch x 3 ft. fl ex hose, | ||
The leveling bolts are located at the rear of the appliance. | |||
2 hose clamps, 1 collar assembly, 1 termination cap | |||
To access the bolts, remove the side access panels. Reach | assembly, 1 trim ring, fasteners and air intake channel | ||
in and turn the bolt to the desired height to level the appli- | (discard). | ||
ance. Shown in Figures 18.1 and 18.2. | Tools Needed: Phillips head screwdriver; wire cutters; | ||
| hole saw or jig saw. | ||
| 1. | Measure distance from fl oor to air vent opening in appli- | |
|
| ance and mark location on wall. | |
| 2. | Use saw to cut opening in wall. Cut a | |
|
| ||
|
| ||
| 3. | Use hose clamp to secure fl ex pipe to collar assembly. | |
| 4. | Slide trim ring over fl ex pipe and run pipe through wall. | |
| 5. | Attach hose to outside termination cap with second | |
|
| hose clamp. | |
| 6. | Secure termination cap to outside surface. | |
| 7. | Secure trim ring to interior wall. | |
|
| CAUTION | |
Leveling Bolt on each Side |
| Never draw outside combustion air from: | |
| • Wall, fl oor or ceiling cavity | ||
Figure 18.1 |
| • Enclosed space such as an attic or garage | |
|
| ||
Leveling Bolt |
Attach Termination |
Cap to Exterior Wall |
2 inch diameter Flex Pipe |
Figure 18.2
Air Intake Channel (Discard)
Trim Ring | Termination |
| Cap Assembly |
Flex Hose
Hose Clamp
Collar
Hose Clamp
Assembly
Page 18 | January 19, 2011 |