Maintenance
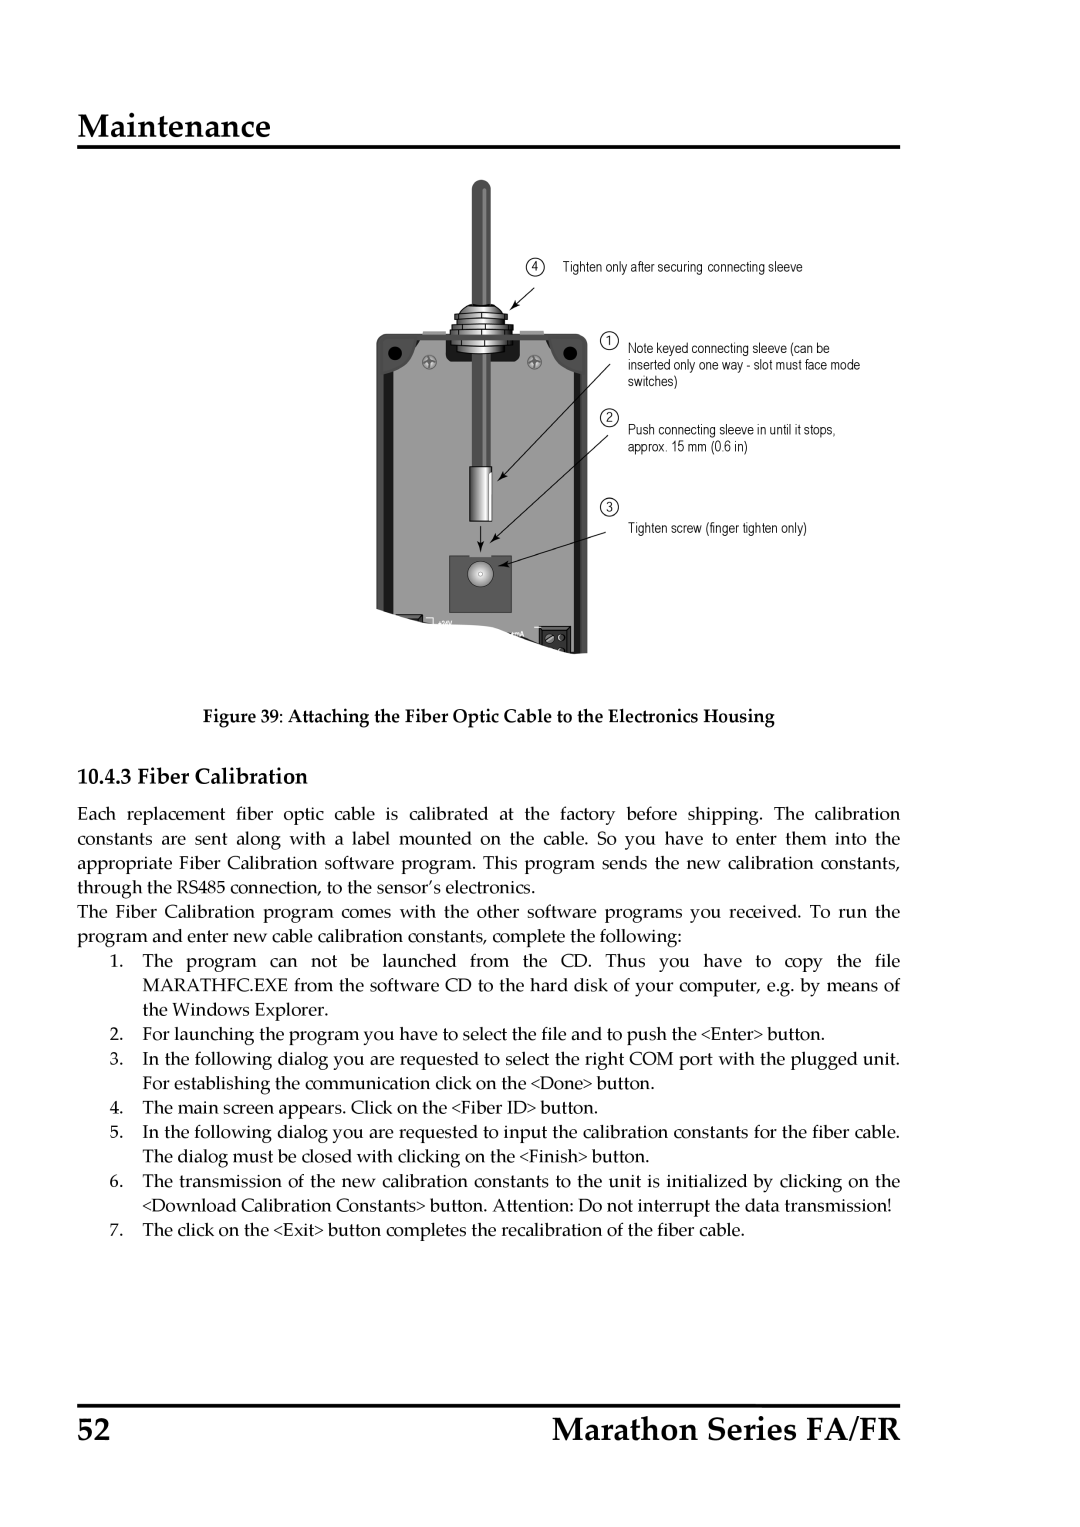
Tighten only after securing connecting sleeve
Note keyed connecting sleeve (can be inserted only one way - slot must face mode switches)
Push connecting sleeve in until it stops, approx. 15 mm (0.6 in)
Tighten screw (finger tighten only)
Figure 39: Attaching the Fiber Optic Cable to the Electronics Housing
10.4.3 Fiber Calibration
Each replacement fiber optic cable is calibrated at the factory before shipping. The calibration constants are sent along with a label mounted on the cable. So you have to enter them into the appropriate Fiber Calibration software program. This program sends the new calibration constants, through the RS485 connection, to the sensor’s electronics.
The Fiber Calibration program comes with the other software programs you received. To run the program and enter new cable calibration constants, complete the following:
1.The program can not be launched from the CD. Thus you have to copy the file MARATHFC.EXE from the software CD to the hard disk of your computer, e.g. by means of the Windows Explorer.
2.For launching the program you have to select the file and to push the <Enter> button.
3.In the following dialog you are requested to select the right COM port with the plugged unit. For establishing the communication click on the <Done> button.
4.The main screen appears. Click on the <Fiber ID> button.
5.In the following dialog you are requested to input the calibration constants for the fiber cable. The dialog must be closed with clicking on the <Finish> button.
6.The transmission of the new calibration constants to the unit is initialized by clicking on the <Download Calibration Constants> button. Attention: Do not interrupt the data transmission!
7.The click on the <Exit> button completes the recalibration of the fiber cable.
52 | Marathon Series FA/FR |