Installation
5 Installation
5.1 Mounting the Sensor
After all preparations are complete according to section 4 Sensor Location, page 13 ff., you can install the sensor.
How and where you anchor the optical head and electronics enclosure depends on the type of surface and the type of bracket you are using. You can mount the optical head through a hole, on a bracket of your own design, or on the available bracket accessory.
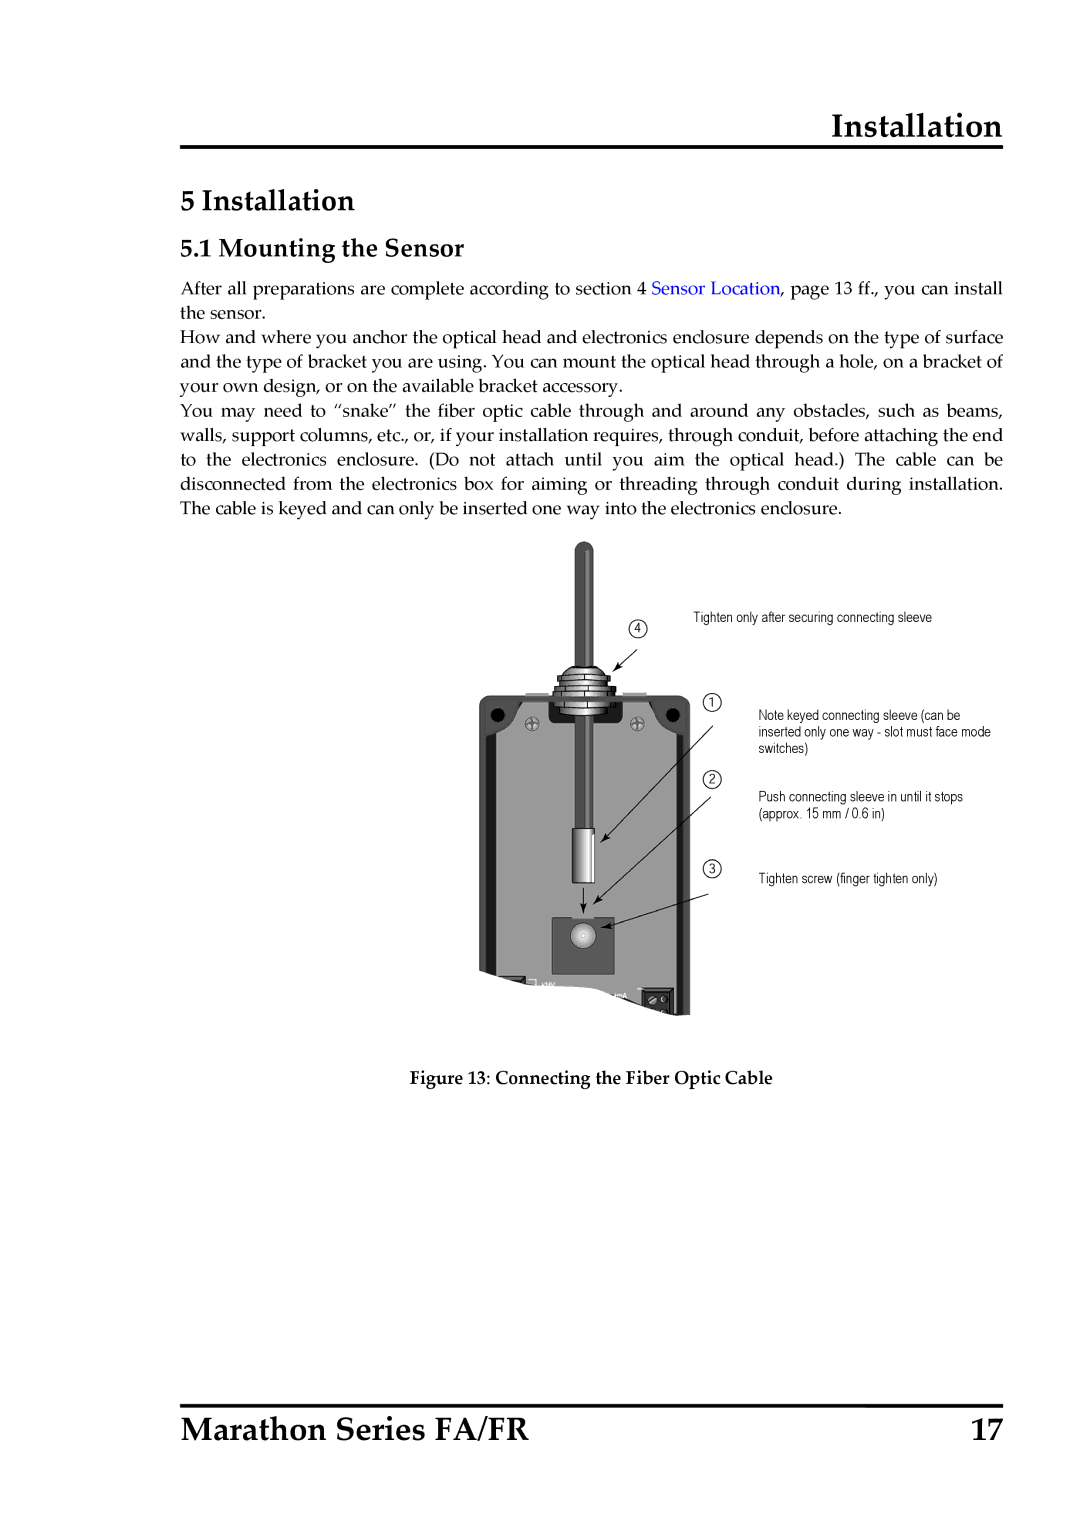
You may need to “snake” the fiber optic cable through and around any obstacles, such as beams, walls, support columns, etc., or, if your installation requires, through conduit, before attaching the end to the electronics enclosure. (Do not attach until you aim the optical head.) The cable can be disconnected from the electronics box for aiming or threading through conduit during installation. The cable is keyed and can only be inserted one way into the electronics enclosure.
Tighten only after securing connecting sleeve
Note keyed connecting sleeve (can be inserted only one way - slot must face mode switches)
Push connecting sleeve in until it stops (approx. 15 mm / 0.6 in)
Tighten screw (finger tighten only)
Figure 13: Connecting the Fiber Optic Cable
Marathon Series FA/FR | 17 |