.SP6498 Belt Drive Saw 05/03 7/15/03 7:04 AM Page 19
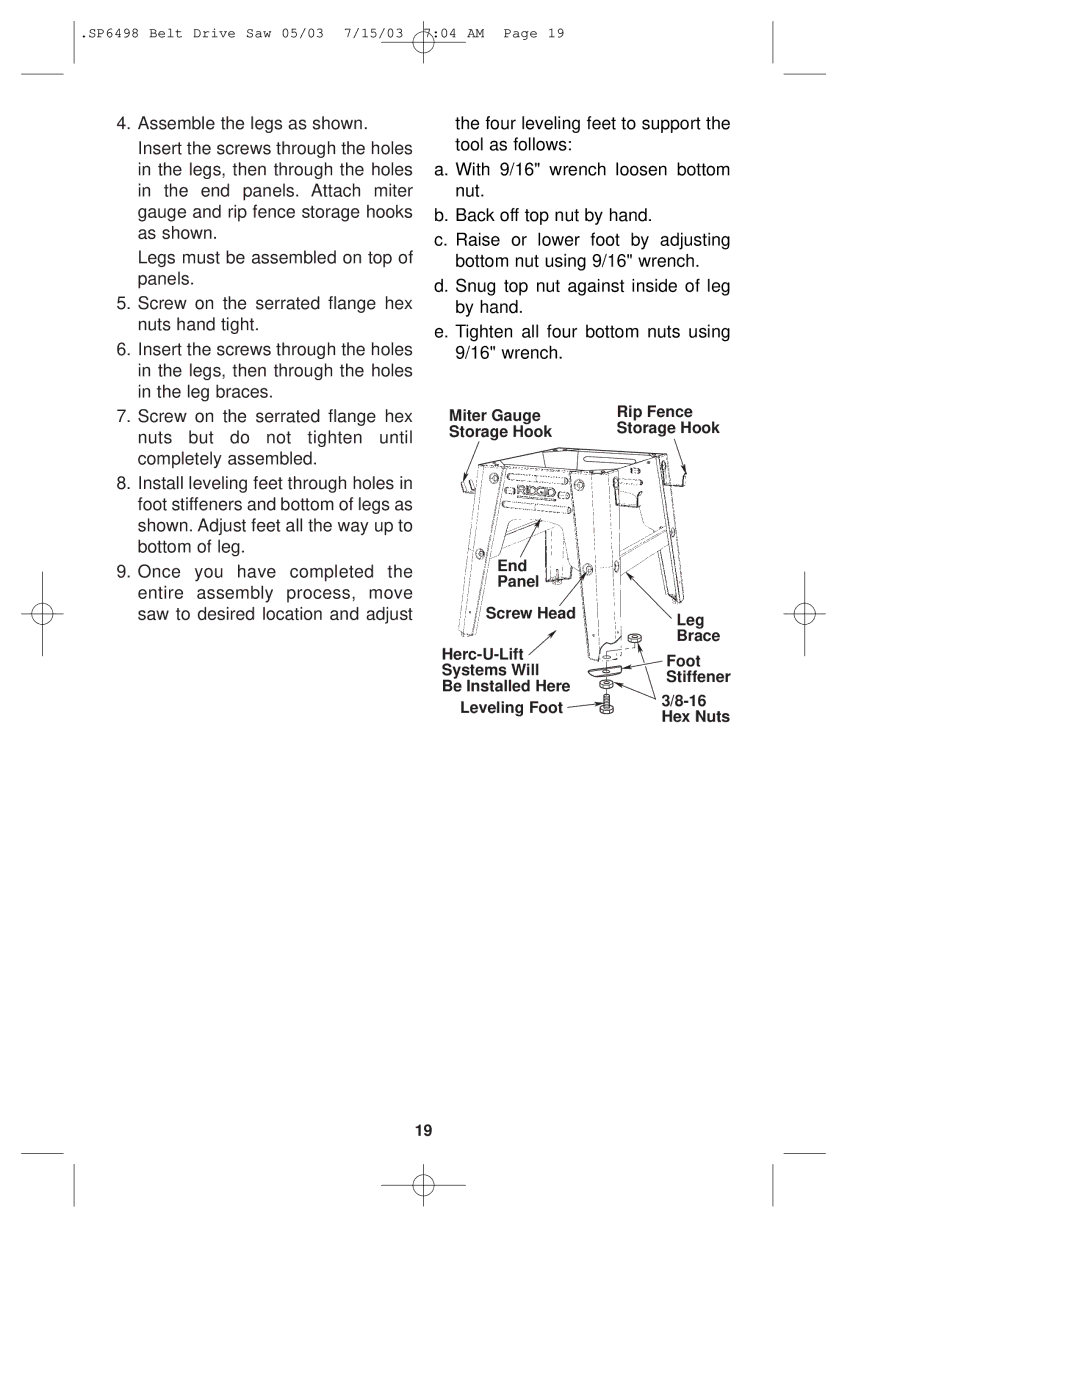
4.Assemble the legs as shown. Insert the screws through the holes in the legs, then through the holes in the end panels. Attach miter gauge and rip fence storage hooks as shown.
Legs must be assembled on top of panels.
5.Screw on the serrated flange hex nuts hand tight.
6.Insert the screws through the holes in the legs, then through the holes in the leg braces.
7.Screw on the serrated flange hex nuts but do not tighten until completely assembled.
8.Install leveling feet through holes in foot stiffeners and bottom of legs as shown. Adjust feet all the way up to bottom of leg.
9.Once you have completed the entire assembly process, move saw to desired location and adjust
the four leveling feet to support the tool as follows:
a. With 9/16" wrench loosen bottom nut.
b. Back off top nut by hand.
c. Raise or lower foot by adjusting bottom nut using 9/16" wrench.
d. Snug top nut against inside of leg by hand.
e. Tighten all four bottom nuts using 9/16" wrench.
Miter Gauge | Rip Fence |
Storage Hook | Storage Hook |
End |
|
Panel |
|
Screw Head | Leg |
| |
| Brace |
Foot | ||
Systems Will | ||
Stiffener | ||
Be Installed Here | ||
Leveling Foot | ||
Hex Nuts | ||
|
19