.SP6498 Belt Drive Saw 05/03 7/15/03 7:04 AM Page 40
Assembly (continued)
2.Lower blade all the way down and remove the motor belt.
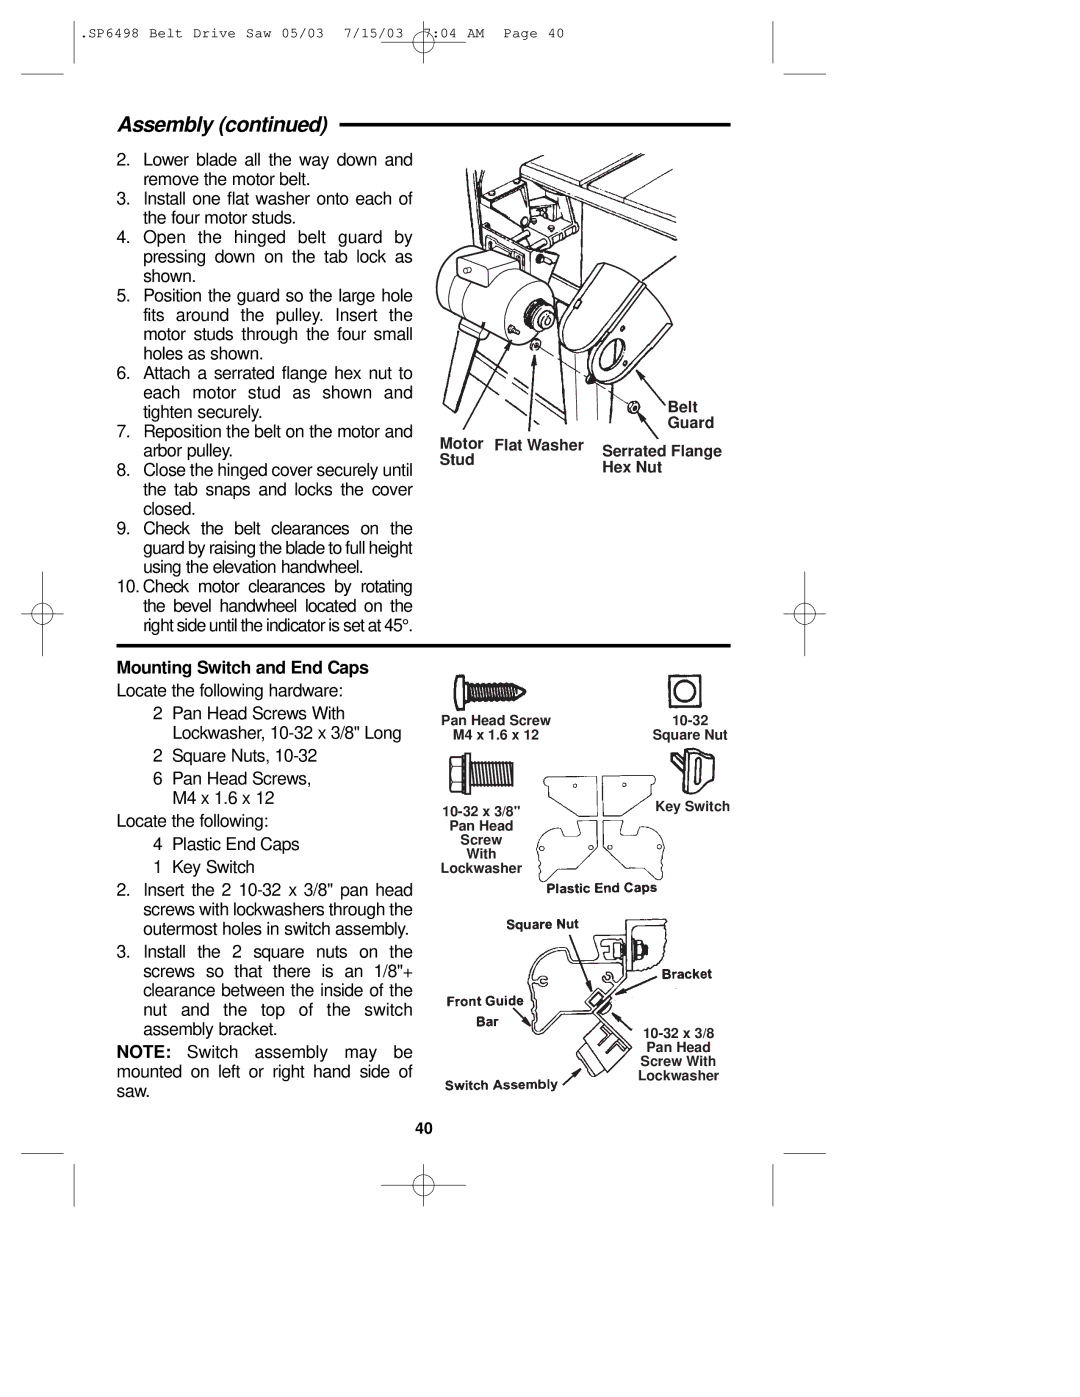
3.Install one flat washer onto each of the four motor studs.
4.Open the hinged belt guard by pressing down on the tab lock as shown.
5.Position the guard so the large hole fits around the pulley. Insert the motor studs through the four small holes as shown.
6.Attach a serrated flange hex nut to each motor stud as shown and tighten securely.
7.Reposition the belt on the motor and arbor pulley.
8.Close the hinged cover securely until the tab snaps and locks the cover closed.
9.Check the belt clearances on the guard by raising the blade to full height using the elevation handwheel.
10.Check motor clearances by rotating the bevel handwheel located on the right side until the indicator is set at 45°.
Belt
Guard
Motor Flat Washer | Serrated Flange | |
Stud | ||
Hex Nut | ||
|
Mounting Switch and End Caps
Locate the following hardware:
2Pan Head Screws With Lockwasher,
2 Square Nuts,
6Pan Head Screws, M4 x 1.6 x 12
Locate the following:
4Plastic End Caps
1Key Switch
2.Insert the 2
3.Install the 2 square nuts on the screws so that there is an 1/8"+ clearance between the inside of the nut and the top of the switch assembly bracket.
NOTE: Switch assembly may be mounted on left or right hand side of saw.
Pan Head Screw |
|
M4 x 1.6 x 12 | Square Nut |
Key Switch | |
| |
Pan Head |
|
Screw |
|
With |
|
Lockwasher |
|
40