.SP6498 Belt Drive Saw 05/03 7/15/03 7:04 AM Page 38
Assembly (continued)
4.Place rip fence on the right hand side of table. Carefully move it against blade so that it is parallel to the blade, and just touches tips of saw teeth. Tighten rip fence lock lever.
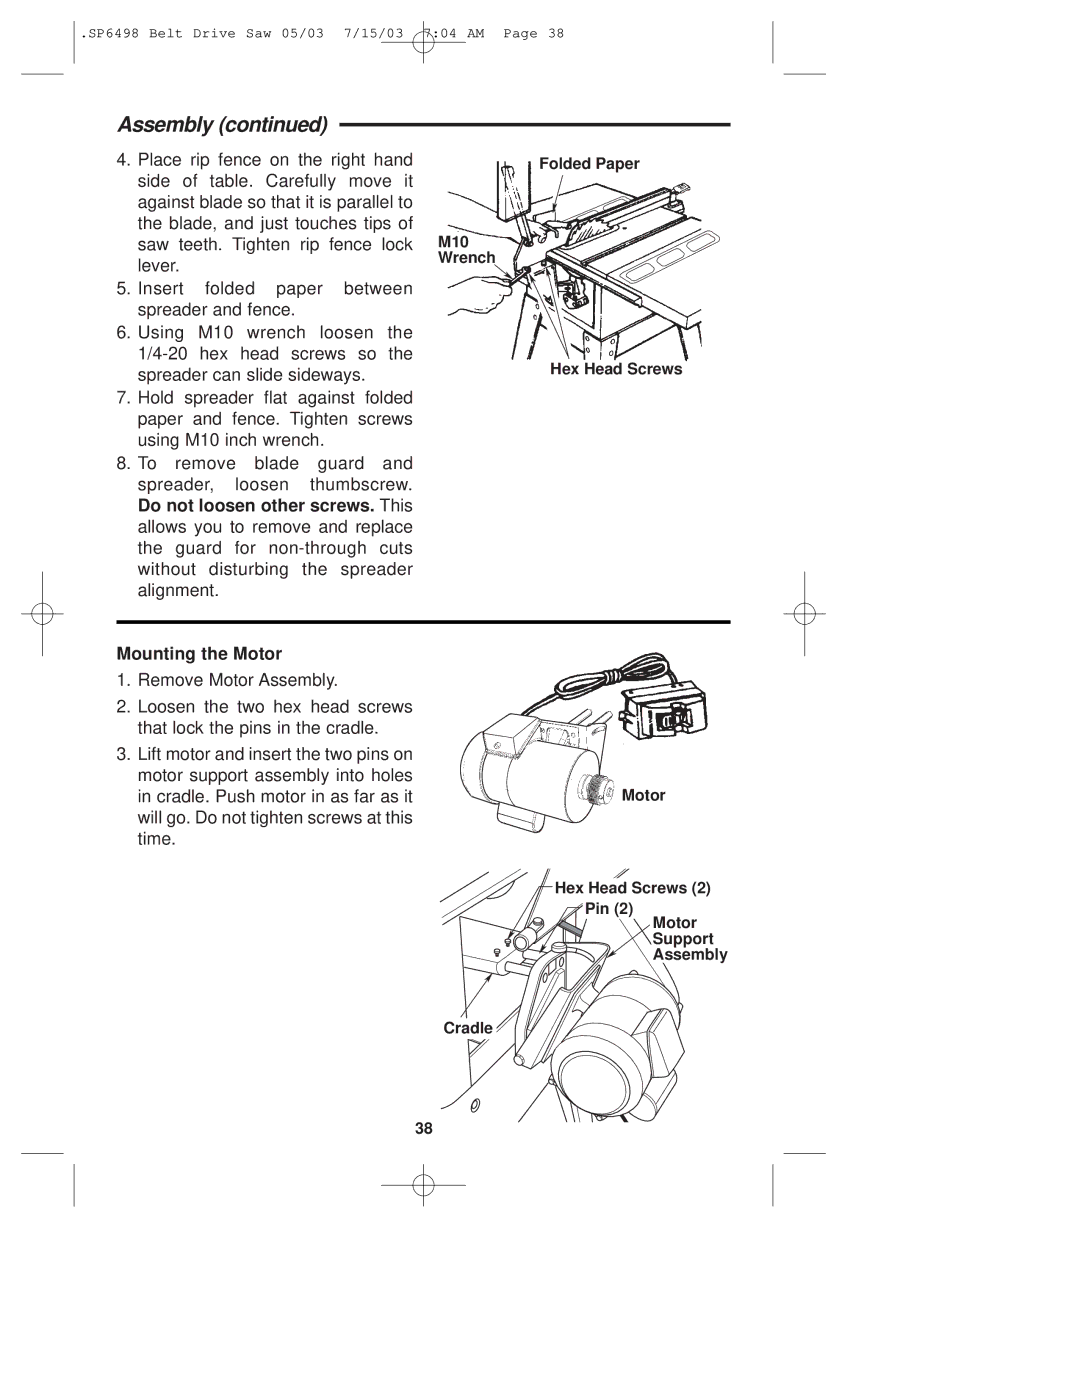
5.Insert folded paper between spreader and fence.
6.Using M10 wrench loosen the
7.Hold spreader flat against folded paper and fence. Tighten screws using M10 inch wrench.
8.To remove blade guard and spreader, loosen thumbscrew. Do not loosen other screws. This allows you to remove and replace the guard for
Folded Paper
M10
Wrench
Hex Head Screws
Mounting the Motor
1.Remove Motor Assembly.
2.Loosen the two hex head screws that lock the pins in the cradle.
3.Lift motor and insert the two pins on motor support assembly into holes in cradle. Push motor in as far as it will go. Do not tighten screws at this time.
Motor
Hex Head Screws (2)
Pin (2)
Motor
Support
Assembly
Cradle
38