.SP6498 Belt Drive Saw 05/03 7/15/03 7:05 AM Page 68
Adjustments
WARNING: For your own safety, turn switch “OFF” and remove plug from power source outlet before making any adjustments.
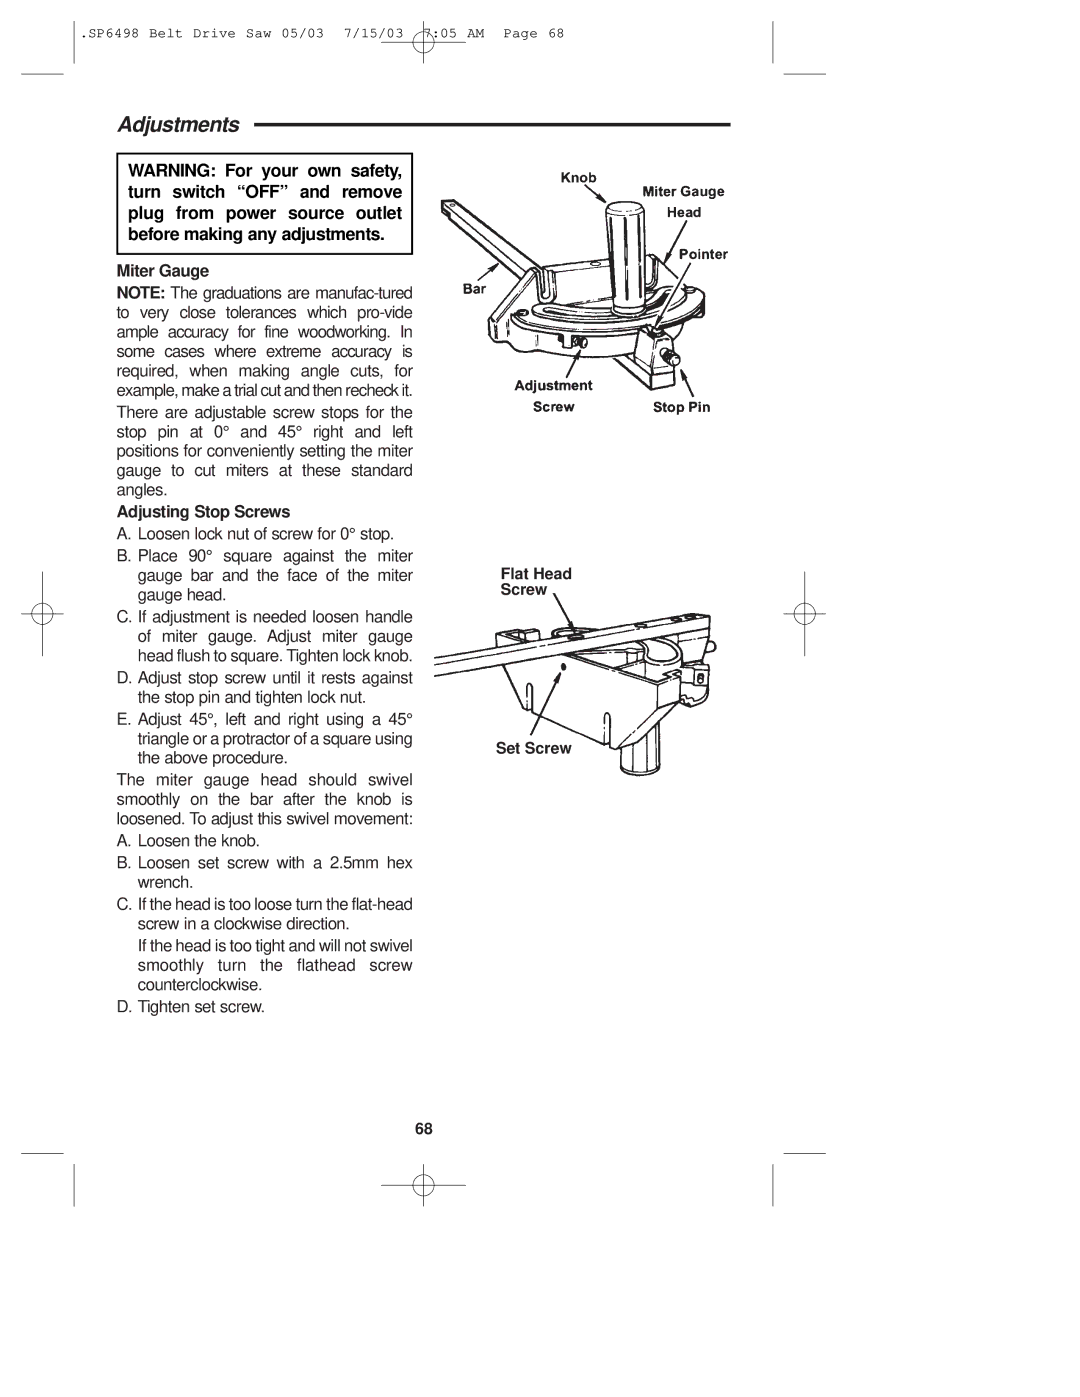
Miter Gauge
NOTE: The graduations are
Adjusting Stop Screws
A.Loosen lock nut of screw for 0° stop.
B.Place 90° square against the miter gauge bar and the face of the miter gauge head.
C.If adjustment is needed loosen handle of miter gauge. Adjust miter gauge head flush to square. Tighten lock knob.
D.Adjust stop screw until it rests against the stop pin and tighten lock nut.
E.Adjust 45°, left and right using a 45° triangle or a protractor of a square using the above procedure.
The miter gauge head should swivel smoothly on the bar after the knob is loosened. To adjust this swivel movement:
A.Loosen the knob.
B.Loosen set screw with a 2.5mm hex wrench.
C.If the head is too loose turn the
If the head is too tight and will not swivel smoothly turn the flathead screw counterclockwise.
D.Tighten set screw.
Flat Head Screw
Set Screw
68