.SP6498 Belt Drive Saw 05/03 7/15/03 7:04 AM Page 34
Assembly (continued)
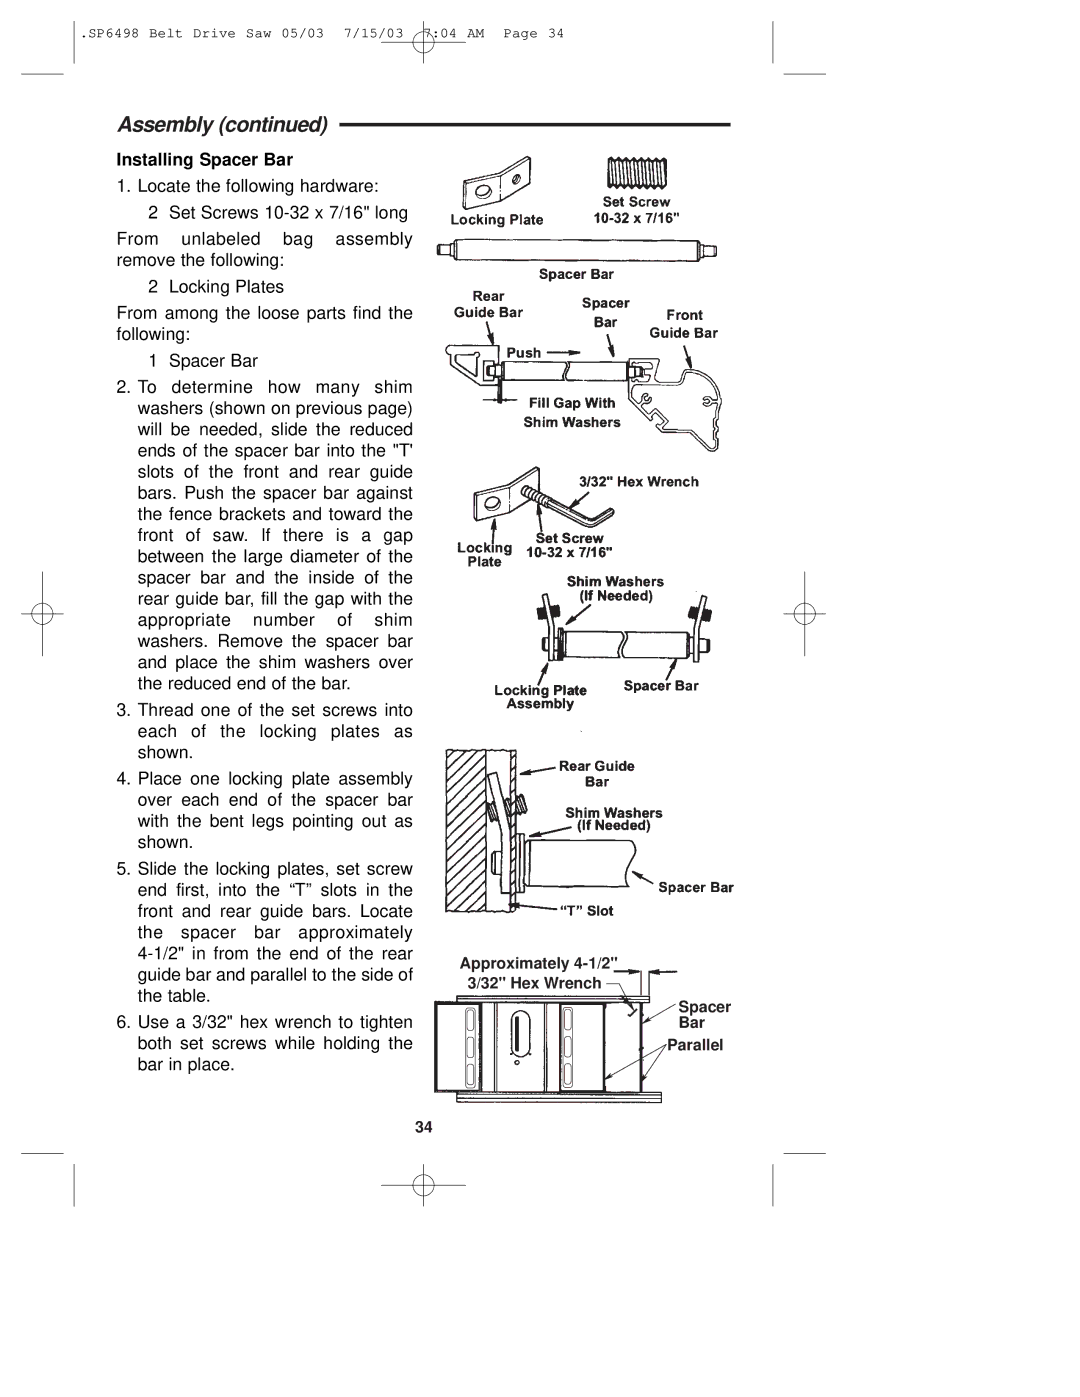
Installing Spacer Bar
1. Locate the following hardware:
2 Set Screws
From unlabeled bag assembly remove the following:
2 Locking Plates
From among the loose parts find the following:
1 | Spacer Bar | |
2. To determine how many shim | ||
washers (shown on previous page) | ||
will be needed, slide the reduced | ||
ends of the spacer bar into the "T' | ||
slots of the front and rear guide | ||
bars. Push the spacer bar against | ||
the fence brackets and toward the | ||
front of saw. If there is a gap | ||
between the large diameter of the | ||
spacer bar and the inside of the | ||
rear guide bar, fill the gap with the | ||
appropriate | number of shim | |
washers. Remove the spacer bar | ||
and place the shim washers over | ||
the reduced end of the bar. | ||
3. Thread one of the set screws into | ||
each of the locking plates as | ||
shown. |
| |
4. Place one locking plate assembly | ||
over each end of the spacer bar | ||
with the bent legs pointing out as | ||
shown. |
| |
5. Slide the locking plates, set screw | ||
end first, into the “T” slots in the | ||
front and rear guide bars. Locate | ||
the | spacer | bar approximately |
guide bar and parallel to the side of | ||
the table. |
| |
6. Use a 3/32" hex wrench to tighten | ||
Approximately ![]()
Spacer Bar
both set screws while holding the |
bar in place. |
![]() Parallel
Parallel
34
