.SP6498 Belt Drive Saw 05/03 7/15/03 7:04 AM Page 39
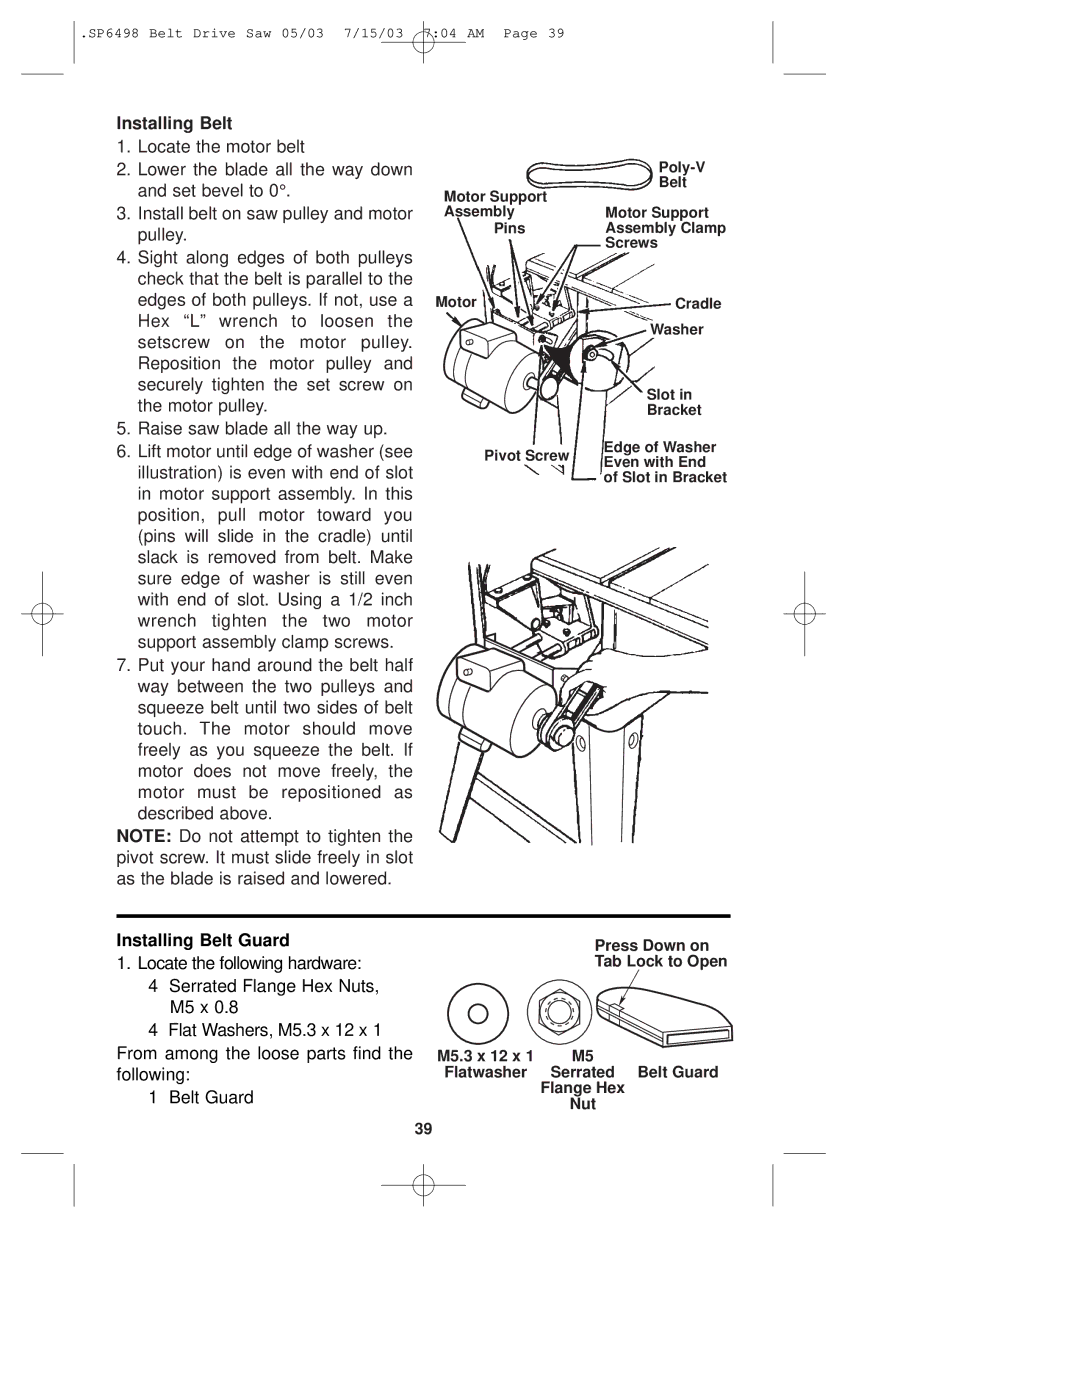
Installing Belt
1.Locate the motor belt
2.Lower the blade all the way down and set bevel to 0°.
3.Install belt on saw pulley and motor pulley.
4.Sight along edges of both pulleys check that the belt is parallel to the edges of both pulleys. If not, use a Hex “L” wrench to loosen the setscrew on the motor pulley. Reposition the motor pulley and securely tighten the set screw on the motor pulley.
5.Raise saw blade all the way up.
6.Lift motor until edge of washer (see illustration) is even with end of slot in motor support assembly. In this position, pull motor toward you (pins will slide in the cradle) until slack is removed from belt. Make sure edge of washer is still even with end of slot. Using a 1/2 inch wrench tighten the two motor support assembly clamp screws.
7.Put your hand around the belt half way between the two pulleys and squeeze belt until two sides of belt touch. The motor should move freely as you squeeze the belt. If motor does not move freely, the motor must be repositioned as described above.
NOTE: Do not attempt to tighten the pivot screw. It must slide freely in slot as the blade is raised and lowered.
Motor Support
Assembly
Pins
Motor
Pivot Screw
Belt
Motor Support
Assembly Clamp
Screws
Cradle
Washer
Slot in
Bracket
Edge of Washer Even with End ![]() of Slot in Bracket
of Slot in Bracket
Installing Belt Guard
1. Locate the following hardware:
4Serrated Flange Hex Nuts, M5 x 0.8
4Flat Washers, M5.3 x 12 x 1 From among the loose parts find the following:
1Belt Guard
Press Down on
Tab Lock to Open
M5.3 x 12 x 1 | M5 |
Flatwasher | Serrated Belt Guard |
| Flange Hex |
| Nut |
39