.SP6498 Belt Drive Saw 05/03 7/15/03 7:04 AM Page 31
Installing Front Rip Fence Guide Bar
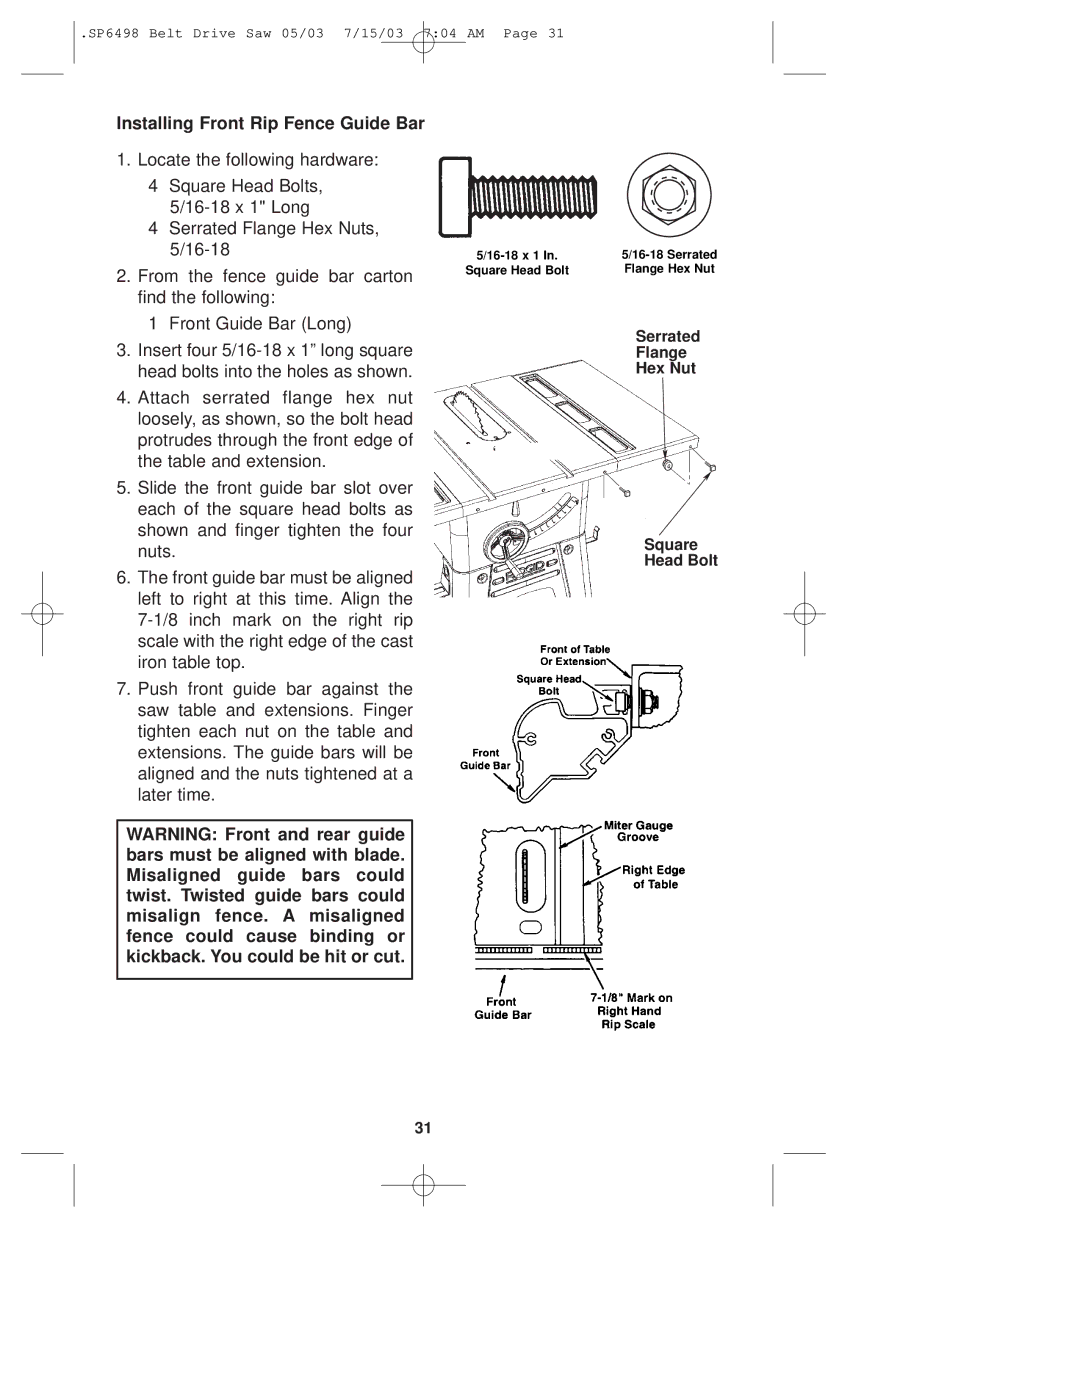
1. Locate the following hardware:
4Square Head Bolts,
4Serrated Flange Hex Nuts,
2.From the fence guide bar carton find the following:
1Front Guide Bar (Long)
3.Insert four
4.Attach serrated flange hex nut loosely, as shown, so the bolt head protrudes through the front edge of the table and extension.
5.Slide the front guide bar slot over each of the square head bolts as shown and finger tighten the four nuts.
6.The front guide bar must be aligned left to right at this time. Align the
7.Push front guide bar against the saw table and extensions. Finger tighten each nut on the table and extensions. The guide bars will be aligned and the nuts tightened at a later time.
WARNING: Front and rear guide bars must be aligned with blade. Misaligned guide bars could twist. Twisted guide bars could misalign fence. A misaligned fence could cause binding or kickback. You could be hit or cut.
Square Head Bolt | Flange Hex Nut |
Serrated
Flange
Hex Nut
Square
Head Bolt
31