advanced recording
HANDLING MENUS AND Q.MENUS
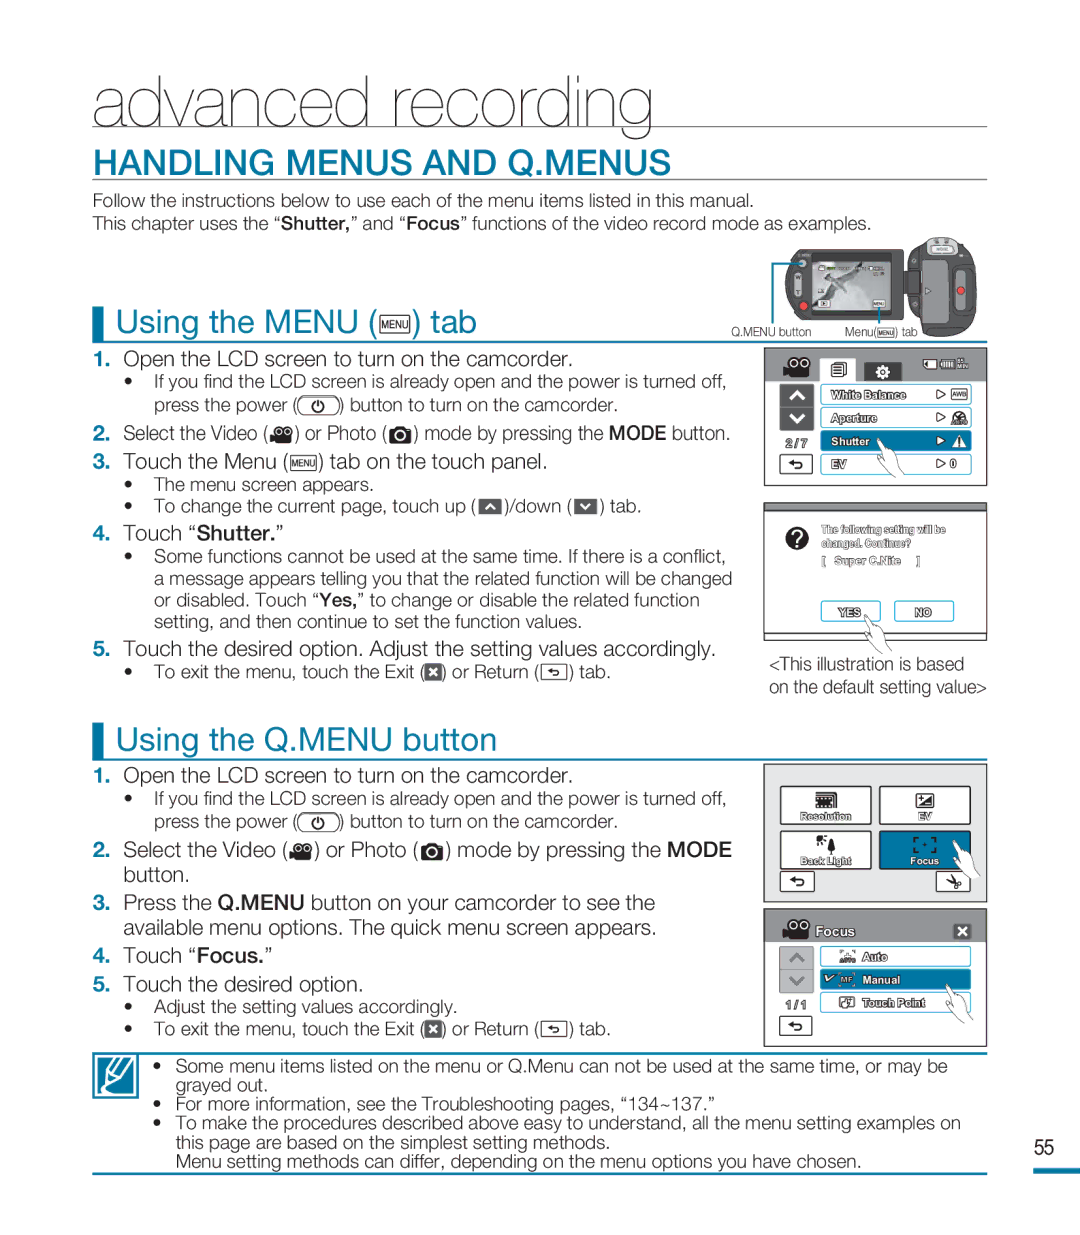
Follow the instructions below to use each of the menu items listed in this manual.
This chapter uses the “Shutter,” and “Focus” functions of the video record mode as examples.
|
|
|
|
|
|
|
| MODE |
|
|
|
|
|
| Q. MENU |
|
|
|
|
|
|
|
|
| STBY 00:00:00 [80Min] |
|
| Using the MENU ( | ) tab |
| Q.MENU button | Menu( | ) tab | ||
1. | Open the LCD screen to turn on the camcorder. |
|
| MIN | ||||
|
|
|
|
|
|
|
| 85 |
| • If you find the LCD screen is already open and the power is turned off, | White Balance | ||||||
| press the power ( | ) button to turn on the camcorder. | ||||||
| Aperture |
| ||||||
2. | Select the Video ( | ) or Photo ( | ) mode by pressing the MODE button. |
| ||||
Shutter |
| |||||||
3. | Touch the Menu ( ) tab on the touch panel. | 2 / 7 |
| |||||
| EV | 0 | ||||||
| • The menu screen appears. |
| )/down ( | ) tab. |
|
| ||
| • To change the current page, touch up ( |
| 85 | |||||
|
|
|
|
|
|
|
| MIN |
4. Touch “Shutter.” | changed. Continue? |
| |
| The following setting will be | ||
• Some functions cannot be used at the same time. If there is a conflict, | [ | 조리개 | ] |
Super C.Nite | |||
a message appears telling you that the related function will be changed |
| 셔터 |
|
or disabled. Touch “Yes,” to change or disable the related function | 2 / 6 | 노출 보정 | 0 |
setting, and then continue to set the function values. |
| YES | NO |
|
| ||
5.Touch the desired option. Adjust the setting values accordingly.
• To exit the menu, touch the Exit ( ) or Return ( | ) tab. | <This illustration is based | |
on the default setting value> | |||
|
|
| Using the Q.MENU button |
|
| |
1. | Open the LCD screen to turn on the camcorder. |
|
| |
| • If you find the LCD screen is already open and the power is turned off, |
|
| |
| press the power ( | ) button to turn on the camcorder. | Resolution | EV |
|
|
| ||
2. | Select the Video ( | ) or Photo ( ) mode by pressing the MODE | Back Light | Focus |
| button. |
| ||
|
|
|
| |
3. | Press the Q.MENU button on your camcorder to see the |
|
| |
| available menu options. The quick menu screen appears. | Focus |
| |
4. | Touch “Focus.” |
| AUTO Auto |
|
5. | Touch the desired option. | Manual |
| |
|
|
|
| |
• Adjust the setting values accordingly. | 1 / 1 | Touch Point |
• To exit the menu, touch the Exit (![]() ) or Return (
) or Return (![]() ) tab.
) tab.
• Some menu items listed on the menu or Q.Menu can not be used at the same time, or may be grayed out.
•For more information, see the Troubleshooting pages, “134~137.”
•To make the procedures described above easy to understand, all the menu setting examples on
this page are based on the simplest setting methods. | 55 | |
Menu setting methods can differ, depending on the menu options you have chosen. |
|
|
