13-4-2.Connect the vacuum pump and a manifold valve as shown Fig. 1. Confirm that all connections are cor- rectly made.

NOTE

In order to withstand negative suction pressure during evacuation, the manifold valve should be equipped with a Hi/Lo compound gauge with a minimum scale reading of –76 cmHg.

13-4-3.Install (first by hand-tightening, then securely with a wrench) flare nuts and bonnets at service valves in the refrigeration circuit where evacuation will take place. This process is highly important to completely evacuate the system.

13-4-4.Check that the BLK/WHT connector is properly attached. (Fig. 1)

13-4-5.Turn the disconnect switch ON (if it has been OFF) to open the 2 solenoid valves (SV1 and SV2). (Fig. 2)

13-4-6.With both the “Lo” and “Hi” knobs of the manifold valve open, run the vacuum pump. The operation time varies with the capacity of the pump. (Run the pump at least 30 minutes.) Evacuation is successful if

the vacuum gauge reading remains at –75 cmHg or more for at least 10 seconds after closing both the “Lo” and “Hi” knobs of the manifold valve.

13-4-7.With the vacuum pump still running, turn both the narrow and wide service valves all the way in to close the valves (position – b – in Fig. 3). Then stop the pump.

13-4-8.After removing the vacuum hoses from the service valves, replace the flare nuts and bonnets on the valves. The refrigerant circuit is now ready for charging.

13-5. Refrigerant Charging

13-5-1.After evacuation is completed, charge the circuit with the proper amount of refrigerant.

NOTE

The proper amount of refrigerant is specified on the nameplate of the outdoor unit and in Section “2-1. Unit Specifications” in the service manual.

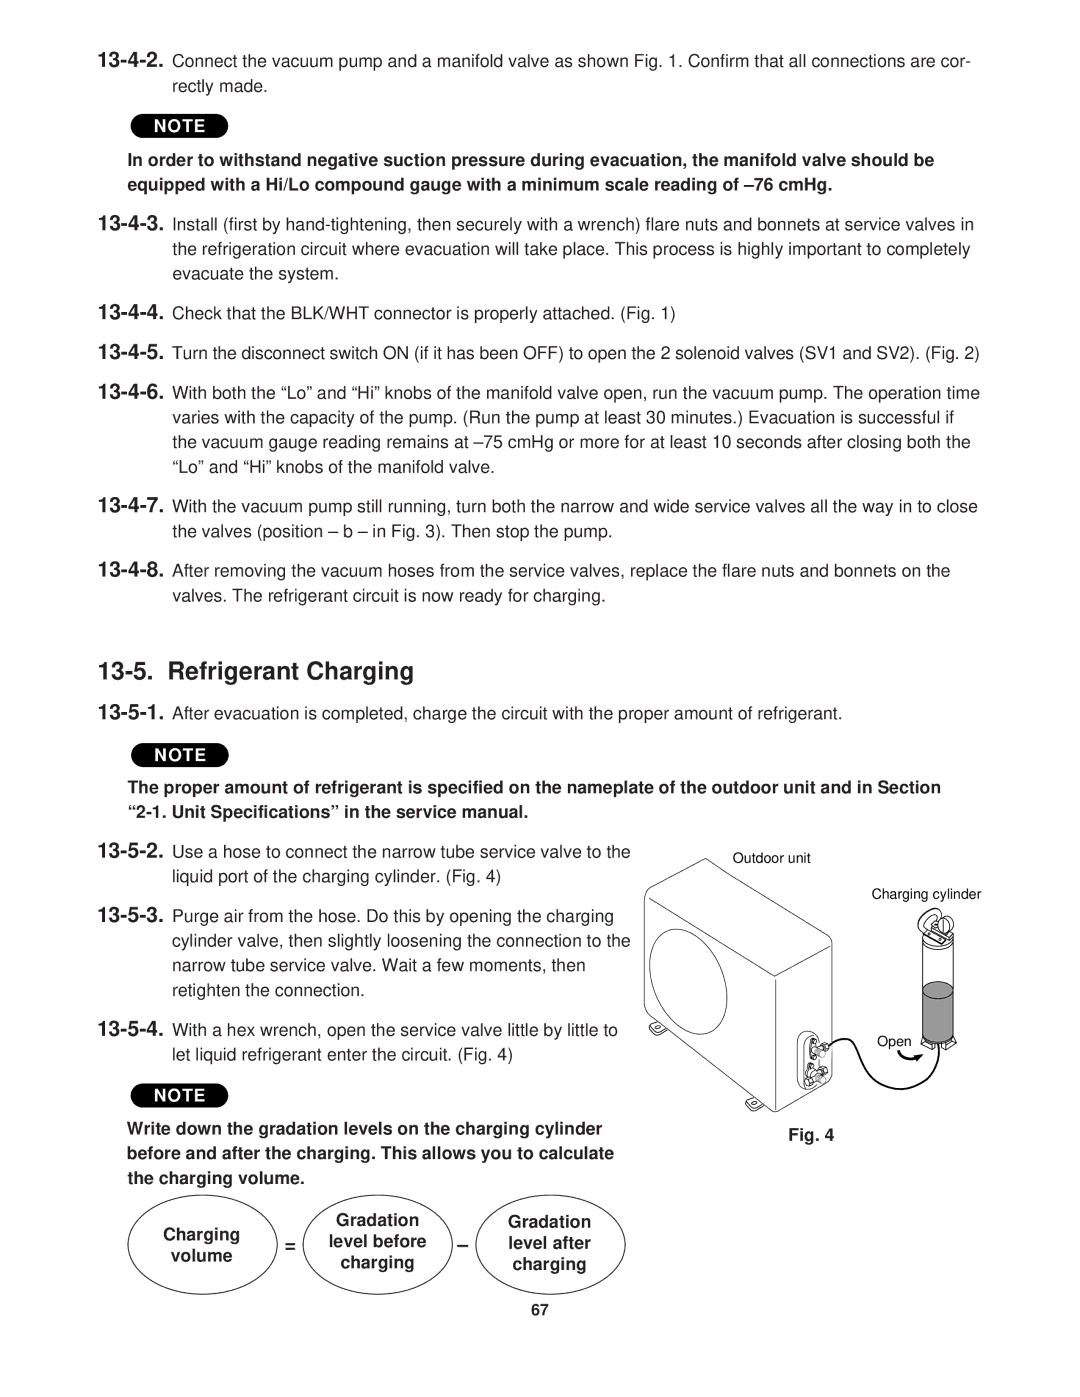
13-5-2.Use a hose to connect the narrow tube service valve to the liquid port of the charging cylinder. (Fig. 4)

13-5-3.Purge air from the hose. Do this by opening the charging cylinder valve, then slightly loosening the connection to the narrow tube service valve. Wait a few moments, then retighten the connection.

13-5-4.With a hex wrench, open the service valve little by little to let liquid refrigerant enter the circuit. (Fig. 4)

NOTE

Write down the gradation levels on the charging cylinder before and after the charging. This allows you to calculate the charging volume.

Outdoor unit

Charging cylinder

Open

Fig. 4

Charging


Gradation

Gradation

=

level before

level after

volume


charging

charging


67

Page 71
Image 71
Sanyo KGS1411, CG1411 service manual Refrigerant Charging, Charging Gradation Level before, Volume, Level after

KGS1411, CG1411 specifications

Sanyo KGS1411 and CG1411 are notable solar panel models from Sanyo, a brand recognized for its innovation in photovoltaic technology. These models are particularly designed to deliver high efficiency and reliable performance for residential and commercial solar energy applications.

One of the standout features of the Sanyo KGS1411 is its use of HIT (Heterojunction with Intrinsic Thin layer) technology. This cutting-edge technology combines crystalline and thin-film solar cells, resulting in a unique structure that maximizes light absorption. The HIT technology results in higher conversion efficiency compared to traditional solar panels. The KGS1411 can achieve efficiencies of up to 20.4%, making it an excellent choice for those looking to maximize energy output from limited rooftop space.

The CG1411 model complements the KGS1411 by offering enhanced performance in low-light conditions. It is particularly effective in urban settings or regions with frequent overcast weather. This model also employs advanced cell design that improves performance during high temperatures, avoiding the efficiency loss typical in conventional solar panels.

Another significant characteristic of both models is their durable construction. Sanyo panels are designed to withstand severe weather conditions, including strong winds and heavy snow loads. This robustness is complemented by an extended warranty period, giving users peace of mind about their investment.

In terms of aesthetics, both the KGS1411 and CG1411 feature a sleek, all-black design, allowing them to blend seamlessly with various roofing materials. This visual appeal makes them an attractive option for homeowners who prioritize the appearance of their solar energy systems.

Furthermore, Sanyo panels come with integrated monitoring solutions that allow users to track energy production and system performance in real-time. This feature is invaluable for assessing the efficiency of the solar system and making informed decisions about energy consumption.

In conclusion, the Sanyo KGS1411 and CG1411 solar panels represent a synthesis of advanced technology and reliable performance. With their high efficiency, durability, and user-friendly monitoring solutions, these models are well-suited for consumers seeking sustainable energy solutions without compromising on quality or aesthetics. Whether for residential use or larger commercial projects, Sanyo’s offerings stand out in the competitive solar market.