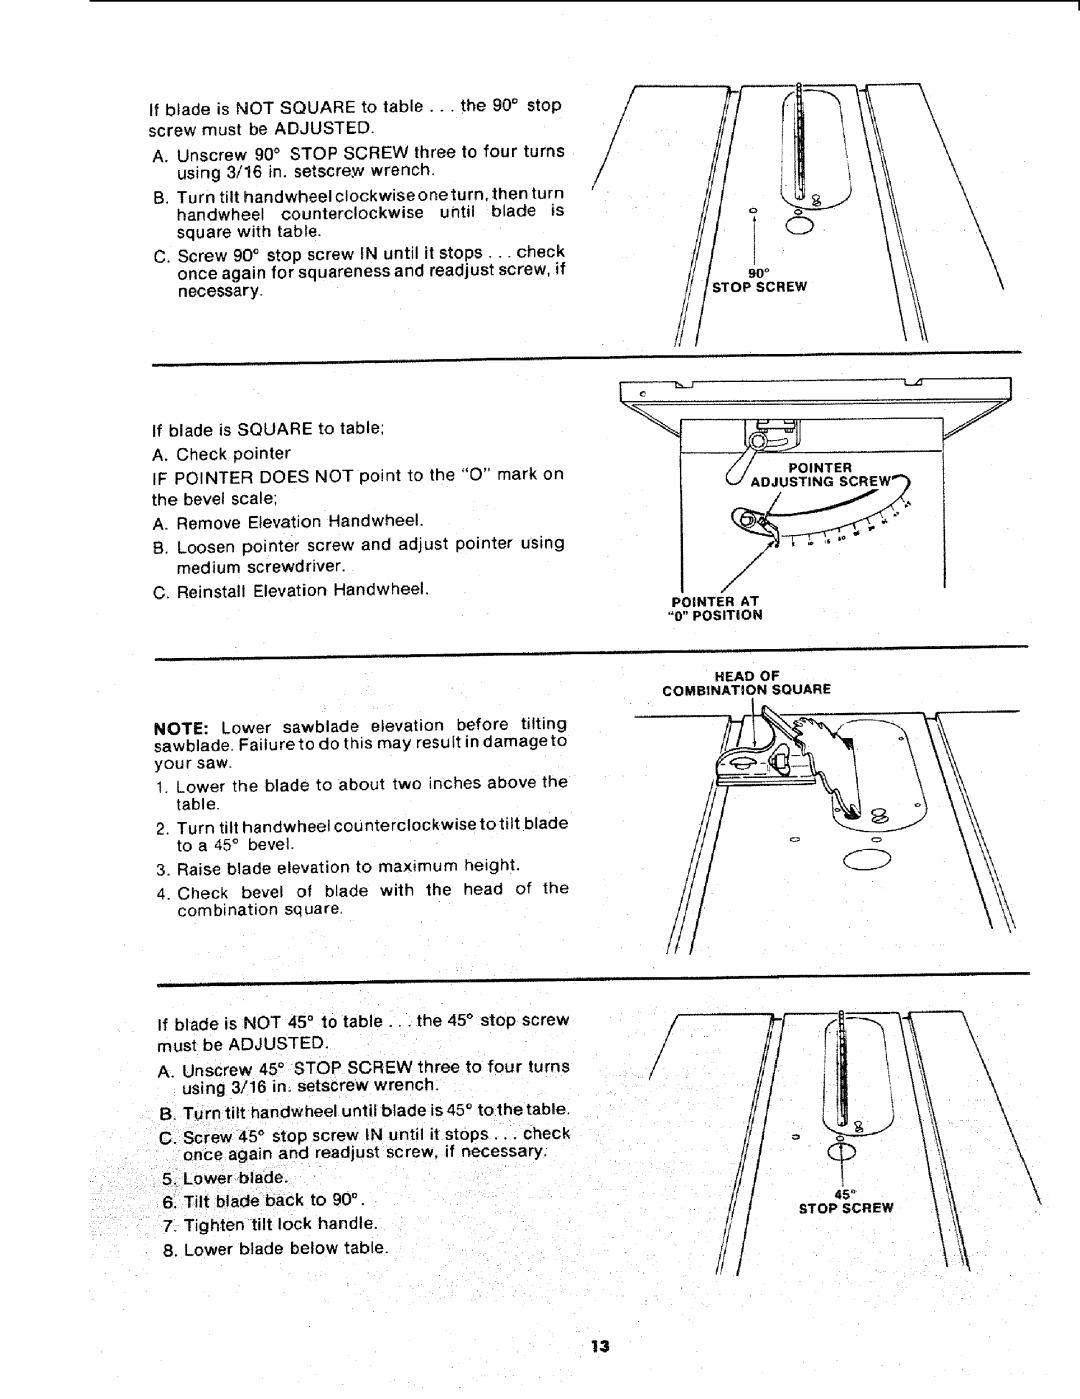
If blade is NOT SQUARE to table .. the 90° stop screw must be ADJUSTED.
A. Unscrew 90° STOP SCREW three to four turns using 3/16 in setscre.w wrench.
B. Turn tilt handwheel clockwise oneturn, then turn
handwheel counterclockwise until blade is square with table.
C. Screw 90° stop screw IN until it stops.., check once again for squareness and readjust screw, if necessary.
If blade is SQUARE to table:
A. Check pointer
IF POINTER DOES NOT point to the "O" mark on the bevel scale:
A. Remove Elevation Handwheel.
/
/
!
/
|
| \ | |
i | O | \ | |
\ | |||
90 ° |
| ||
| \ | ||
STOPSCREW |
| ||
|
|
1
J
2
B. Loosen pointer screw and adjust pointer using medium screwdriver.
C. Reinstall Elevation Handwheel.
NOTE: Lower sawblade elevation before tilting sawblade. Failu re to do this may result in damage to your saw.
1.Lower the blade to about two inches above the table.
2.Turn tilt handwheel counterclockwise to tilt blade to a 45 ° bevel.
3.Raise blade elevation to maximum height.
4.Check bevel of blade with the head of the
combination square.
If blade is | NOT |
| 45 ° to | table.., | the 45 ° | stop | screw |
must be ADJUSTED. |
|
|
|
| |||
A. Unscrew | 45 | ° | STOP | SCREW | three to | four | turns |
using 3/16 in. setscrew wrench.
B. Turn tilt handwheel until blade is45 ° to the table.
C. Screw | 45 ° stop screw IN until it stops.., | check |
once again and readjust screw, if necessary. | ||
5 Lower | blade; |
|
6.Tilt blade back to 90 ° .
7.Tighten tilt lock handle.
8.Lower blade below table.
//
/,
/
POINTER AT "0" POSITION
HEAD OF
COMBINATION SQUARE
/
/
\
\ \
\
13