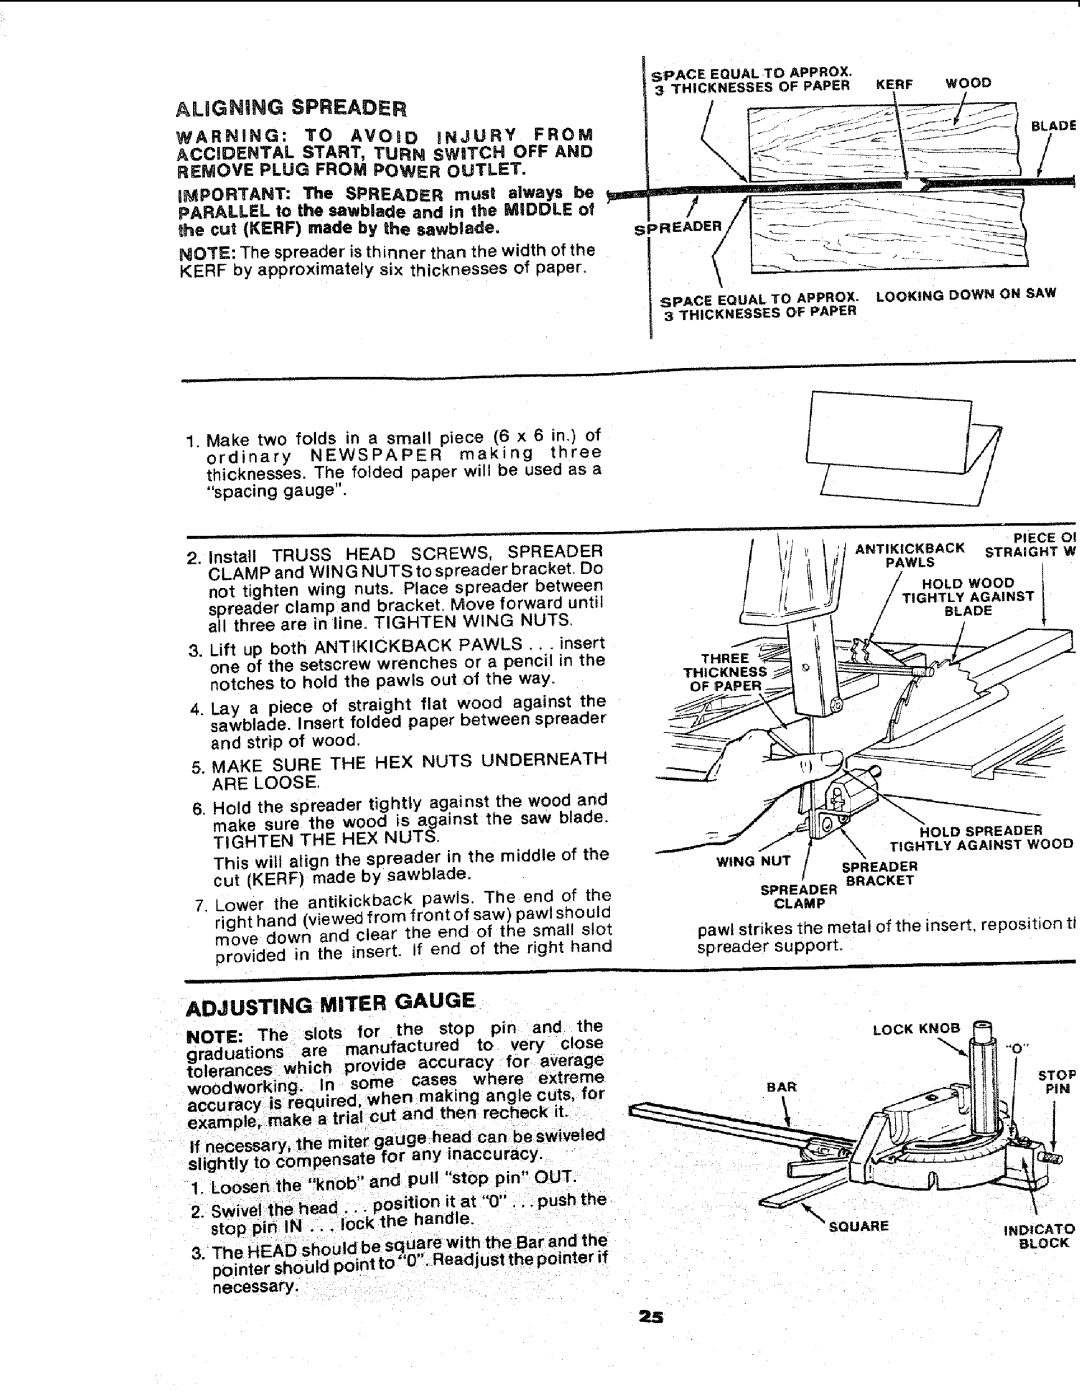
sPACE EQUAL TO APPROX,
3 THICKNESSES OF PAPER KERF WOOD
WARNING: | AVORD | iNJURY | |
ACCIDENTAL | START, | TURN | SWITCH OFF AND |
REMOVE PLUG FROM | POWER | OUTLET. | |
iMPORTANT: The SPREADER must always be
the cut (KERF) made by the sawblade,
PARALLEL to the sawb,ade and in the MIDDLE of
NOTE: The spreader is thinner than the width of the KERF by approximately six thicknesses of paper.
| .- | _ | _ | J | _:_._ ,_ | BLADE |
|
| .... |
| |||
, | "_" _ | ...................... |
| - | ||
\._[_'C:3;:.:Ci_ |
| |||||
y=am |
|
|
|
|
| |
sPR | _._ | _ | :___: |
| ||
|
|
|
| - |
| |
_/ | l_]i!i | "'z2 | _._ |
|
| |
SPACE EQUAL TO APPROX. LOOKING DOWN ON SAW
1.Make two folds in a small piece (6 x 6 in,) of
ordinary NEWSPAPER making three thicknesses. The folded paper will be used as a "spacing gauge".
2, Install TRUSS HEAD SCREWS, SPREADER CLAM P and WING NUTS to spreader bracket. Do net tighten wing nuts. Place spreader between spreader clamp and bracket. Move forward until all three are in line. TIGHTEN WING NUTS.
3.Lift up both ANTIKICKBACK PAWLS ... insert one of the setscrew wrenches or a pencil in the notches to hold the pawls out of the way.
4.Lay a piece of straight flat wood against the sawblade. Insert folded paper between spreader and strip of wood.
5, MAKE SURE THE HEX NUTS UNDERNEATH ARE LOOSE,
6.Hold the spreader tightly against the wood and make sure the wood is against the saw blade.
TIGHTEN THE HEX NUTS.
This will align the spreader in the middle of the cut (KERF) made by sawblade.
7.Lower the antikickback pawls The end of the
right hand (viewed from front of saw) pawl should move down and clear the end of the small slot provided in the insert. If end of the right hang
3 THIC KN ESSES OF PAPER
/;1ANT,K,CKBACK
t | / | t | _ /[! | PAWLS |
t |
| ft ,J/ | 1 .OLD*OOD |
Jt, I_ _/ t TIGHTLYAGAINSTI
_. _ | _ |
|
| HOLD | SPREADER |
| _ | F | _ | TIGHTLY | AGAINST WOOD |
WING | NUT | I |
|
|
|
/SPREADER BRACKET
SPREADER
CLAMP
pawt strikes the metal of the insert, reposition tl sp reader support.
ADJUSTING MITER GAUGE
NOTE: The slots for the stop pin and the
graduations are manufactured to very close tolerances which provide accuracy for average
woodworking. In some cases where extreme accuracy is required, when making angle cuts, for example, make a trial cut and then recheck it.
,' pin" OUT.
1, Loosen the "knob and pull stop
INDICATO
BLOCK
necessary,