ADDITIONAL SAFETY iNSTRUCTiONS FOR TABLE SAWS
WARNING: FOR YOUR OWN SAFETY, DO NOT
OPERATE YOUR SAW UNTIL IT IS COMPLETELY ASSEMBLED AND INSTALLED ACCORDING TO
THE INSTRUCTIONS ... AND UNTIL YOU HAVE READ AND UNDERSTAND THE FOLLOWING.
1. GENERAL SAFETY INSTRUCTIONS FOR
POWER TOOLS ... SEE PAGE 2
2.GETTING TO KNOW YOUR SAW... SEE PAGE 27.
3.BASIC SAW OPERATION... SEE PAGE 30.
4, MAINTENANCE... SEE PAGE 38.
5.STABILITY OF SAW
if there is any tendency for the saw to tip over or move during certain cutting operations such as cutting extremely large heavy panels or long heavy boards, the saw should bebolted down. If you attach any kind of table extensions over 24" wide to either end of the saw, make sure you either bolt the saw to the bench or floor as
appropriate, or support the outer end of the
extension from the bench or floor, as appropriate.
6.LOCATION
The saw should be positioned so neither the
operator nor a causal observer is forced to stand in line with the saw blade.
operating immediately until the particular part is properly repaired or replaced.
B. Small loose pieces of wood or other objects that contact the rear of the revolving blade can be thrown back at the operator at excessive speed. This can usually be avoided by keeping the guard and spreader in place
for all
C. is removed for resawing, dadoing, rabbeting,
or molding replace the guard as soon as that operation is completed.
D. For rip or
board is applied must be square
(perpendicular to the fence) in order that feed pressure applied to the workpiece by the push stick or block does not cause the workpiece to come away from the fence, and possibly cause a kickback.
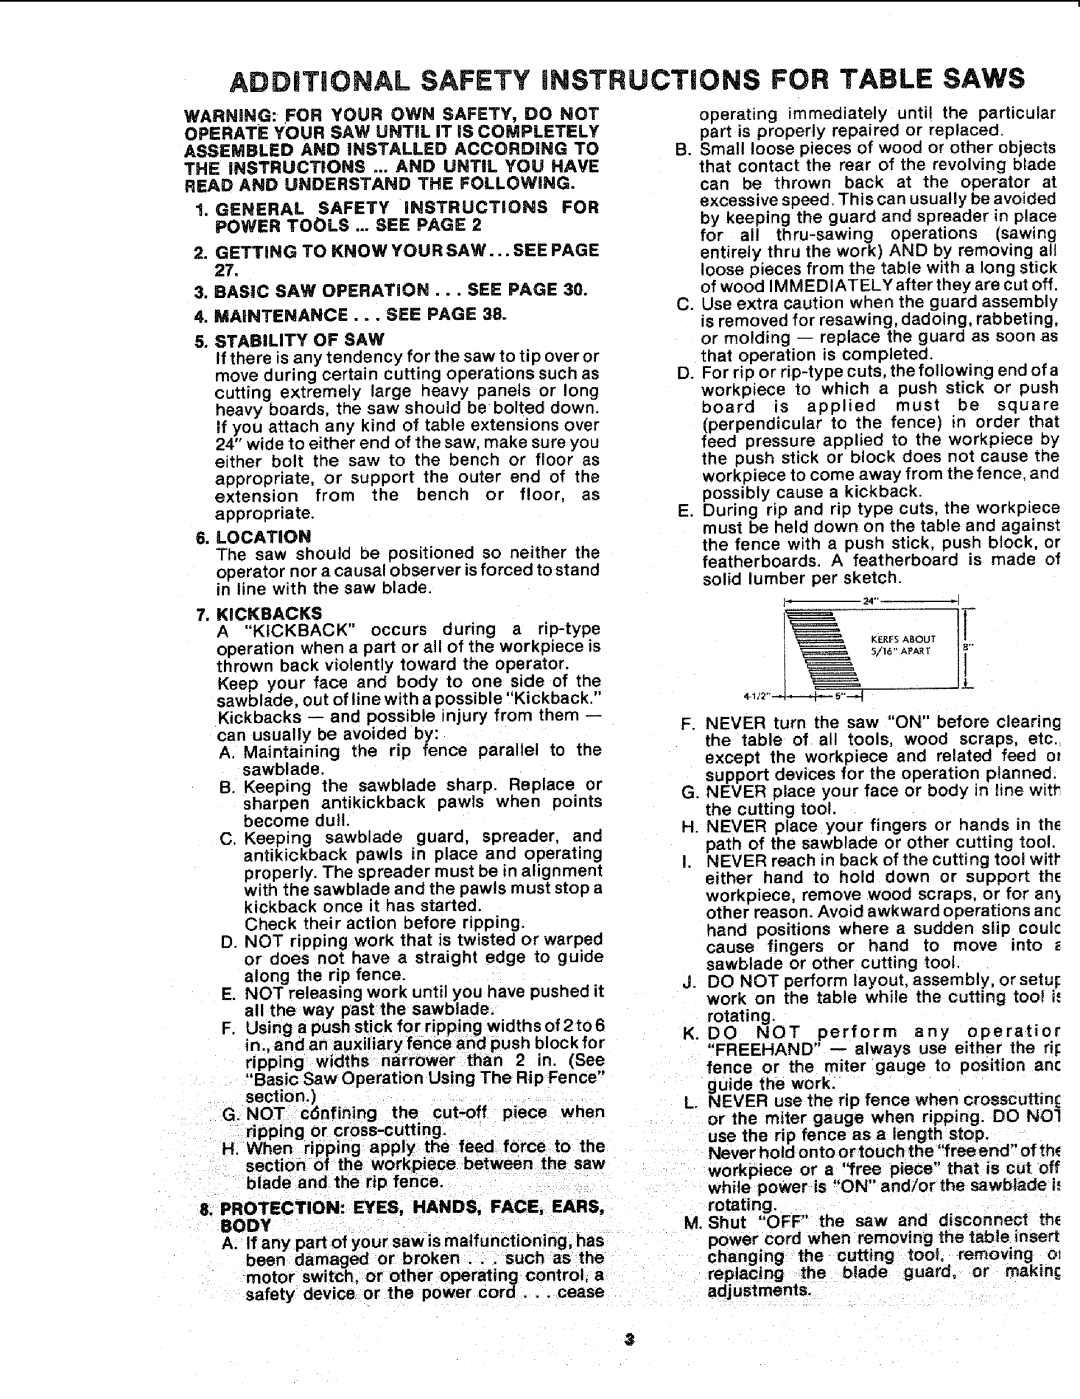
E. During rip and rip type cuts. the workpiece must be held down on the table and against the fence with a push stick, push block, or featherboards. A featherboard is made of
solid lumber per sketch.
]_ | 24'" | I |
7.KICKBACKS
A "KICKBACK" occurs during a
Kickbacks and possible injury from them can usually be avoided by:
A.Maintaining the rip fence parallel to the sawblade.
B.Keeping the sawblade sharp. Replace or sharpen anti kickback pawls when points become dull.
C.Keeping sawblade guard, spreader, and antikickback pawls in place and operating properly. The spreacler must be in alignment
with the sawblade and the pawls must stop a kickback once it has started,
Check their action before ripping.
D.NOT ripping work that is twisted or warped or does not have a straight edge to guide along the rip fence.
E.NOT releasing work until you have pushed it all the way past the sawblade.
F.Using a push stick for ripping widths of 2 to 6 in, and an auxi iary fence and push block for ripping widths narrower than 2 in. (See "Basic Saw Operation Using The Rip Fence"
section.)
G, NOT c6nfining the
section of the workpiece between the saw blade and the rip fence
8.PROTECTION: EYES, HANDS, FACE, EARS, BODY
A.If any part of your saw is malfunctioning, has
been damaged or broken.., such as the motor switch, or other operating control, a
safety device or the power Cord... cease
5/16" AP_T
F. NEVER turn the saw "ON" before clearing the table of all tools, wood scraps, etc. except the workpiece and related feed of support devices for the operation planned.
G. NEVER place your face or body in line witf"
the cutting tool.
H. NEVER place your fingers or hands in the path of the sawblade or other cutting tool.
I.NEVER reach in back of the cutting tool witl" either hand to hold down or support th_ workpiece, remove wood scraps, or for an_ other reason. Avoid awkward operations anc
hand positions where a suddenmovS_lPinto"coulc cause fingers or hand to
sawbtade or other cutting tool.
J. DO NOT perform layout, assembly, or setu_ work on the table while the cutting toot i,'
rotating.
K. DO NOT perform any operatior "FREEHAND"
guide the work.
L.NEVER use the rip fence when crosscuttin_
..... miter gauge when ripping. DO NO! use the rip fence as a length stop.
Never hold onto or touch the "freeend"of the workpiece or a "free piece" that is cut off while power is "ON" and/or the sawbiade i,. rotating.
M.Shut "OFF" the saw and disconnect th_
power cord when removing the table insert changing the cutting tool, removing ot replacing the blade guard, or makin{; adjustments.