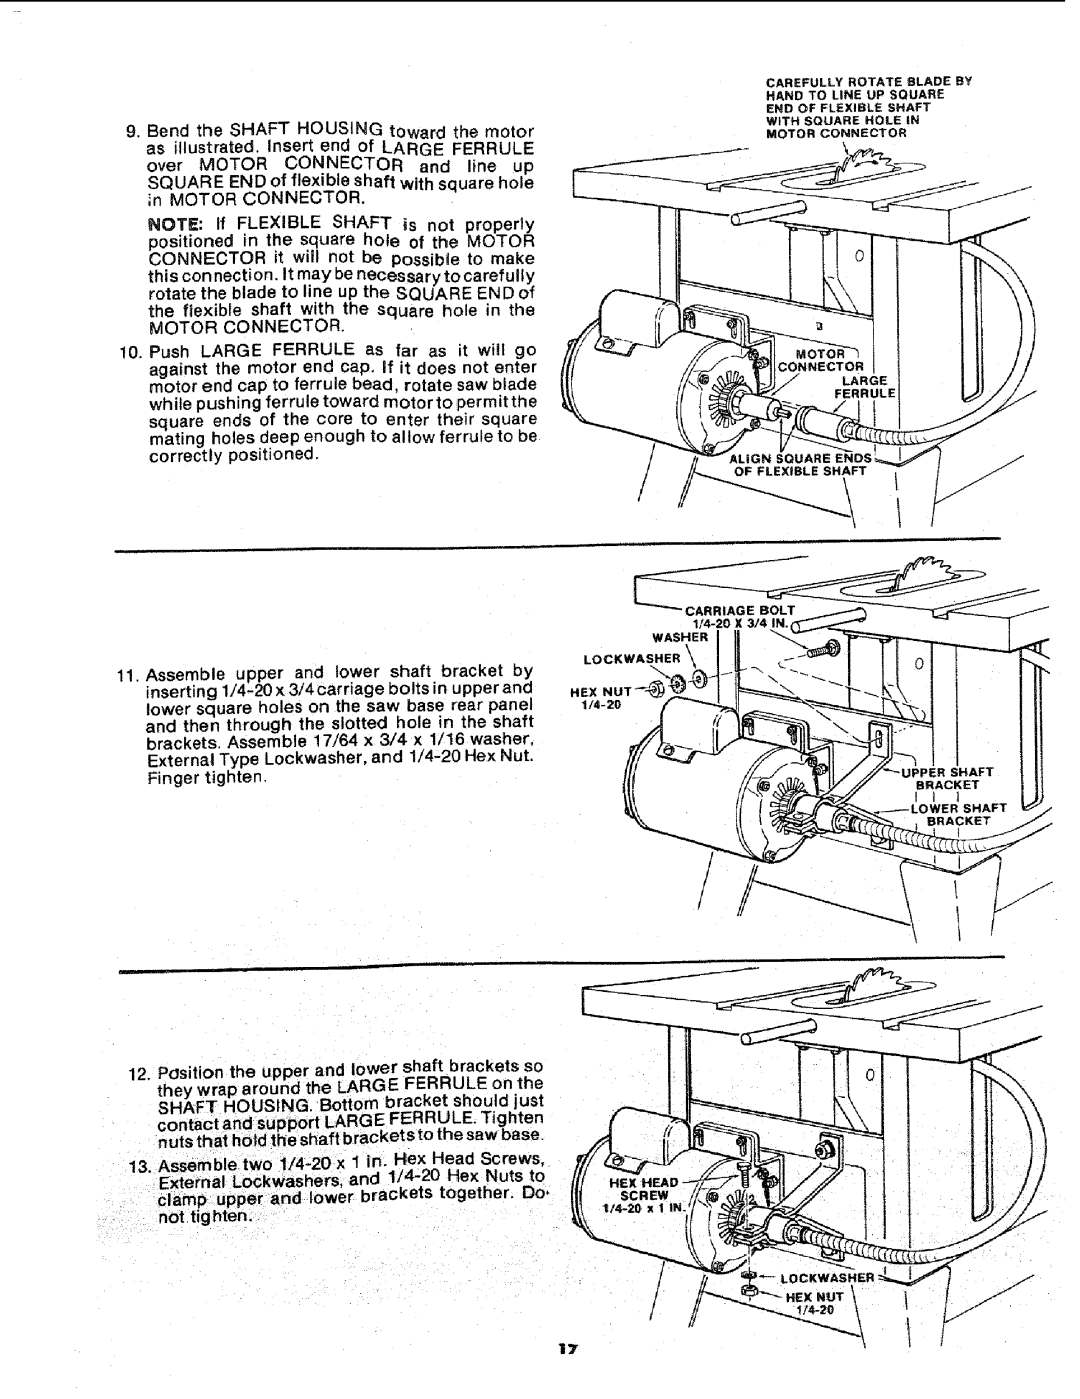
9.Bend the SHAFT HOUSING toward the motor as illustrated, insert end of LARGE FERRULE
over MOTOR CONNECTOR and line up
SQUARE END of flexible shaft with square hoJe in MOTOR CONNECTOR.
NOTF.: ff FLEXIBLE SHAFT is not properly positioned in the square hole of the MOTOR CONNECTOR it will not be Possible to make this con nection. It may be necessary to carefully rotate the blade to line up the SQUARE END of
the flexible shaft with the square hole in the
MOTOR CONNECTOR.
10.Push LARGE FERRULE as far as it will go against the motor end cap. if it does not enter motor end cap to ferrule bead, rotate saw blade while pushing ferrule toward motorto permitthe square ends of the core to enter their square mating holes deep enough to allow ferrule to be correctly positioned.
11.Assemble upper and lower shaft bracket by inserting
12.POsition the upper and lower shaft brackets so they wrap around the LARGE FERRULE on the SHAFT HOUSING. Bottom bracket should just
contact and support LARG E FERRULE. Tighten nuts that hold the shaft b rackets to the saw base.
13.Assemble two
CAREFULLY ROTATE BLADE BY HAND TO LINE UP SQUARE
END OF FLEXIBLE SHAFT
WiTH SQUARE HOLE IN
MOTOR CONNECTOR
\
17
