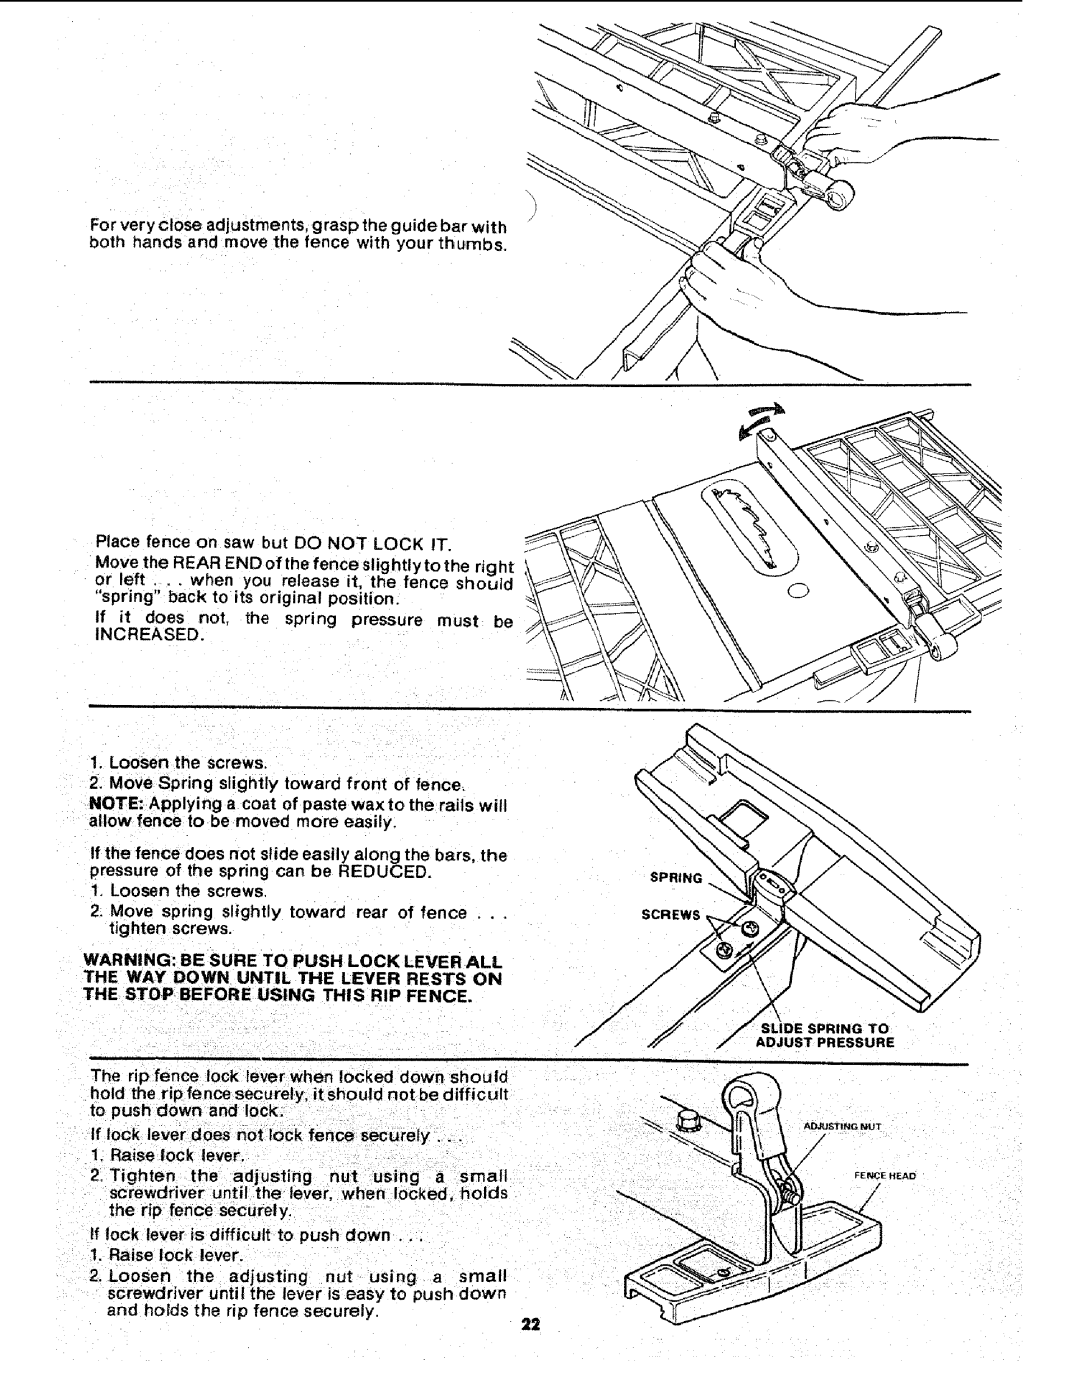
For very close adjustments, grasp the guide bar with both hands and move the fence with your thumbs.
Place fence on saw but DO NOT LOCK IT.
Move the REAR END of the fence slightly to the rig ht or left . . . when you release it, the fence should
"spring" back to its original position.
If it does not, the spring pressure must be
INCREASED.
1.Loosen the screws.
2.Move Spring slightly toward front of fence. NOTE: Applying a coat of paste wax to the rails will allow fence to be moved more easily.
If the fence does not slide easily along the bars, the pressure of the spring can be REDUCED.
1.Loosen the screws.
2.Move spring slightly toward rear of fence . . .
tighten screws.
WARNING: BE SURE TO PUSH LOCK LEVER ALL THE WAY" DOWN UNTIL THE LEVER RESTS ON THE STOP BEFORE USING THIS RIP FENCE.
The rip fence lock lever when locked down should
hold the rip fence securely, it should not be difficult to push down and lock.
If lock lever does not lock fence securely ....
1.Raise lock lever.
2.Tighten the adjusting nut using a small screwdriver until the lever, when locked, holds the rip fence securely.
fflock lever is difficult to push down ...
1. Raise lock lever_
2. Loosen the adjusting nut using a srnall screwdriver until the lever is easy to push down
and holds the rip fence securely.
22
\
SPRING
SLIDE SPRING TO
ADJUST PRESSURE
ADJUSTNG NUT
/
/
FENCE HEAD
/