<P=004>
SETTING THE CLOCK
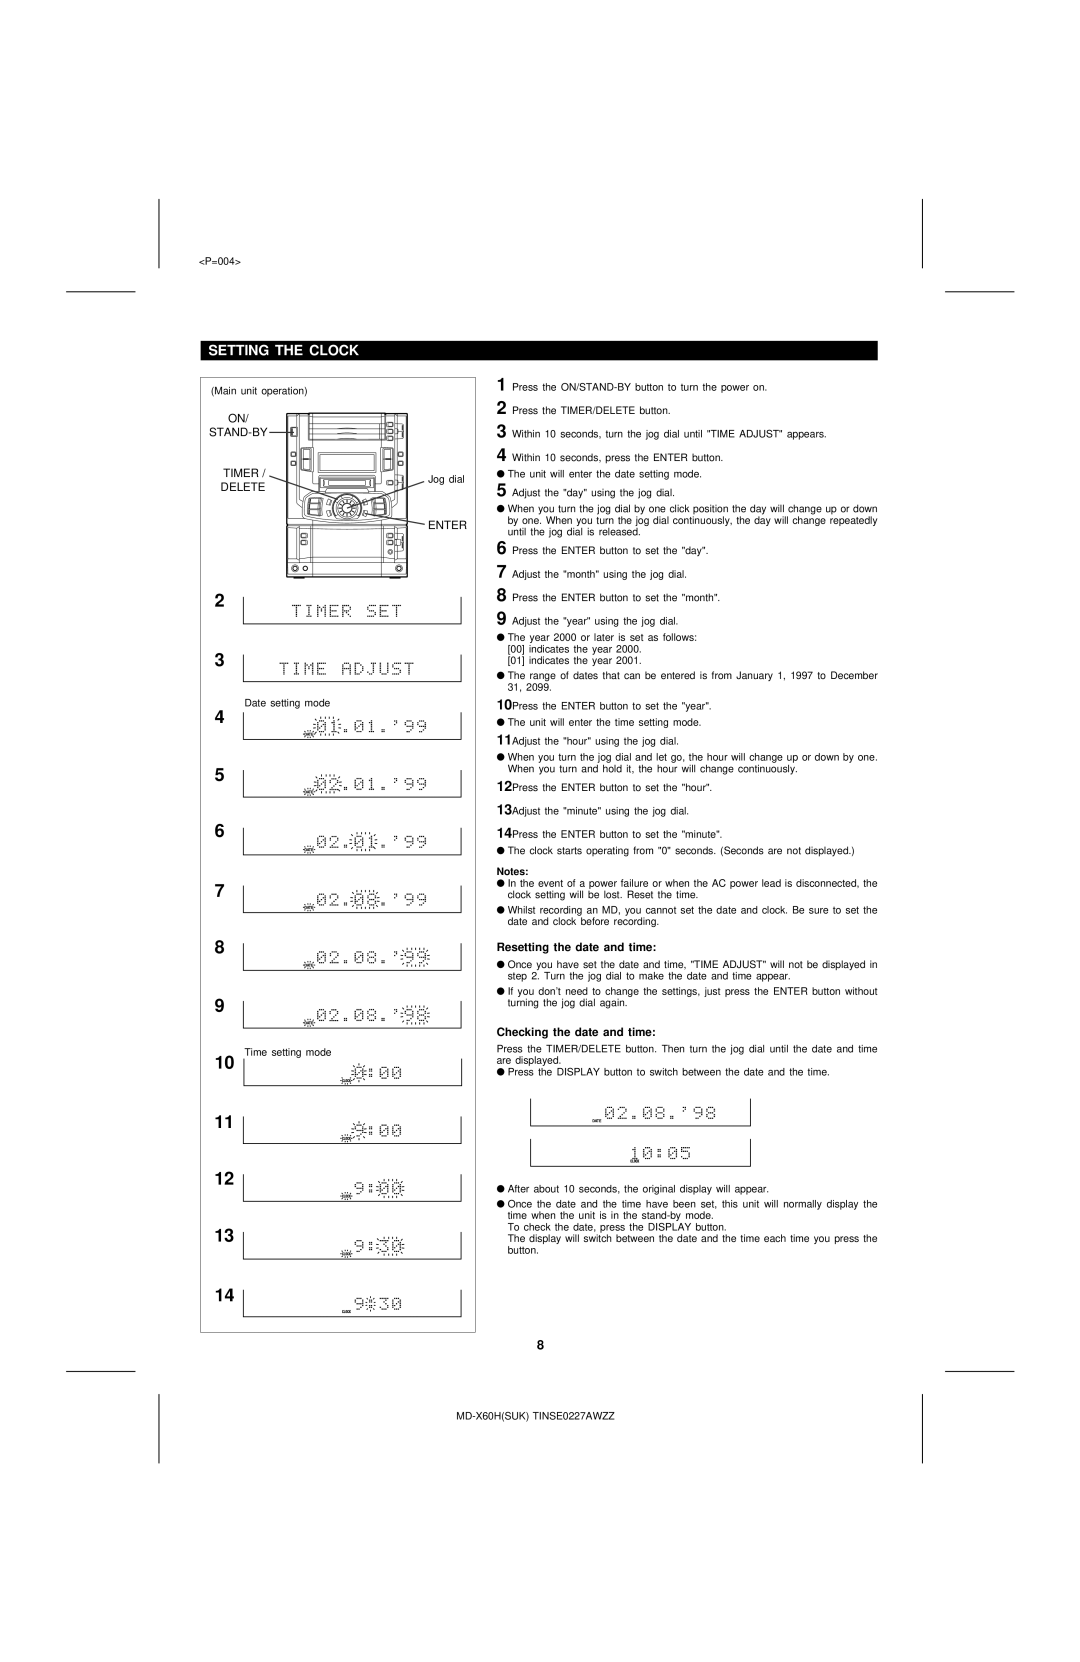
(Main unit operation) |
| |
ON/ |
| |
| ||
TIMER / | Jog dial | |
DELETE | ||
| ||
| ENTER | |
2 |
| |
3 |
| |
Date setting mode |
| |
4 |
| |
5 |
| |
6 |
| |
7 |
| |
8 |
| |
9 |
| |
Time setting mode |
| |
10 |
| |
11 |
| |
12 |
| |
13 |
| |
14 |
|
1 Press the
2 Press the TIMER/DELETE button.
3 Within 10 seconds, turn the jog dial until "TIME ADJUST" appears.
4 Within 10 seconds, press the ENTER button.
●The unit will enter the date setting mode.
5 Adjust the "day" using the jog dial.
●When you turn the jog dial by one click position the day will change up or down by one. When you turn the jog dial continuously, the day will change repeatedly until the jog dial is released.
6 Press the ENTER button to set the "day".
7 Adjust the "month" using the jog dial.
8 Press the ENTER button to set the "month".
9 Adjust the "year" using the jog dial.
●The year 2000 or later is set as follows:
[00]indicates the year 2000.
[01]indicates the year 2001.
●The range of dates that can be entered is from January 1, 1997 to December 31, 2099.
10Press the ENTER button to set the "year".
●The unit will enter the time setting mode.
11Adjust the "hour" using the jog dial.
●When you turn the jog dial and let go, the hour will change up or down by one. When you turn and hold it, the hour will change continuously.
12Press the ENTER button to set the "hour".
13Adjust the "minute" using the jog dial.
14Press the ENTER button to set the "minute".
●The clock starts operating from "0" seconds. (Seconds are not displayed.)
Notes:
●In the event of a power failure or when the AC power lead is disconnected, the clock setting will be lost. Reset the time.
●Whilst recording an MD, you cannot set the date and clock. Be sure to set the date and clock before recording.
Resetting the date and time:
●Once you have set the date and time, "TIME ADJUST" will not be displayed in step 2. Turn the jog dial to make the date and time appear.
●If you don't need to change the settings, just press the ENTER button without turning the jog dial again.
Checking the date and time:
Press the TIMER/DELETE button. Then turn the jog dial until the date and time are displayed.
●Press the DISPLAY button to switch between the date and the time.
●After about 10 seconds, the original display will appear.
●Once the date and the time have been set, this unit will normally display the time when the unit is in the
To check the date, press the DISPLAY button.
The display will switch between the date and the time each time you press the button.
8