<P=003>
(Continued) |
|
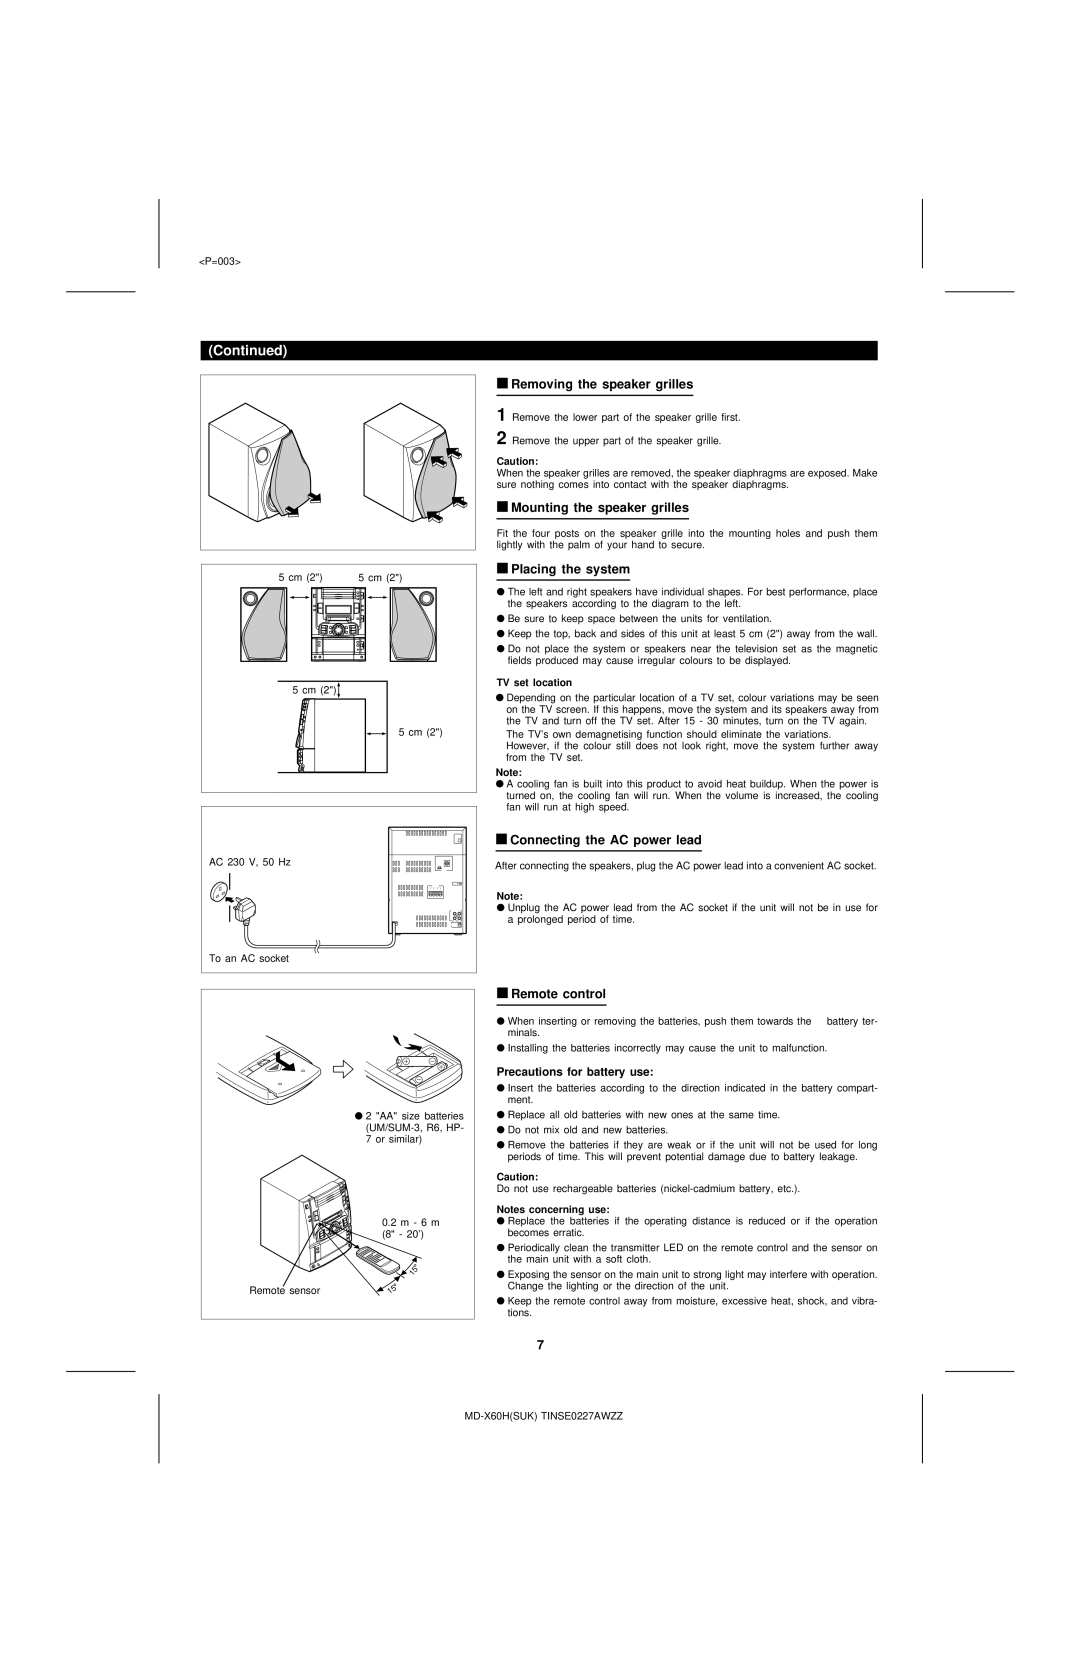
5 cm (2") | 5 cm (2") |
5 cm (2")
5 cm (2")
AC 230 V, 50 Hz
To an AC socket
■Removing the speaker grilles
1 Remove the lower part of the speaker grille first.
2 Remove the upper part of the speaker grille.
Caution:
When the speaker grilles are removed, the speaker diaphragms are exposed. Make sure nothing comes into contact with the speaker diaphragms.
■Mounting the speaker grilles
Fit the four posts on the speaker grille into the mounting holes and push them lightly with the palm of your hand to secure.
■Placing the system
●The left and right speakers have individual shapes. For best performance, place the speakers according to the diagram to the left.
●Be sure to keep space between the units for ventilation.
●Keep the top, back and sides of this unit at least 5 cm (2") away from the wall.
●Do not place the system or speakers near the television set as the magnetic fields produced may cause irregular colours to be displayed.
TV set location
●Depending on the particular location of a TV set, colour variations may be seen on the TV screen. If this happens, move the system and its speakers away from the TV and turn off the TV set. After 15 - 30 minutes, turn on the TV again.
The TV's own demagnetising function should eliminate the variations. However, if the colour still does not look right, move the system further away from the TV set.
Note:
●A cooling fan is built into this product to avoid heat buildup. When the power is turned on, the cooling fan will run. When the volume is increased, the cooling fan will run at high speed.
■Connecting the AC power lead
After connecting the speakers, plug the AC power lead into a convenient AC socket.
Note:
●Unplug the AC power lead from the AC socket if the unit will not be in use for a prolonged period of time.
● 2 | "AA" size batteries |
7 | or similar) |
| 0.2 m - 6 m |
| (8" - 20') |
| 15 |
Remote sensor | 15 |
■Remote control
●When inserting or removing the batteries, push them towards the ë battery ter- minals.
●Installing the batteries incorrectly may cause the unit to malfunction.
Precautions for battery use:
●Insert the batteries according to the direction indicated in the battery compart- ment.
●Replace all old batteries with new ones at the same time.
●Do not mix old and new batteries.
●Remove the batteries if they are weak or if the unit will not be used for long periods of time. This will prevent potential damage due to battery leakage.
Caution:
Do not use rechargeable batteries
Notes concerning use:
●Replace the batteries if the operating distance is reduced or if the operation becomes erratic.
●Periodically clean the transmitter LED on the remote control and the sensor on the main unit with a soft cloth.
●Exposing the sensor on the main unit to strong light may interfere with operation. Change the lighting or the direction of the unit.
●Keep the remote control away from moisture, excessive heat, shock, and vibra- tions.
7