SETTING THE CLOCK
|
| ENTER |
| POWER | TIMER/ |
|
| |
|
| DELETE |
| 2 |
|
| 3 |
|
| 4 |
|
| 5 |
|
| 6 |
|
| 7 |
|
| 8 |
|
| 9 |
|
| 10 |
|
| 11 |
|
| 12 |
|
| 13 |
|
| 14 |
|
|
| 8 |
| 8 |
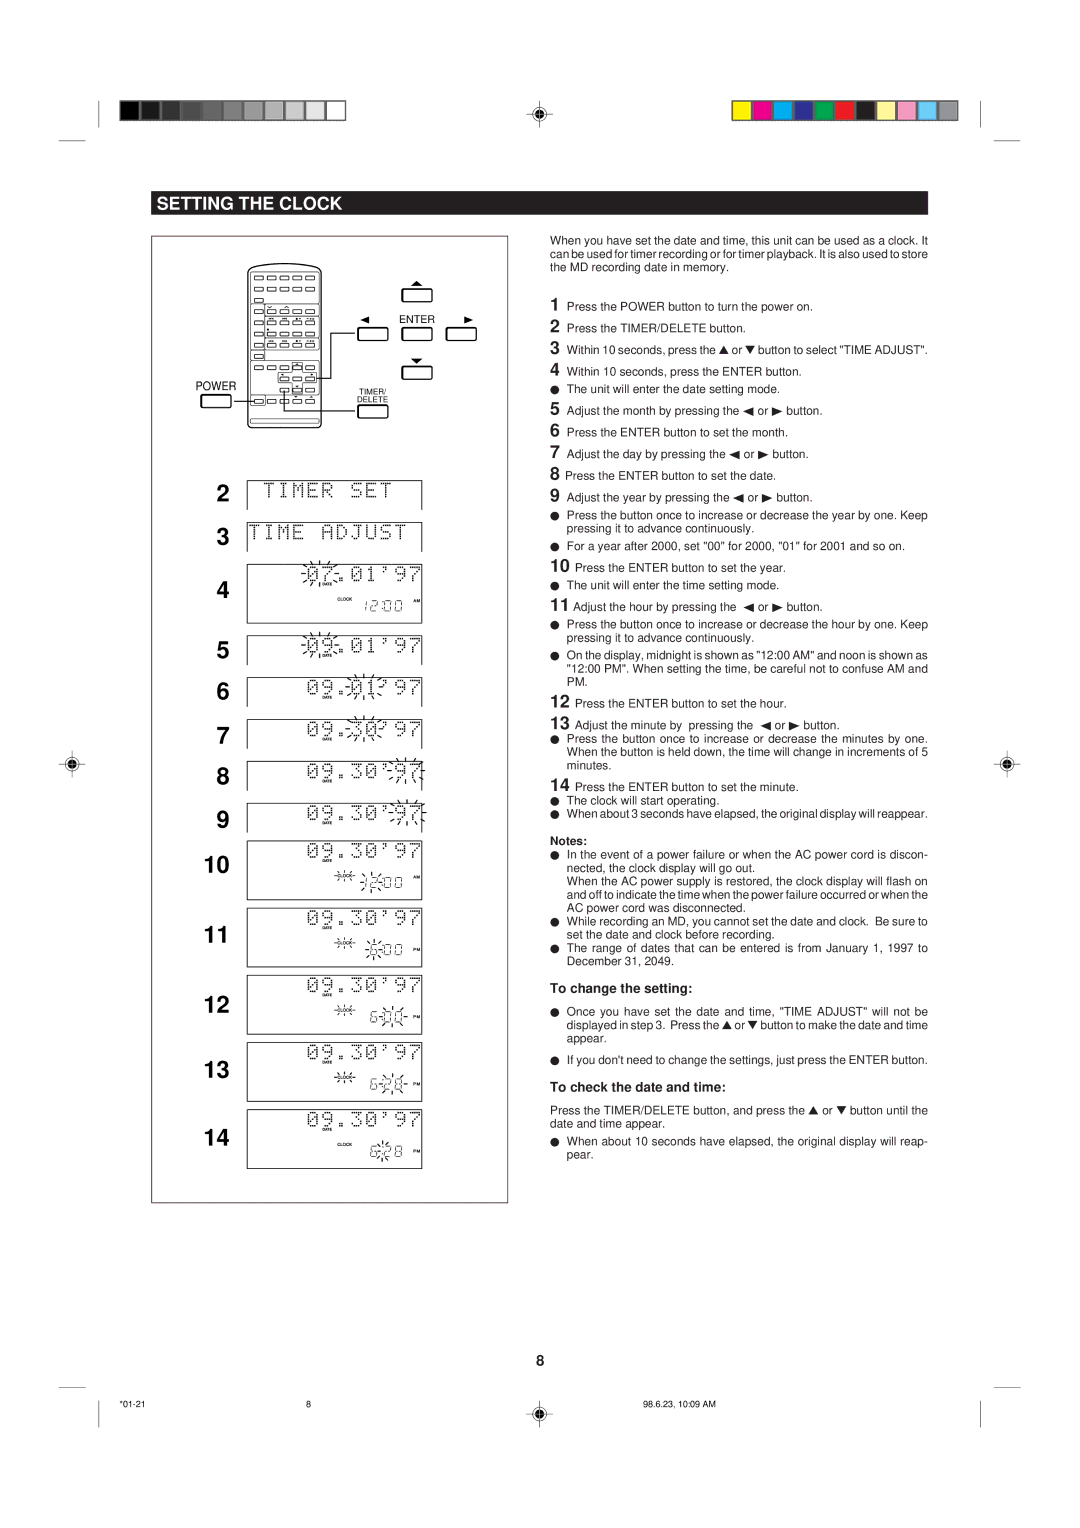
When you have set the date and time, this unit can be used as a clock. It can be used for timer recording or for timer playback. It is also used to store the MD recording date in memory.
1 Press the POWER button to turn the power on.
2 Press the TIMER/DELETE button.
3 Within 10 seconds, press the ▲ or ▼ button to select "TIME ADJUST".
4 Within 10 seconds, press the ENTER button.
IThe unit will enter the date setting mode.
5 Adjust the month by pressing the 1 or 0 button.
6 Press the ENTER button to set the month.
7 Adjust the day by pressing the 1 or 0 button.
8 Press the ENTER button to set the date.
9 Adjust the year by pressing the 1 or 0 button.
IPress the button once to increase or decrease the year by one. Keep pressing it to advance continuously.
IFor a year after 2000, set "00" for 2000, "01" for 2001 and so on.
10 Press the ENTER button to set the year.
IThe unit will enter the time setting mode.
11 Adjust the hour by pressing the 1 or 0 button.
IPress the button once to increase or decrease the hour by one. Keep pressing it to advance continuously.
IOn the display, midnight is shown as "12:00 AM" and noon is shown as "12:00 PM". When setting the time, be careful not to confuse AM and PM.
12 Press the ENTER button to set the hour.
13 Adjust the minute by pressing the 1 or 0 button.
IPress the button once to increase or decrease the minutes by one. When the button is held down, the time will change in increments of 5 minutes.
14 Press the ENTER button to set the minute.
IThe clock will start operating.
IWhen about 3 seconds have elapsed, the original display will reappear.
Notes:
IIn the event of a power failure or when the AC power cord is discon- nected, the clock display will go out.
When the AC power supply is restored, the clock display will flash on and off to indicate the time when the power failure occurred or when the AC power cord was disconnected.
IWhile recording an MD, you cannot set the date and clock. Be sure to set the date and clock before recording.
IThe range of dates that can be entered is from January 1, 1997 to December 31, 2049.
To change the setting:
IOnce you have set the date and time, "TIME ADJUST" will not be displayed in step 3. Press the ▲ or ▼ button to make the date and time appear.
IIf you don't need to change the settings, just press the ENTER button.
To check the date and time:
Press the TIMER/DELETE button, and press the ▲ or ▼ button until the date and time appear.
IWhen about 10 seconds have elapsed, the original display will reap- pear.
98.6.23, 10:09 AM