(Continued)
2
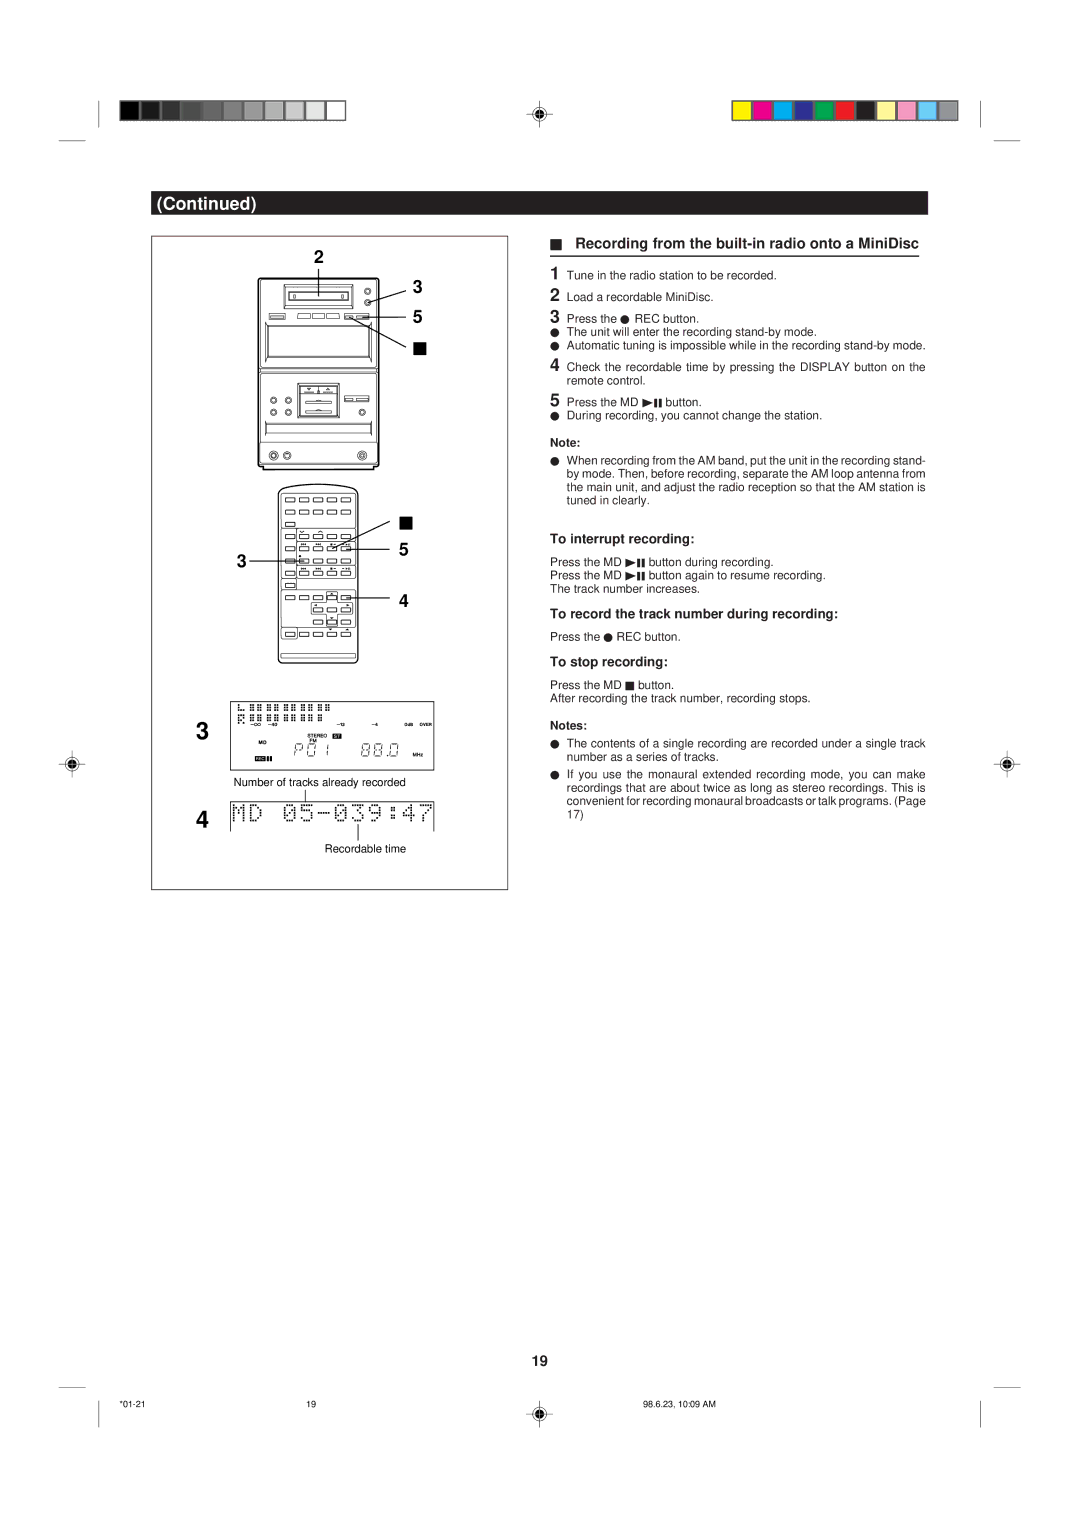
HRecording from the built-in radio onto a MiniDisc
1 Tune in the radio station to be recorded.
3
3
3
5
H
H
5
4
2 Load a recordable MiniDisc.
3 Press the I REC button.
IThe unit will enter the recording
IAutomatic tuning is impossible while in the recording
4 Check the recordable time by pressing the DISPLAY button on the remote control.
5 Press the MD 06 button.
IDuring recording, you cannot change the station.
Note:
IWhen recording from the AM band, put the unit in the recording stand- by mode. Then, before recording, separate the AM loop antenna from the main unit, and adjust the radio reception so that the AM station is tuned in clearly.
To interrupt recording:
Press the MD 06 button during recording.
Press the MD 06 button again to resume recording.
The track number increases.
To record the track number during recording:
Press the I REC button.
To stop recording:
Press the MD H button.
After recording the track number, recording stops.
Notes:
I The contents of a single recording are recorded under a single track |
number as a series of tracks. |
I If you use the monaural extended recording mode, you can make |
Number of tracks already recorded
4
Recordable time
recordings that are about twice as long as stereo recordings. This is |
convenient for recording monaural broadcasts or talk programs. (Page |
17) |
19
19 | 98.6.23, 10:09 AM |