Digital Still Camera Features
Camera Recording
Digital Still Camera Features
Card Recording
Available mode:
Card Camera
You can take a still picture in the same way as you do with a standard camera and record that image on the card.
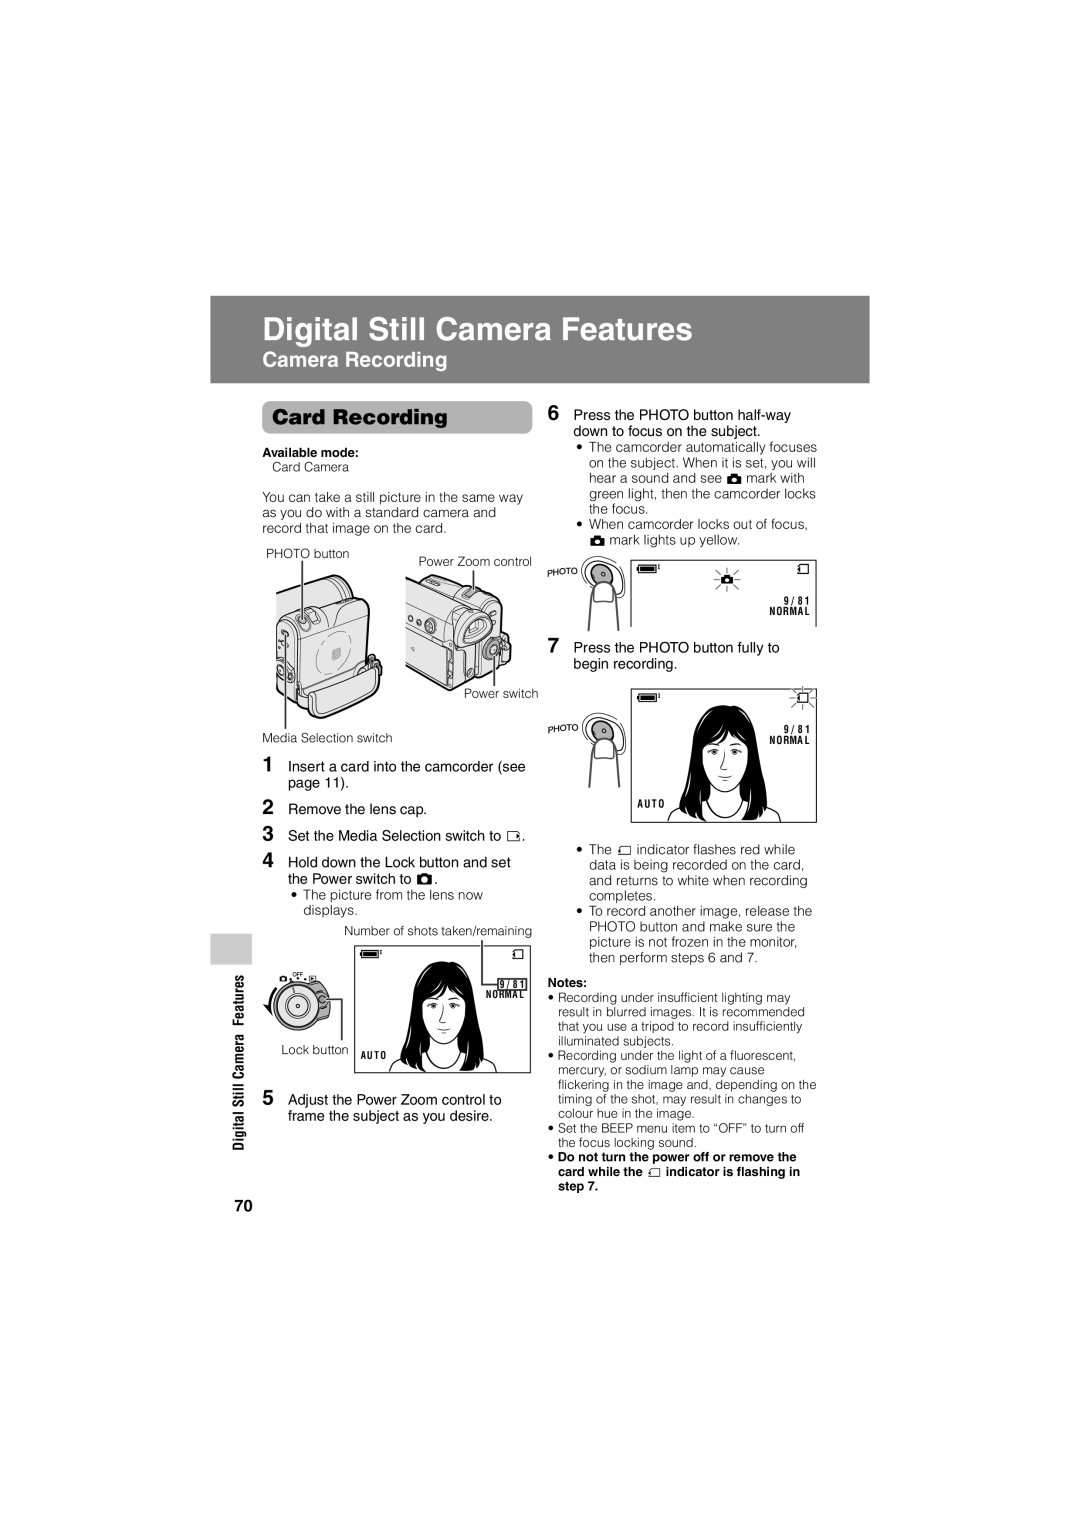
PHOTO button
Power Zoom control
Power switch
Media Selection switch
1 Insert a card into the camcorder (see page 11).
2 Remove the lens cap.
3 Set the Media Selection switch to u.
4 Hold down the Lock button and set the Power switch to v.
¥The picture from the lens now displays.
Number of shots taken/remaining
![]() 9 / 8 1
9 / 8 1
NO RMA L
Lock button A U T O
5 Adjust the Power Zoom control to frame the subject as you desire.
6 Press the PHOTO button
¥The camcorder automatically focuses on the subject. When it is set, you will hear a sound and see T mark with green light, then the camcorder locks the focus.
¥When camcorder locks out of focus, T mark lights up yellow.
9 / 8 1
N ORMA L
7 Press the PHOTO button fully to begin recording.
9 / 8 1
NO RMA L
A U T O
¥The S indicator flashes red while data is being recorded on the card, and returns to white when recording completes.
¥To record another image, release the PHOTO button and make sure the picture is not frozen in the monitor, then perform steps 6 and 7.
Notes:
¥Recording under insufficient lighting may result in blurred images. It is recommended that you use a tripod to record insufficiently illuminated subjects.
¥Recording under the light of a fluorescent, mercury, or sodium lamp may cause flickering in the image and, depending on the timing of the shot, may result in changes to colour hue in the image.
¥Set the BEEP menu item to ÒOFFÓ to turn off the focus locking sound.
¥Do not turn the power off or remove the card while the S indicator is flashing in step 7.
70