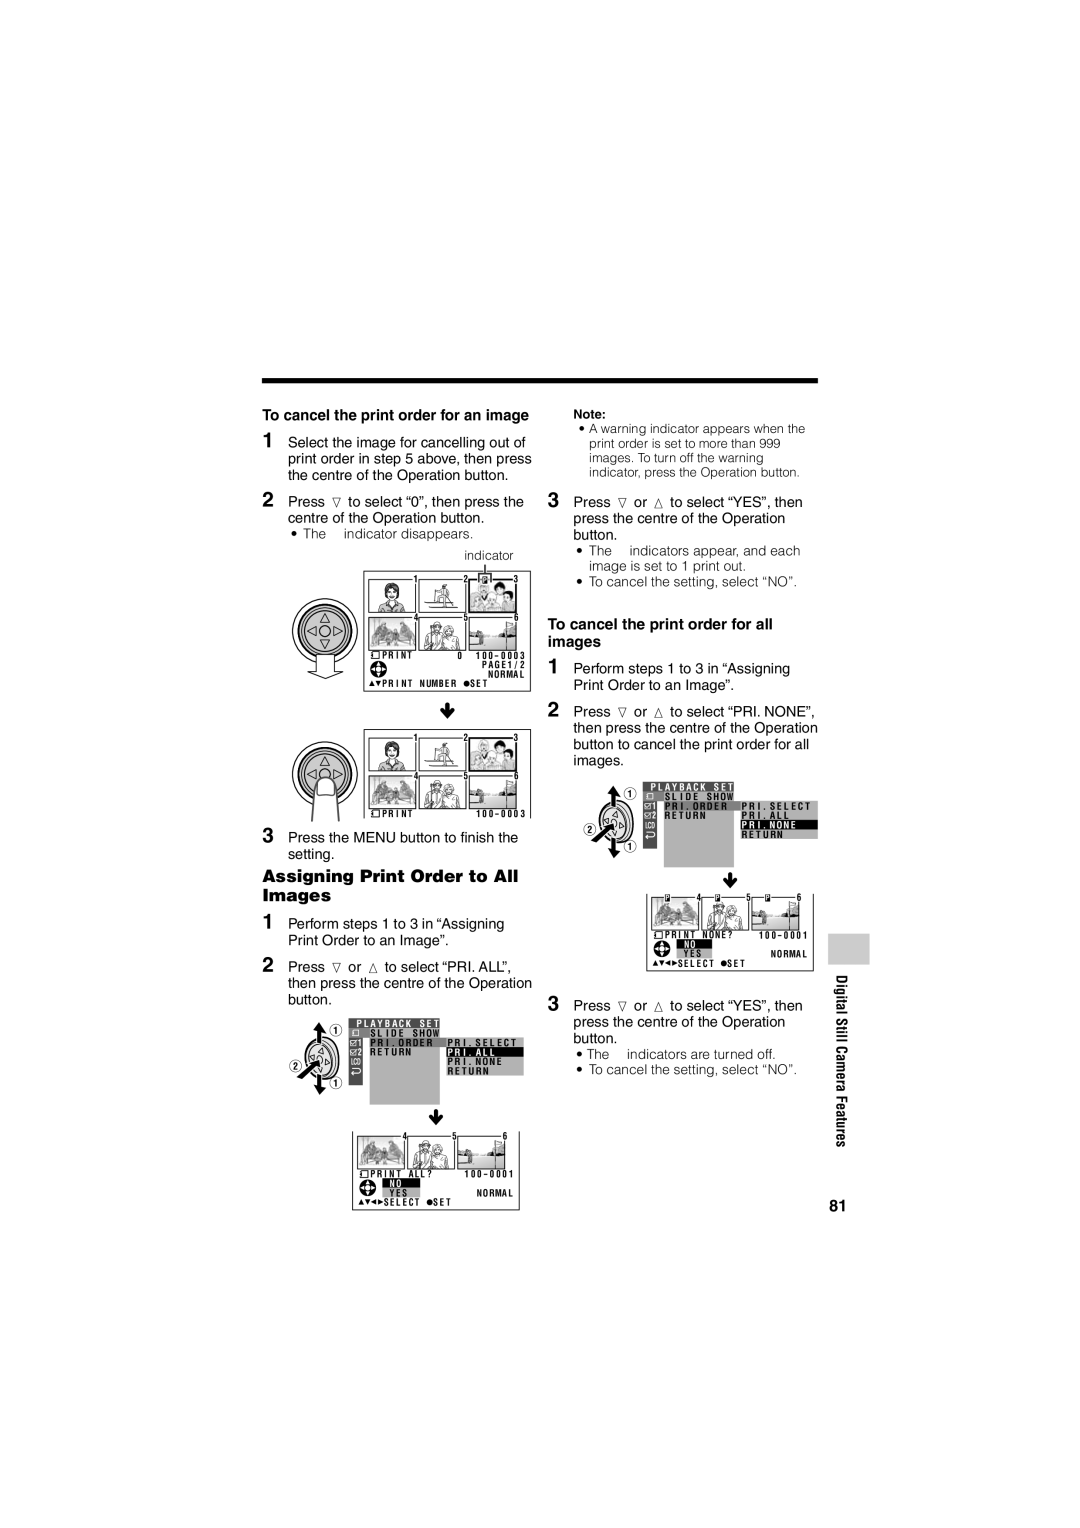
To cancel the print order for an image
1 Select the image for cancelling out of print order in step 5 above, then press the centre of the Operation button.
2 Press l to select “0”, then press the centre of the Operation button.
¥ The M indicator disappears.
M indicator
| 1 | 2 | P | 3 |
| 4 | 5 |
| 6 |
P R I N T |
| 0 | 1 0 0 - 0 0 0 3 | |
|
|
| P A G E 1 / 2 | |
P R I N T | NUMB E R |
| S E T | NORMA L |
|
| |||
1 | 2 | 3 |
4 | 5 | 6 |
P R I N T |
| 1 0 0 - 0 0 0 3 |
3 Press the MENU button to finish the setting.
Assigning Print Order to All Images
1 Perform steps 1 to 3 in “Assigning Print Order to an Image”.
2 Press l or m to select “PRI. ALL”, then press the centre of the Operation button.
P L A Y B A C K S E T
S L I D E | S HOW |
P R I . O R D E R P R I . S E L E C T | |
R E T U RN | P R I . A L L |
| P R I . N O N E |
| R E T U RN |
4 | 5 | 6 |
P R I N T A L L ? |
| 1 0 0 - 0 0 0 1 |
N O |
|
|
Y E S | S E T | NO RMA L |
S E L E C T |
|
Note:
¥A warning indicator appears when the print order is set to more than 999 images. To turn off the warning indicator, press the Operation button.
3 Press l or m to select “YES”, then press the centre of the Operation button.
¥The M indicators appear, and each image is set to 1 print out.
¥To cancel the setting, select ÒNOÓ.
To cancel the print order for all images
1 Perform steps 1 to 3 in “Assigning Print Order to an Image”.
2 Press l or m to select “PRI. NONE”, then press the centre of the Operation button to cancel the print order for all images.
P L A Y B A C K S E T
S L I D E | S HOW |
P R I . O R D E R P R I . S E L E C T | |
R E T U RN | P R I . A L L |
| P R I . N O N E |
| R E T U RN |
P | 4 | P | 5 | P | 6 |
P R I N T NO N E ? | 1 0 0 - 0 0 0 1 | ||||
| N O |
|
|
|
|
| Y E S |
| S E T |
| NO RMA L |
| S E L E C T |
|
|
| |
3 Press l or m to select “YES”, then | Digital | |
press the centre of the Operation | Still | |
button. | ||
CameraFeatures | ||
¥ The M indicators are turned off. | ||
¥ To cancel the setting, select ÒNOÓ. |
|
81
