Useful Features
Camera Recording
Self recording with reversed | 3 Open the LCD monitor to a 90° angle |
grip | to the camcorder body (1), and then |
Available mode: | rotate it 180° vertically (2). |
| |
Tape Camera | 90¡ |
| |
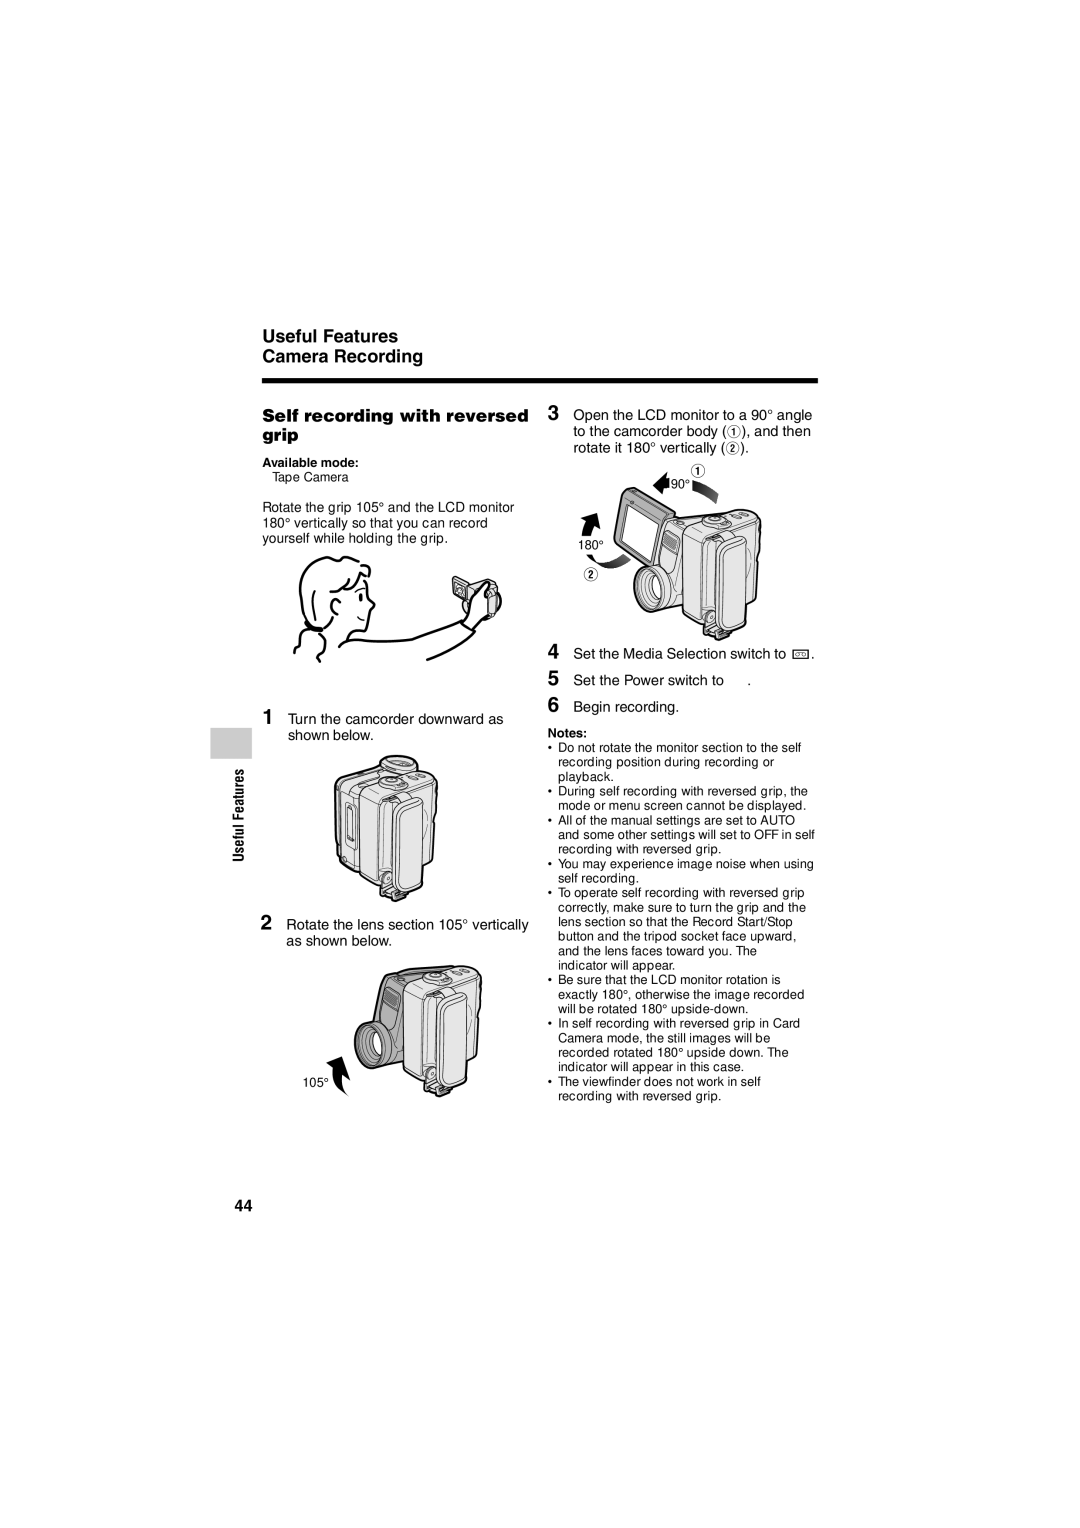
Rotate the grip 105¡ and the LCD monitor |
|
180¡ vertically so that you can record |
|
yourself while holding the grip. | 180¡ |
|
1 Turn the camcorder downward as shown below.
Useful Features
2 Rotate the lens section 105° vertically as shown below.
105¡
4 Set the Media Selection switch to V.
5 Set the Power switch to v.
6 Begin recording.
Notes:
¥Do not rotate the monitor section to the self recording position during recording or playback.
¥During self recording with reversed grip, the mode or menu screen cannot be displayed.
¥All of the manual settings are set to AUTO and some other settings will set to OFF in self recording with reversed grip.
¥You may experience image noise when using self recording.
¥To operate self recording with reversed grip correctly, make sure to turn the grip and the lens section so that the Record Start/Stop button and the tripod socket face upward, and the lens faces toward you. The I indicator will appear.
¥Be sure that the LCD monitor rotation is exactly 180¡, otherwise the image recorded will be rotated 180¡
¥In self recording with reversed grip in Card Camera mode, the still images will be recorded rotated 180¡ upside down. The J indicator will appear in this case.
¥The viewfinder does not work in self recording with reversed grip.
44
