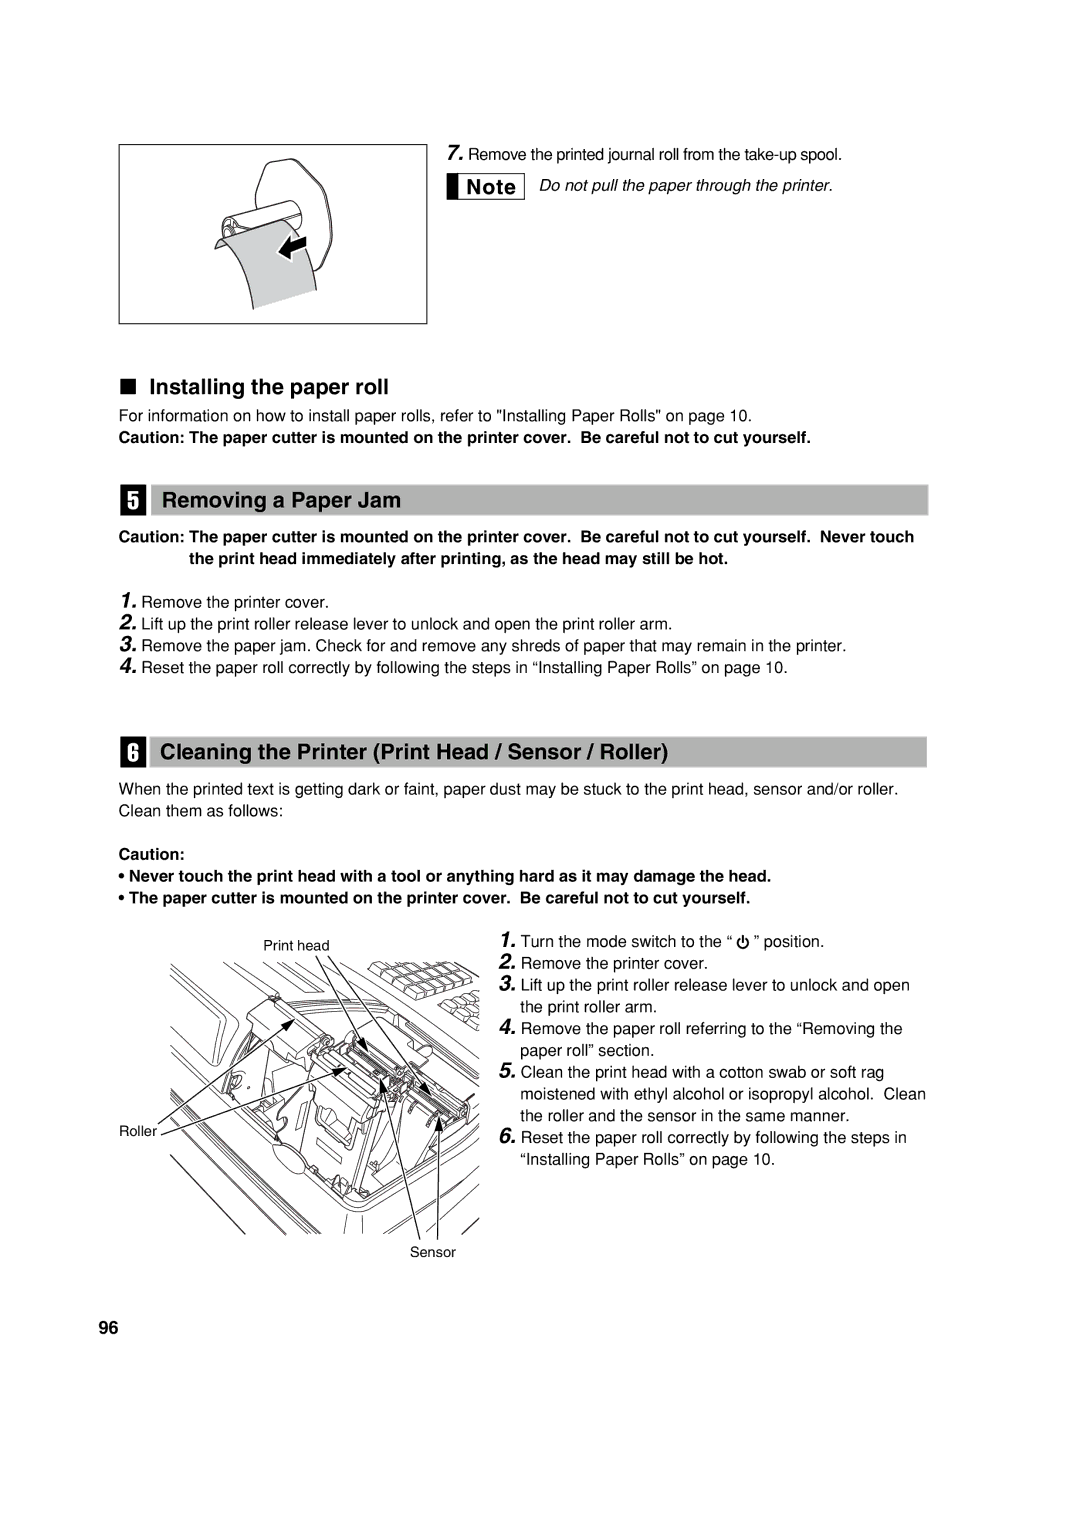
7.Remove the printed journal roll from the
Do not pull the paper through the printer.
Installing the paper roll
For information on how to install paper rolls, refer to "Installing Paper Rolls" on page 10.
Caution: The paper cutter is mounted on the printer cover. Be careful not to cut yourself.
5Removing a Paper Jam
Caution: The paper cutter is mounted on the printer cover. Be careful not to cut yourself. Never touch the print head immediately after printing, as the head may still be hot.
1.Remove the printer cover.
2.Lift up the print roller release lever to unlock and open the print roller arm.
3.Remove the paper jam. Check for and remove any shreds of paper that may remain in the printer.
4.Reset the paper roll correctly by following the steps in “Installing Paper Rolls” on page 10.
6Cleaning the Printer (Print Head / Sensor / Roller)
When the printed text is getting dark or faint, paper dust may be stuck to the print head, sensor and/or roller. Clean them as follows:
Caution:
•Never touch the print head with a tool or anything hard as it may damage the head.
•The paper cutter is mounted on the printer cover. Be careful not to cut yourself.
Print head | 1. Turn the mode switch to the “ ” position. |
2.Remove the printer cover.
3.Lift up the print roller release lever to unlock and open the print roller arm.
| 4. | Remove the paper roll referring to the “Removing the | |
| 5. | paper roll” section. | |
| Clean the print head with a cotton swab or soft rag | ||
|
| moistened with ethyl alcohol or isopropyl alcohol. Clean | |
Roller | 6. | the roller and the sensor in the same manner. | |
Reset the paper roll correctly by following the steps in | |||
|
“Installing Paper Rolls” on page 10.
Sensor
96
