Darning

Worn or torn spots on children’s clothes and household linens can be darned effortlessly and quickly with little practice. When greater control is needed, an embroidery hoop and a special darning and embroidery foot, which may be purchased at your SINGER stockist should be used.

Required settings

Stich Selection: Straight Stitch (A)

Needle Position:

Stitch Width:


1 2

3

4

5

Stitch Lenght:

2-5


Foot:

General Purpose (B)

Needle Plate:

General Purpose (A)

Attach feed cover plate (F)

If the area to be darned is open, baste a backing on the underside.

Place area to be darned, right side up, under presser foot; lower the foot and begin stitching, alternately drawing the fabric toward you and pulling it gently away from you.

Continue this forward and backward motion as you fill the area in with parallel lines of stitching.

Quilting

Quilting is the art of stitching two or more thicknesses of fabric together in a planned design. A pad is used to produce a soft, puffed effect.

Required settings

Stich Selection: Straight Stitch (A)

Zurcido

Las partes desgastadas o rotas de las ropas de niños y de la ropa blanca del hogar, se pueden zurcir sin esfuerzo y rápidamente con un poco de práctica. Cuando precise un mayor control del área de zurcir, adquiera en su centro de costura un aro de bordar y un prensatelas especial para zurcir y bordar.

Posiciones recomendadas

Selección punto: Punto recto (A)

Posición aguja:

Anchura punto:


1 2

3

4

5

Longitud punto:

2-5


Prensatelas:

Uso general (B)

Plancha aguja:

Uso general (A)

Adaptar plancha cubre arrastre (F)

Si el área a zurcir está abierta hilvane un refuerzo en el revés.

Coloque el área a zurcir, con el derecho hacia arriba, debajo del prensatelas, baje este y empiece a coser, tirando del tejido con suavidad hacia adelante y hacia atrás, alternativamente.

Continúe realizando estos movimientos según va llenando el área con líneas paralelas de puntos.

Acolchado

Acolchar es el arte de coser dos o mais gruesos de telas en un diseño planificado. Se utiliza un relleno para producir un efecto blando o bufado.

Posiciones recomendadas

Selección punto: Punto recto (A)

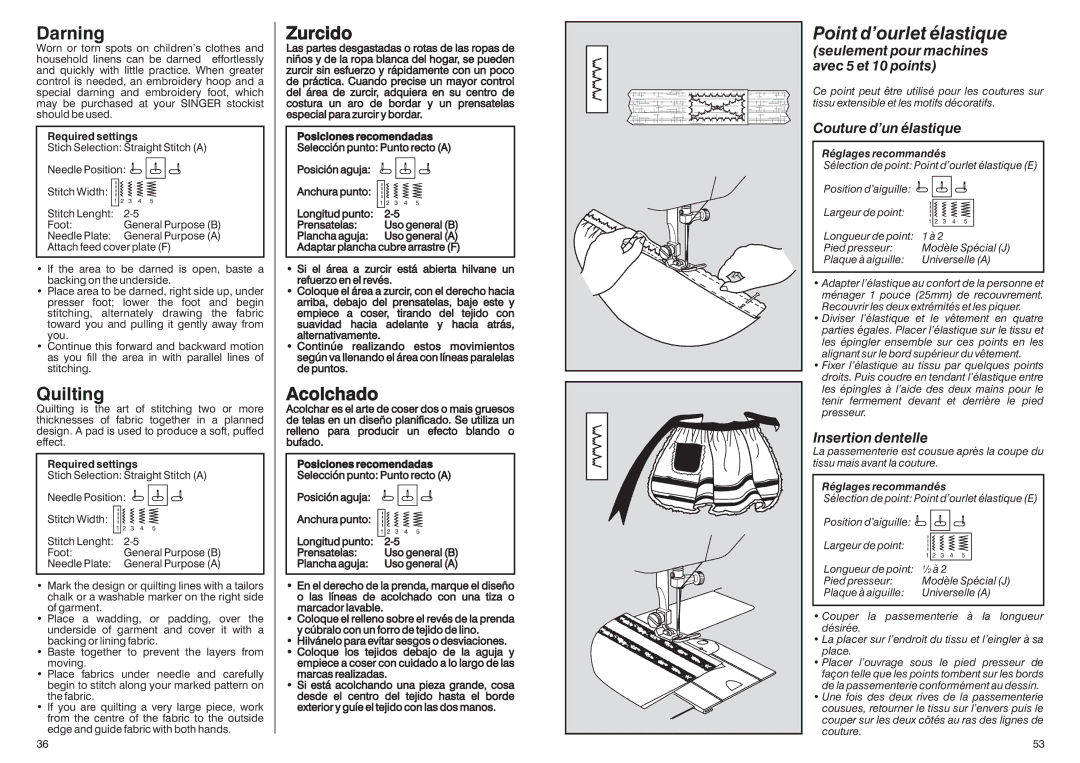
Point d’ourlet élastique

(seulement pour machines avec 5 et 10 points)

Ce point peut être utilisé pour les coutures sur tissu extensible et les motifs décoratifs.

Couture d’un élastique

Réglages recommandés

Sélection de point: Point d’ourlet élastique (E)

Position d’aiguille:

Largeur de point:

1 2

3

4

5


Longueur de point:

1 à 2


Pied presseur:

Modèle Spécial (J)

Plaque à aiguille:

Universelle (A)

Adapter l’élastique au confort de la personne et ménager 1 pouce (25mm) de recouvrement. Recouvrir les deux extrémités et les piquer.

Diviser l’élastique et le vêtement en quatre parties égales. Placer l’élastique sur le tissu et les épingler ensemble sur ces points en les alignant sur le bord supérieur du vêtement.

Fixer l’élastique au tissu par quelques points droits. Puis coudre en tendant l’élastique entre les épingles à l’aide des deux mains pour le tenir fermement devant et derrière le pied presseur.

Insertion dentelle

La passementerie est cousue après la coupe du tissu mais avant la couture.

Réglages recommandés

Needle Position:

Stitch Width:

1 2

3

4

5


Stitch Lenght:

2-5


Foot:

General Purpose (B)

Needle Plate:

General Purpose (A)

Posición aguja:

Anchura punto:

Longitud punto: Prensatelas: Plancha aguja:

1

2

3

4

5

2-5

Uso general (B) Uso general (A)

Sélection de point: Point d’ourlet élastique (E)

Position d’aiguille:

Largeur de point:

1 2

3

4

5


Longueur de point: ½ à 2


Pied presseur:

Modèle Spécial (J)

Mark the design or quilting lines with a tailors chalk or a washable marker on the right side of garment.

Place a wadding, or padding, over the underside of garment and cover it with a backing or lining fabric.

Baste together to prevent the layers from moving.

Place fabrics under needle and carefully begin to stitch along your marked pattern on the fabric.

If you are quilting a very large piece, work from the centre of the fabric to the outside edge and guide fabric with both hands.

36

En el derecho de la prenda, marque el diseño o las líneas de acolchado con una tiza o marcador lavable.

Coloque el relleno sobre el revés de la prenda y cúbralo con un forro de tejido de lino.

Hilvánelo para evitar sesgos o desviaciones.

Coloque los tejidos debajo de la aguja y empiece a coser con cuidado a lo largo de las marcas realizadas.

Si está acolchando una pieza grande, cosa desde el centro del tejido hasta el borde exterior y guíe el tejido con las dos manos.

Plaque à aiguille:

Universelle (A)

Couper la passementerie à la longueur désirée.

La placer sur l’endroit du tissu et l’eingler à sa place.

Placer l’ouvrage sous le pied presseur de façon telle que les points tombent sur les bords de la passementerie conformément au dessin.

Une fois des deux rives de la passementerie cousues, retourner le tissu sur l’envers puis le couper sur les deux cõtés au ras des lignes de couture.

53

Page 38
Image 38
Singer HD-110 manual Darning, Quilting, Zurcido, Acolchado, Point d’ourlet élastique

HD-110 specifications

The Singer HD-110 is a versatile and robust sewing machine designed to meet the needs of both beginners and experienced sewists alike. This machine is part of Singer's Heavy Duty collection, known for its durability and performance under a variety of sewing conditions. With a mix of traditional and modern features, the HD-110 is an ideal choice for those looking to tackle various sewing projects, from basic mending to more complex garments.

One of the standout features of the Singer HD-110 is its powerful motor. This machine boasts a high-speed capability, allowing users to sew at speeds up to 1,100 stitches per minute. This efficiency is particularly beneficial for those who need to complete projects quickly without sacrificing quality. The heavy-duty metal frame of the HD-110 ensures stability and strength, reducing vibrations during operation and providing a secure sewing experience.

The HD-110 comes equipped with a selection of built-in stitch options to accommodate various sewing techniques and styles. Users can choose from 11 different stitches, including essential straight and zigzag stitches, as well as decorative stitches. The easy-to-use stitch selector dial makes it easy to switch between stitches, making the sewing process smooth and enjoyable.

Another notable feature of the Singer HD-110 is its automatic needle threader. This technology simplifies the threading process, saving time and reducing eye strain, particularly for those who may struggle with manual threading. Additionally, the top drop-in bobbin system is designed for ease of use, allowing users to monitor thread levels easily and change bobbins without hassle.

The Singer HD-110 also offers adjustable stitch length and width, giving users greater control over their sewing projects. This customization is essential for achieving the desired results, whether sewing seams, hems, or decorative elements. The machine’s presser foot is another highlight, accommodating various fabric types, including thicker layers such as denim or canvas, making it suitable for diverse sewing tasks.

In terms of usability, the Singer HD-110 features a clear LED workspace, ensuring optimal visibility while sewing. This is especially useful for intricate projects requiring close attention to detail. The included accessories, such as different presser feet, a seam ripper, and a dust cover, further enhance the user experience.

Overall, the Singer HD-110 is a reliable, efficient, and user-friendly sewing machine, perfect for tackling a wide range of projects. Its blend of power, versatility, and innovative features makes it an excellent choice for anyone looking to enhance their sewing skills and broaden their creative horizons. Whether you are a novice or an experienced sewist, the HD-110 promises to deliver exceptional results with each project.