Multi-stitch zig-zag

(only for machines with 5, 8 and 10 stitches)

Mending, overcasting, joining or reinforcing can all be done using the Multi-Stitch Zig-Zag.

Recommended Settings

Stitch Selection: Multi-stitch zig-zag (D) Needle Position:

Stitch Width:


1 2

3

4

5

Stitch Length:

1-2


Foot:

Special Purpose (J)

Needle Plate:

General Purpose (A)

Mending a tear

Trim ragged edges of tear.

Cut a lining for reinforcement.

Bring the edges of tear together and baste lining to wrong side of fabric.

Place tear, right side up, under foot.

If necessary, sew over tear again.

Trim away lining close to stitching.

Bar tacks

Strong multi-stitch bar tacks are effective for tacking belt loops on heavy fabrics such as denim.

Recommended Settings

Stitch Selection: Multi-stitch zig-zag (D)

Needle Position:

Stitch Width:


1 2

3

4

5

Stitch Length:

1-2


Foot:

Special Purpose (J)

Needle Plate:

General Purpose (A)

Mark start and finish lines of belt loop on fabric.

Place one end of belt loop, wrong side up, on beggining mark on fabric and straight stitch in place.

Trim raw end close to stitching and fold belt loop over, right side up.

Stitch a bar tack about 1/8” (3mm) from the fold, as shown.

Fold loose end of belt loop under a press it in place on finishing line.

Stitch second bar tack about 1/8” (3mm) from the fold.

Multipuntada zig-zag

(solamente para máquinas con 5, 8 y 10 modelos de puntos)

Todos los remiendos, sobrepuestos, uniones o refuerzos pueden hacerse utilizando la multipuntada zig-zag.

Posiciones recomendadas

Selección punto: Multipuntada (D)

Posición aguja:

Anchura punto:

1 2

3

4

5

Longitud punto: 1-2

Prensatelas: Uso especial (J)

Plancha aguja: Uso General (A)

Remiendo de un desgarro

Recorte los bordes desiguales del roto.

Corte un trozo de lino pra refuerzo.

Una los bordes del desgarro e hilvane el lino en el revés del tejido.

Coloque el desgarro, con el lado del derecho, hacia arriba, debajo del prensatelas.

Cosa sobre la línea de la rotura, acortando la longitud del punto a cada lado para refuerzo.

Corte los extremos del hilo junto al tejido.

Si fuese necesario, cosa de nuevo sobre el desgarro.

Recorte el lino junto a los puntos.

Presillas

Las presillas con la fuerza de la multipuntada son muy efectivas para rematar las trabillas para cinturones en tejidos pesados como el denim.

Posiciones recomendadas

Selección punto: Multipuntada (D)

Posición aguja:

Anchura punto:

1 2

3

4

5

Longitud punto: 1-2

Prensatelas: Uso especial (J)

Plancha aguja: Uso General (A)

Marque las líneas de comienzo y terminación de la trabilla en el tejido.

Coloque un extremo de la trabilla del revés sobre el tejido, en la marca de comienzo y cosa en recto.

Corte el extremo sobrante junto a las puntadas y doble la trabilla con el derecho hacia arriba.

Cosa una presilla a unos 3mm del doblez, como se muestra.

Doble el extremo de siónelo en el lugar de la línea de terminación.

Cosa la Segunda presilla a unos 3mm del doblez.

1

2

Pose d'une fermeture glissière

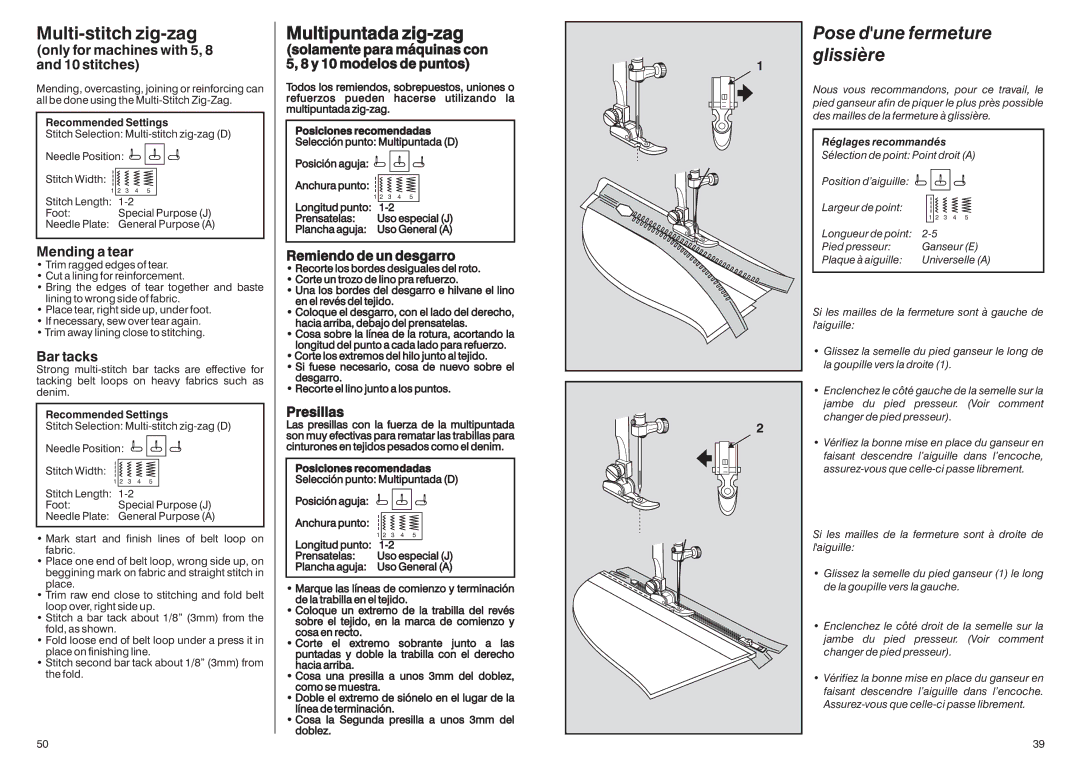
Nous vous recommandons, pour ce travail, le pied ganseur afin de piquer le plus près possible des mailles de la fermeture à glissière.

Réglages recommandés

Sélection de point: Point droit (A)

Position d’aiguille:

Largeur de point:

1 2

3

4

5


Longueur de point:

2-5


Pied presseur:

Ganseur (E)

Plaque à aiguille:

Universelle (A)

Si les mailles de la fermeture sont à gauche de l'aiguille:

Glissez la semelle du pied ganseur le long de la goupille vers la droite (1).

Enclenchez le côté gauche de la semelle sur la jambe du pied presseur. (Voir comment changer de pied presseur).

Vérifiez la bonne mise en place du ganseur en faisant descendre l’aiguille dans l’encoche, assurez-vous que celle-ci passe librement.

Si les mailles de la fermeture sont à droite de l'aiguille:

Glissez la semelle du pied ganseur (1) le long de la goupille vers la gauche.

Enclenchez le côté droit de la semelle sur la jambe du pied presseur. (Voir comment changer de pied presseur).

Vérifiez la bonne mise en place du ganseur en faisant descendre l’aiguille dans l’encoche. Assurez-vous que celle-ci passe librement.

50

39

Page 41
Image 41
Singer HD-110 manual Multi-stitch zig-zag, Multipuntada zig-zag, Pose dune fermeture glissière

HD-110 specifications

The Singer HD-110 is a versatile and robust sewing machine designed to meet the needs of both beginners and experienced sewists alike. This machine is part of Singer's Heavy Duty collection, known for its durability and performance under a variety of sewing conditions. With a mix of traditional and modern features, the HD-110 is an ideal choice for those looking to tackle various sewing projects, from basic mending to more complex garments.

One of the standout features of the Singer HD-110 is its powerful motor. This machine boasts a high-speed capability, allowing users to sew at speeds up to 1,100 stitches per minute. This efficiency is particularly beneficial for those who need to complete projects quickly without sacrificing quality. The heavy-duty metal frame of the HD-110 ensures stability and strength, reducing vibrations during operation and providing a secure sewing experience.

The HD-110 comes equipped with a selection of built-in stitch options to accommodate various sewing techniques and styles. Users can choose from 11 different stitches, including essential straight and zigzag stitches, as well as decorative stitches. The easy-to-use stitch selector dial makes it easy to switch between stitches, making the sewing process smooth and enjoyable.

Another notable feature of the Singer HD-110 is its automatic needle threader. This technology simplifies the threading process, saving time and reducing eye strain, particularly for those who may struggle with manual threading. Additionally, the top drop-in bobbin system is designed for ease of use, allowing users to monitor thread levels easily and change bobbins without hassle.

The Singer HD-110 also offers adjustable stitch length and width, giving users greater control over their sewing projects. This customization is essential for achieving the desired results, whether sewing seams, hems, or decorative elements. The machine’s presser foot is another highlight, accommodating various fabric types, including thicker layers such as denim or canvas, making it suitable for diverse sewing tasks.

In terms of usability, the Singer HD-110 features a clear LED workspace, ensuring optimal visibility while sewing. This is especially useful for intricate projects requiring close attention to detail. The included accessories, such as different presser feet, a seam ripper, and a dust cover, further enhance the user experience.

Overall, the Singer HD-110 is a reliable, efficient, and user-friendly sewing machine, perfect for tackling a wide range of projects. Its blend of power, versatility, and innovative features makes it an excellent choice for anyone looking to enhance their sewing skills and broaden their creative horizons. Whether you are a novice or an experienced sewist, the HD-110 promises to deliver exceptional results with each project.