6.Set the [Interval] of the rule. This is the time in between the outgoing and incoming data traffic.
NOTE: If you set this value too low, the incoming ports will be closed before the return data arrives at the firewall and the connection will be broken and the application will not work.
7.The last 2 options are for Advanced Users, most users can leave this at the default settings:
•IR Replacement – Default Setting: Disable address replacement
•Allow sessions initiated from/to the 3rd host – Default Setting: unchecked
8.When your configuration is complete, click the [Apply] button to save your changes and return to the main Special Application page.
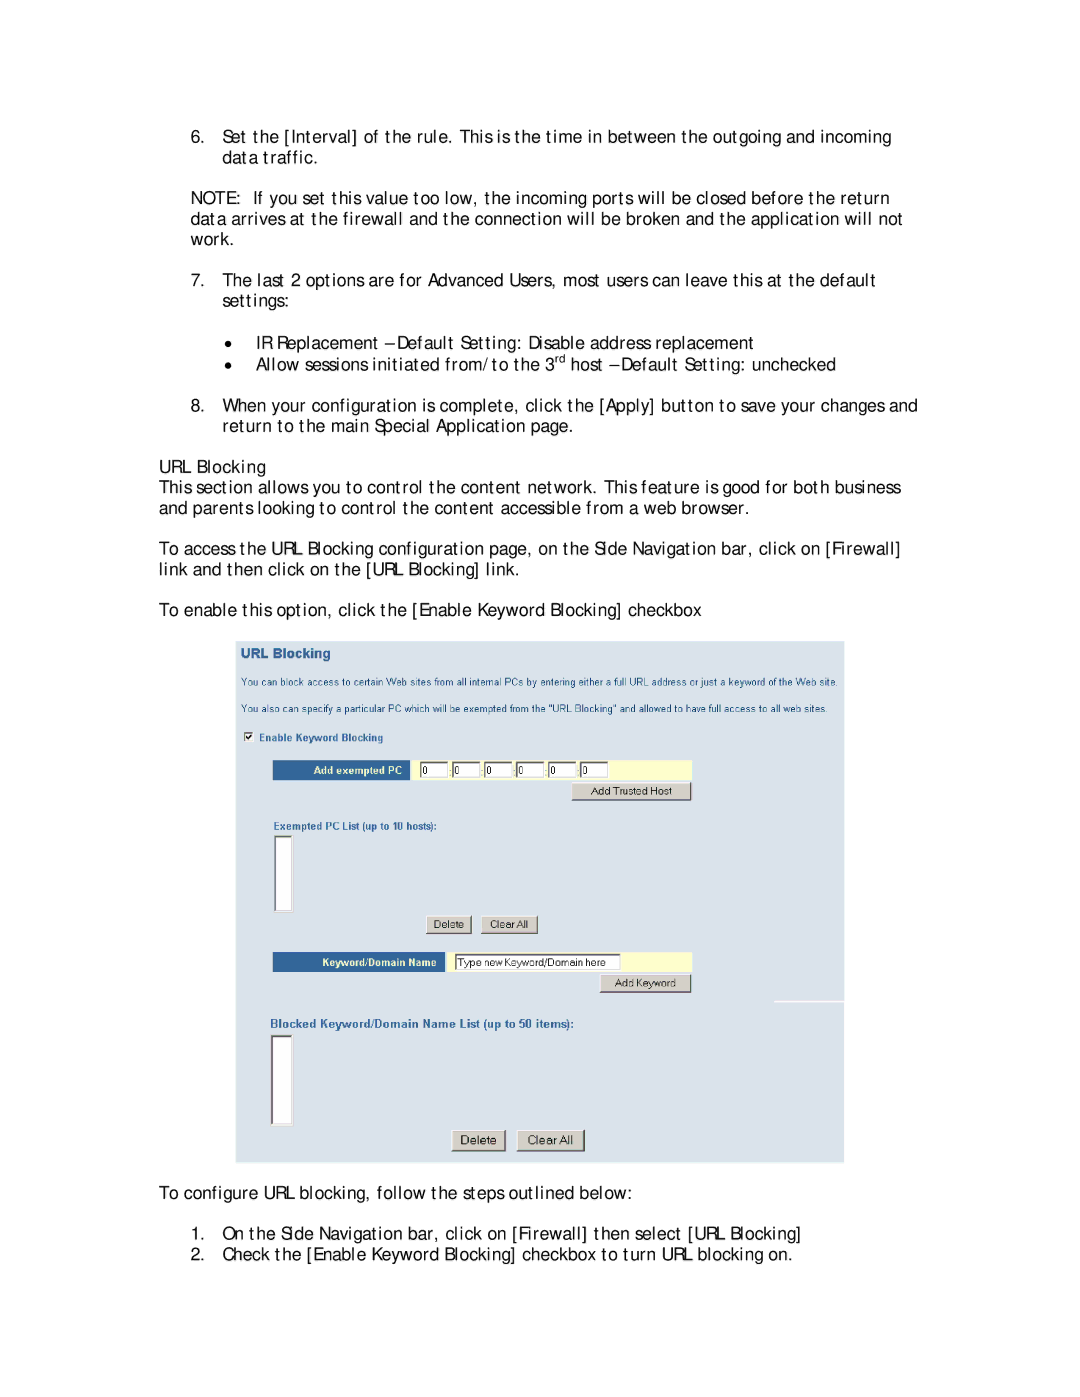
URL Blocking
This section allows you to control the content network. This feature is good for both business and parents looking to control the content accessible from a web browser.
To access the URL Blocking configuration page, on the Side Navigation bar, click on [Firewall] link and then click on the [URL Blocking] link.
To enable this option, click the [Enable Keyword Blocking] checkbox
To configure URL blocking, follow the steps outlined below:
1.On the Side Navigation bar, click on [Firewall] then select [URL Blocking]
2.Check the [Enable Keyword Blocking] checkbox to turn URL blocking on.