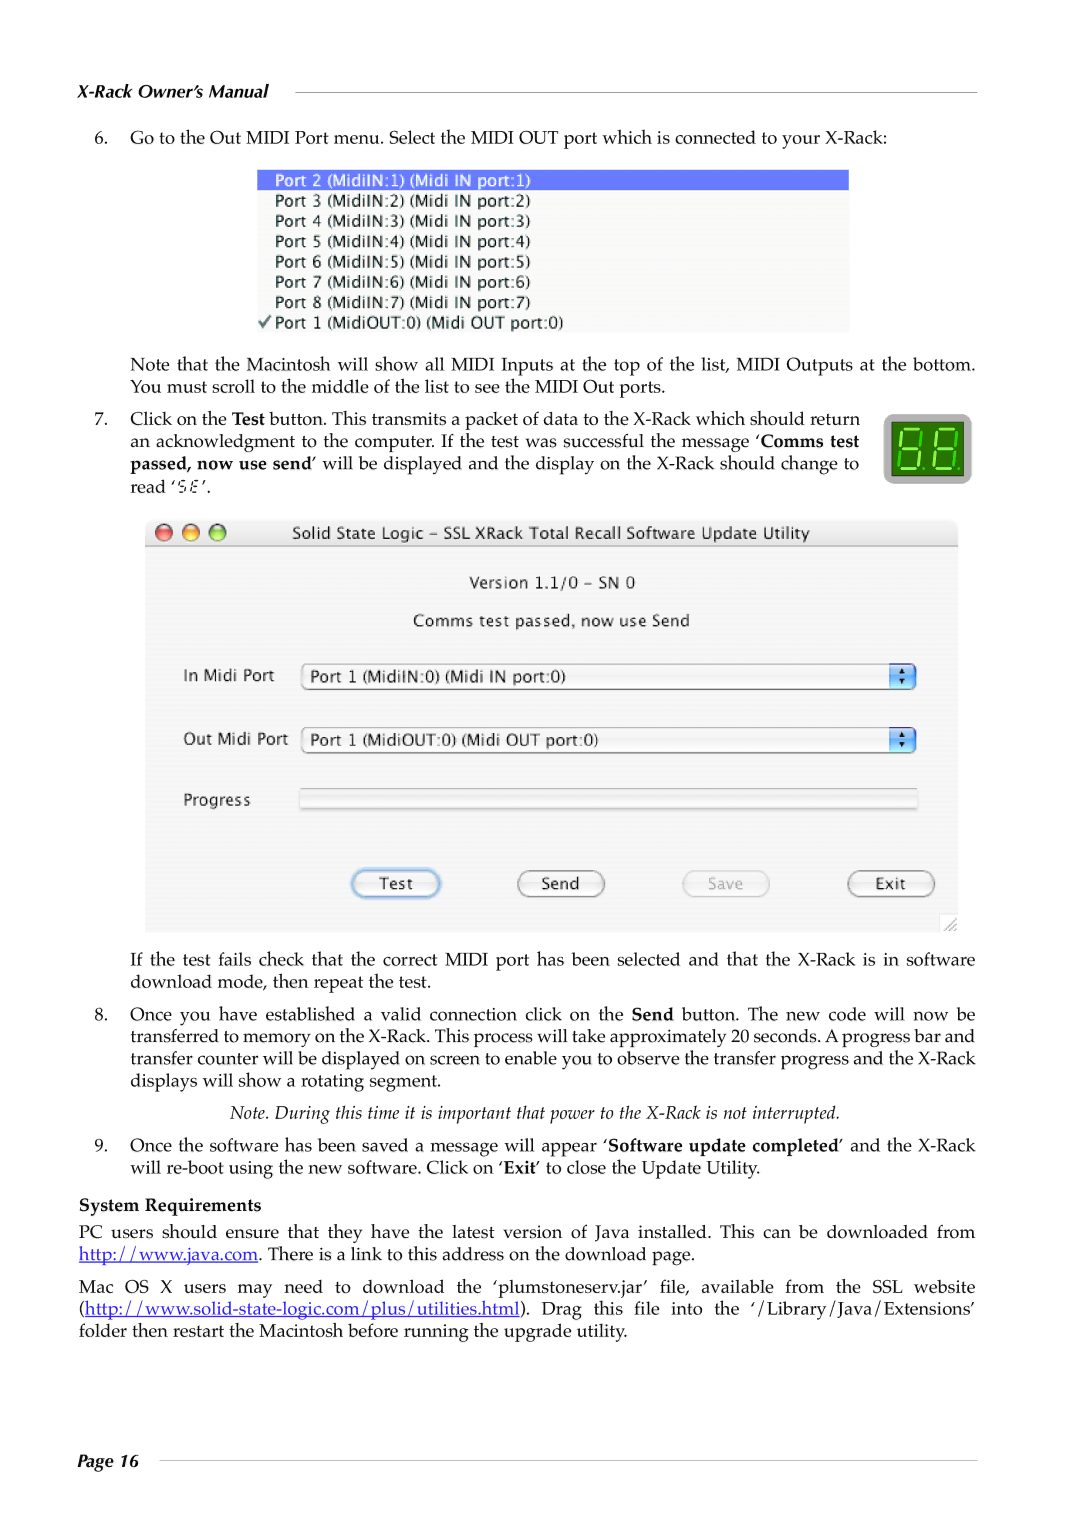
6.Go to the Out MIDI Port menu. Select the MIDI OUT port which is connected to your
Note that the Macintosh will s how all MI DI Inputs at the top of the list, MIDI Outputs at the bottom. You must scroll to the middle of the list to see the MIDI Out ports.
7.Click on the Test button. This transmits a packet of data to the
an acknowledgment to t he computer. If the test was successful the message ‘ Comms test ![]() passed, now use send’ will be displayed and the display on the
passed, now use send’ will be displayed and the display on the
read ‘se’.![]()
| If |
|
|
|
| t he t est fai ls ch eck that t he co rrect MID I po rt h as been selec ted and that | the | ||
8. | download mode, then repeat the test. |
|
| |
Once y ou have es tablished a val id c onnection c lick o n the Send button. The new code will now be | ||||
| transferred to memory on the | |||
| transfer counter will be displayed on screen to enable you to observe the transfer progress and the | |||
| displays will show a rotating segment. |
|
| |
9. |
| Note. During this time it is important that power to the | ||
Once the software has b een saved a messag e will appear ‘Software update completed’ and the | ||||
| will |
|
| |
System Requirements | an be downloaded from | |||
PC users s hould ensur e t hat t hey h ave the latest ver sion of Java installed. This c | ||||
http://www.java.com. There is a link to this address on the download page. |
|
| ||
Mac OS X us ers m ay n eed to dow nload the ‘pl umstoneserv.jar’ file, avail able fro m t he SSL we bsite
Page 16