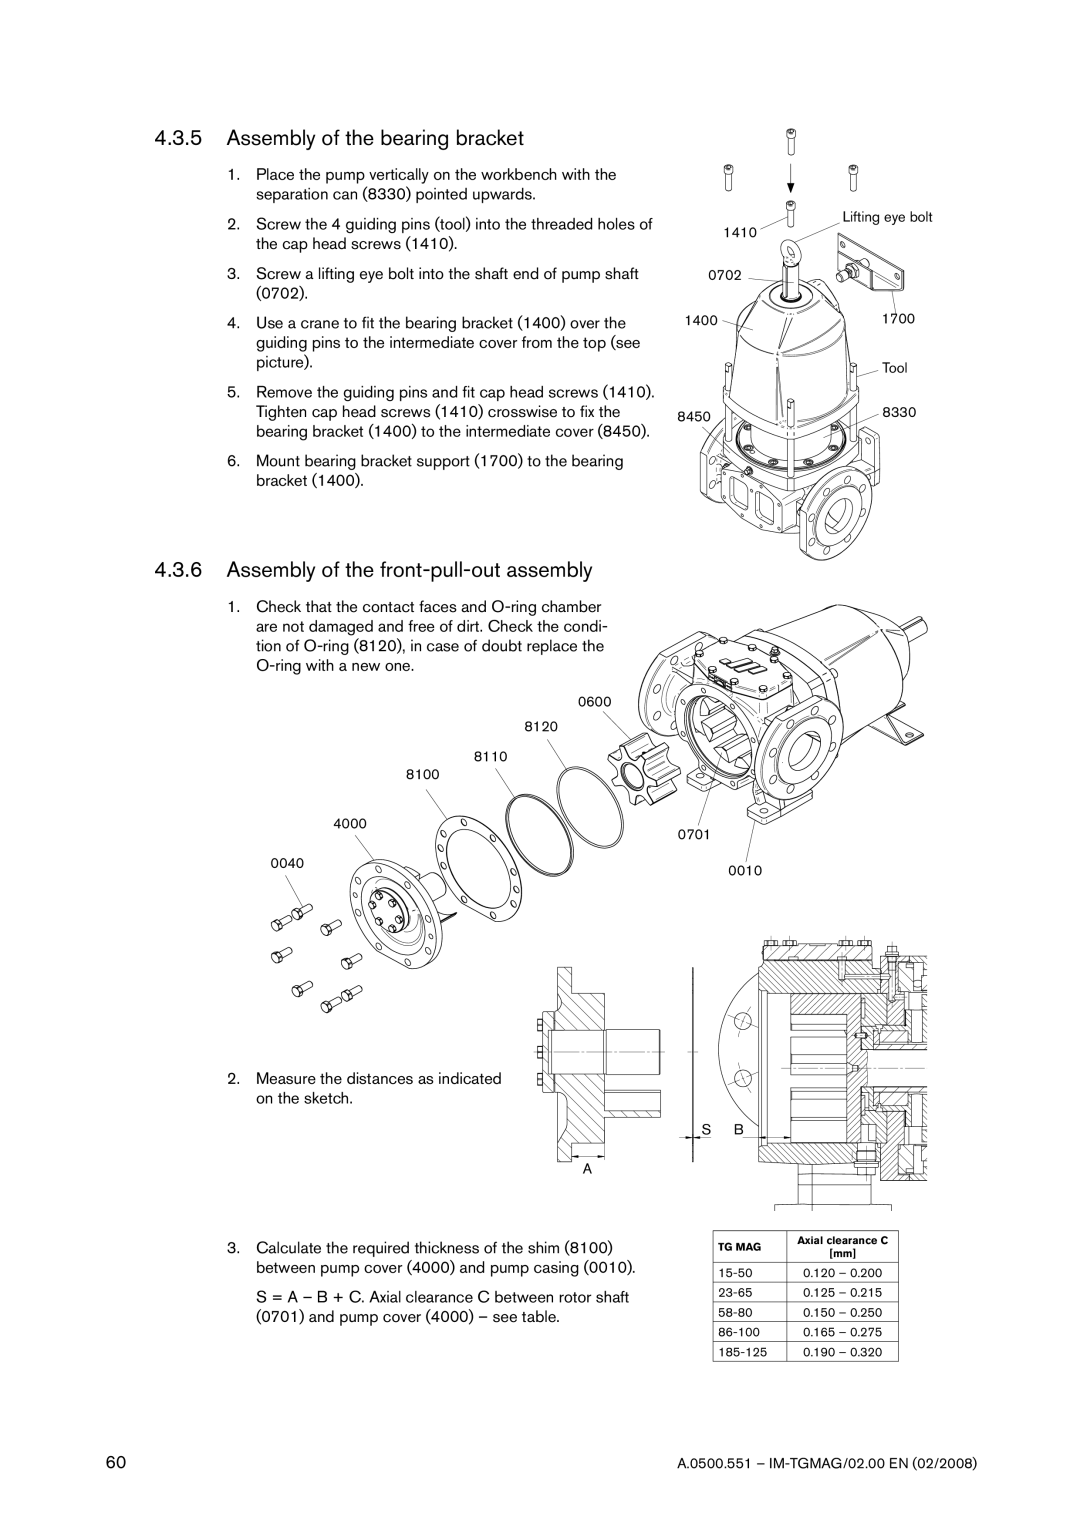
TG MAG86-100, TG MAG23-65, TG MAG58-80, TG MAG15-50, TG MAG185-125 specifications
SPX Cooling Technologies has established itself as a leader in the design and manufacturing of cooling systems, offering a wide range of products tailored to meet specific industrial and commercial needs. Among its impressive lineup, the TG MAG series stands out, featuring models such as TG MAG185-125, TG MAG23-65, TG MAG86-100, TG MAG58-80, and TG MAG15-50. Each of these models combines innovative technology with robust performance characteristics, making them ideal choices for various applications.The TG MAG185-125 model is designed for high-capacity cooling requirements, offering exceptional thermal performance while maintaining energy efficiency. Its advanced fan design minimizes noise levels, making it suitable for installations in noise-sensitive areas. Furthermore, the unit benefits from a corrosion-resistant construction, ensuring longevity and reliable operation in diverse environments.
For smaller applications, the TG MAG23-65 provides a compact solution without compromising on performance. This unit features a space-efficient design and utilizes high-efficiency fans that optimize airflow, thereby enhancing overall cooling efficiency. The integrated digital controls allow for precise temperature management, making it easy for operators to monitor and adjust settings as needed.
The TG MAG86-100 model serves as an ideal middle-ground solution, balancing capacity and efficiency. It incorporates state-of-the-art technology, such as variable speed drives, which adjust the fan speed based on cooling demand, resulting in significant energy savings. The design also promotes easy maintenance, with accessible components that facilitate regular servicing and inspections.
For medium-scale needs, the TG MAG58-80 combines durability with performance, featuring a robust frame that can withstand harsh operational conditions. Its efficient heat exchange technology maximizes cooling output while minimizing energy consumption. Moreover, the enhanced airflow system ensures uniform cooling across the entire unit.
Lastly, the TG MAG15-50 is perfect for smaller spaces where cooling requirements are less demanding. Despite its size, this model is equipped with cutting-edge features such as a compact structure and highly efficient cooling mechanisms to ensure effective performance. The easy installation process and low maintenance needs further enhance its appeal.
Overall, the TG MAG series provides a range of innovative cooling solutions tailored to meet diverse industrial requirements, characterized by efficiency, durability, and advanced technology, ensuring optimal performance across all operating conditions.

