5 -4-3 CONNECTING ROD
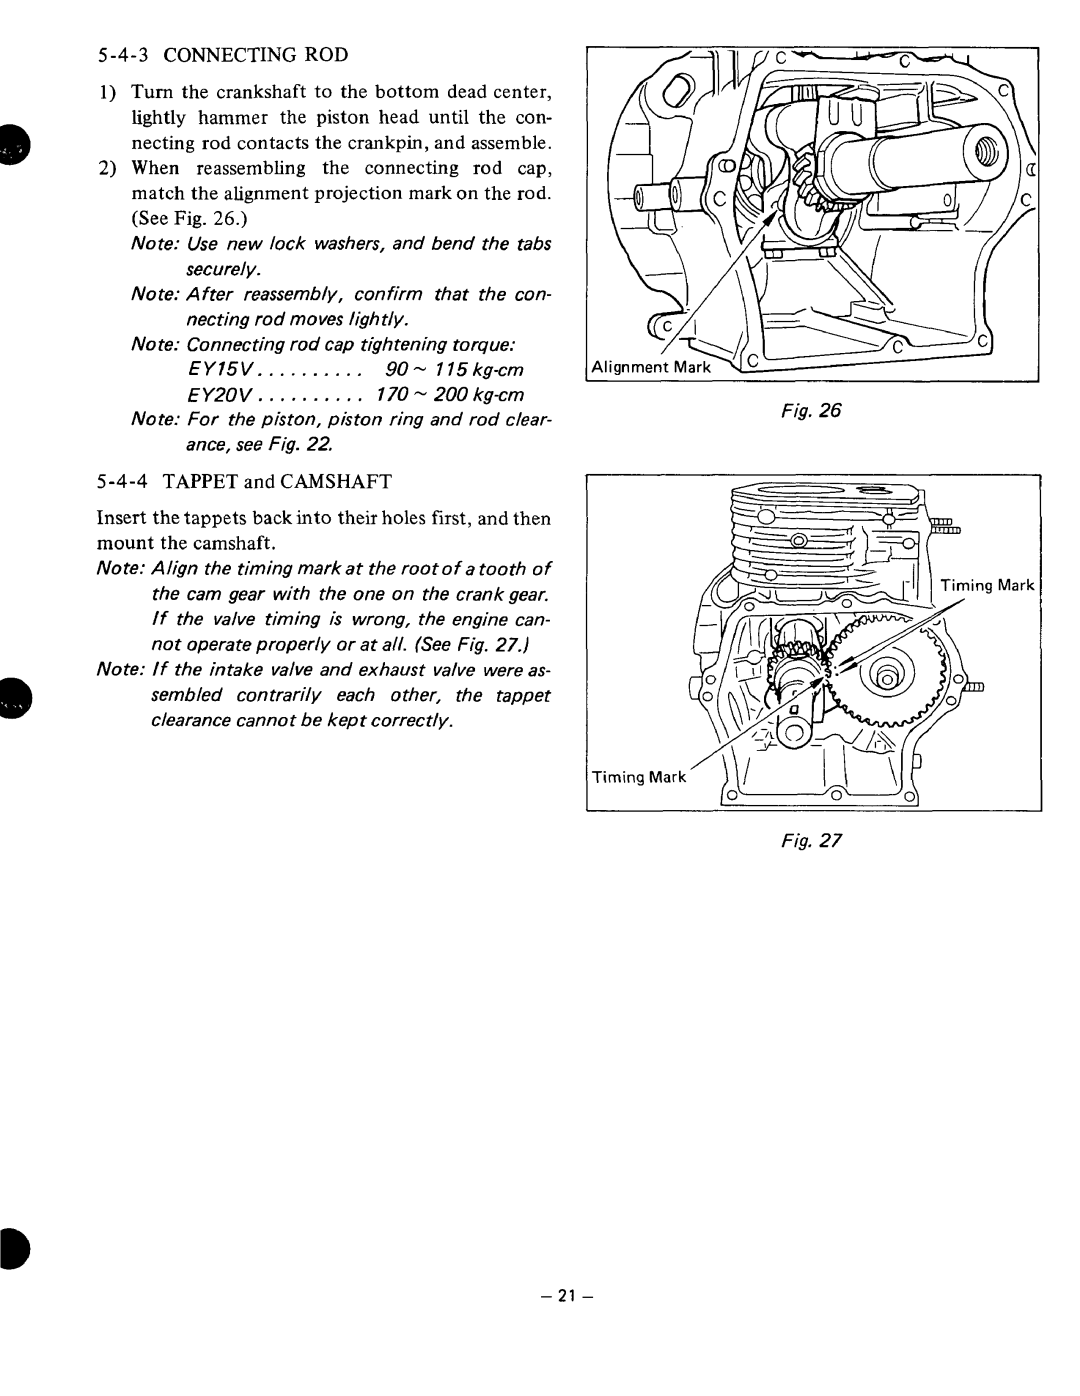
1) Turn thecrankshaft to the bottom deadcenter, lightlyhammer thepistonhead until the con- necting rod contacts the crankpin, and assemble.
2) When reassembling theconnectingrodcap,
match the alignment projection markon the rod. (See Fig. 26.)
Note: Use new lock washers, and bend the tabs |
| ||
securely. |
|
|
|
Note: After reassembly, confirmthatthe con- |
| ||
necting rod moves lightly. |
|
| |
Note: Connecting rod cap tightening torque: |
| ||
E Y I S V | 90 | - 115 | 1 |
E Y20V | 170 | - 200 |
|
Note: For the piston, piston ring and rod clear- ance, see Fig. 22.
5 - 4 - 4 TAPPET and CAMSHAFT
Insert the tappetsback into their holes first, and then mount the camshaft.
Note: Align the timing markat the rootofatooth of the cam gear with the one on the crank gear. lf the valve timing is wrong, the enginecan- not operate properly or at all. (See Fig. 27.)
Note: If the intake valve and exhaust valve were as-
sembled contrarily each other,the tappet clearance cannot bekept correctly.
Timing
1
Fig. 26
Mark
I
Fig. 27
- 21 -
