Chapter 2: Installation
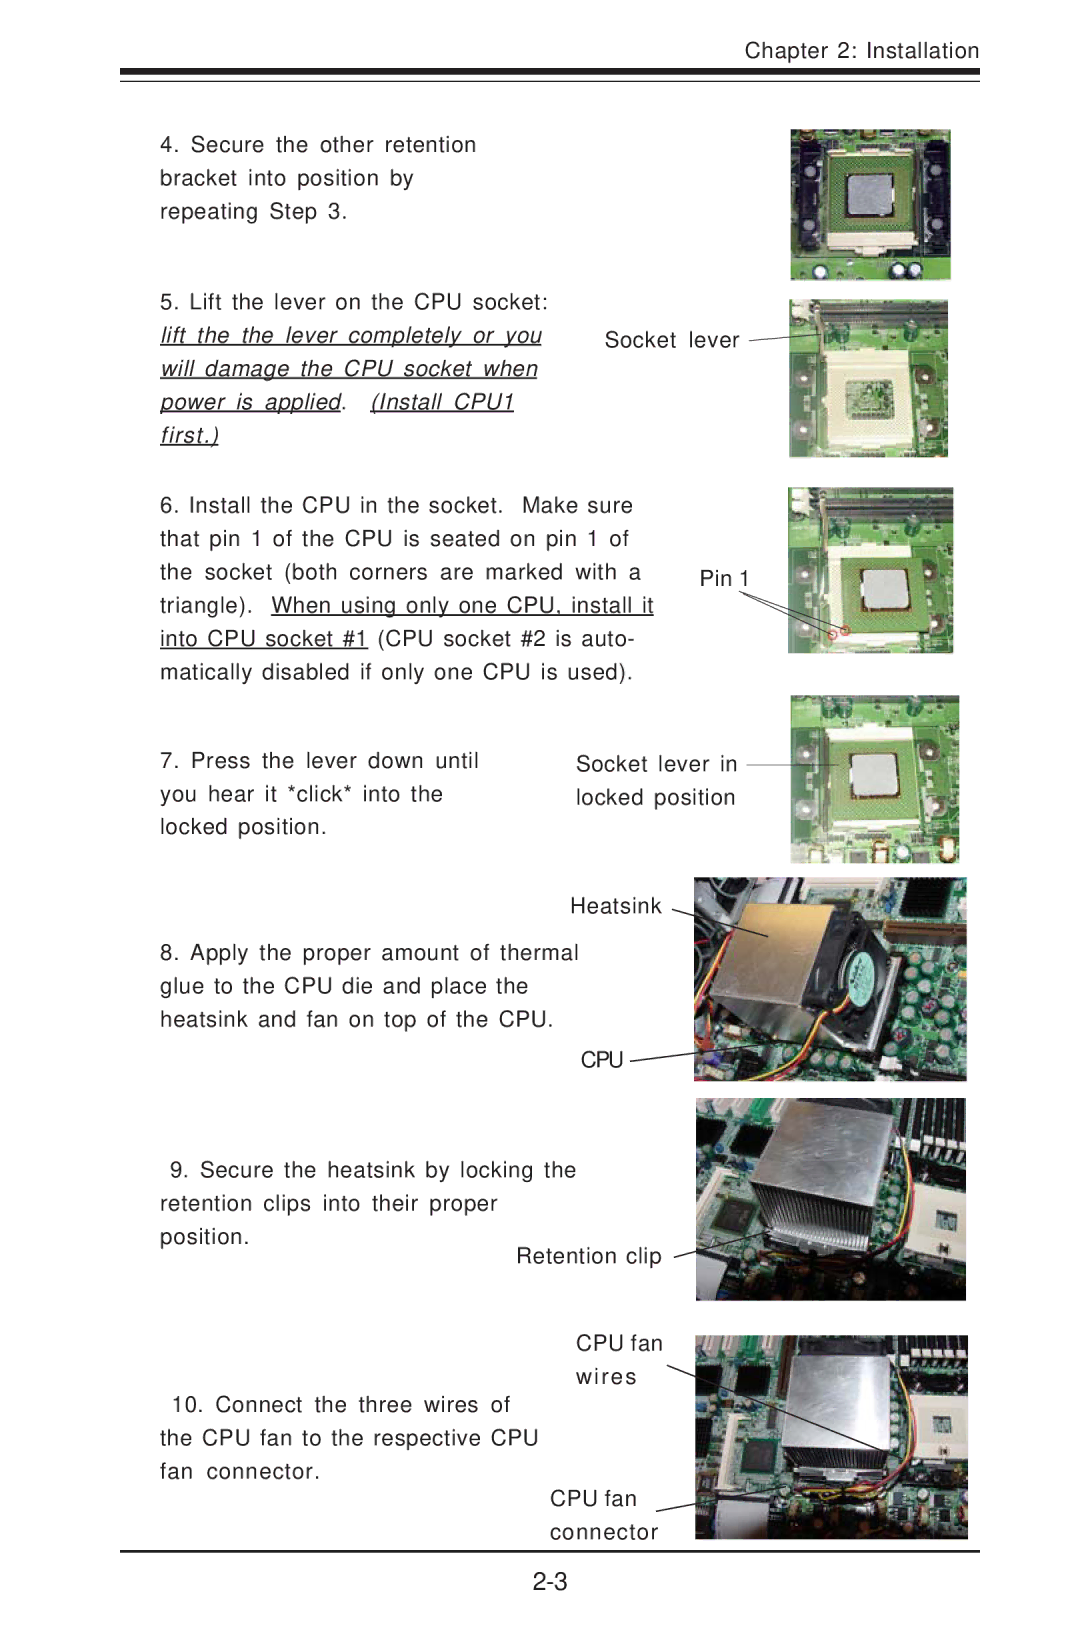
4.Secure the other retention bracket into position by repeating Step 3.
5.Lift the lever on the CPU socket:
lift the the lever completely or you | Socket | lever |
will damage the CPU socket when |
|
|
power is applied. (Install CPU1 |
|
|
first.) |
|
|
6. Install the CPU in the socket. Make sure |
| |
that pin 1 of the CPU is seated on pin 1 of |
| |
the socket (both corners are marked with a | Pin 1 | |
triangle). When using only one CPU, install it into CPU socket #1 (CPU socket #2 is auto- matically disabled if only one CPU is used).
7.Press the lever down until you hear it *click* into the locked position.
Socket lever in locked position
Heatsink
8.Apply the proper amount of thermal glue to the CPU die and place the heatsink and fan on top of the CPU.
CPU
9.Secure the heatsink by locking the retention clips into their proper
position.
10.Connect the three wires of the CPU fan to the respective CPU fan connector.