Standby
Input selector
Navigation /Enter
Menu
7.Master volume /Mute
Front Panel Controls
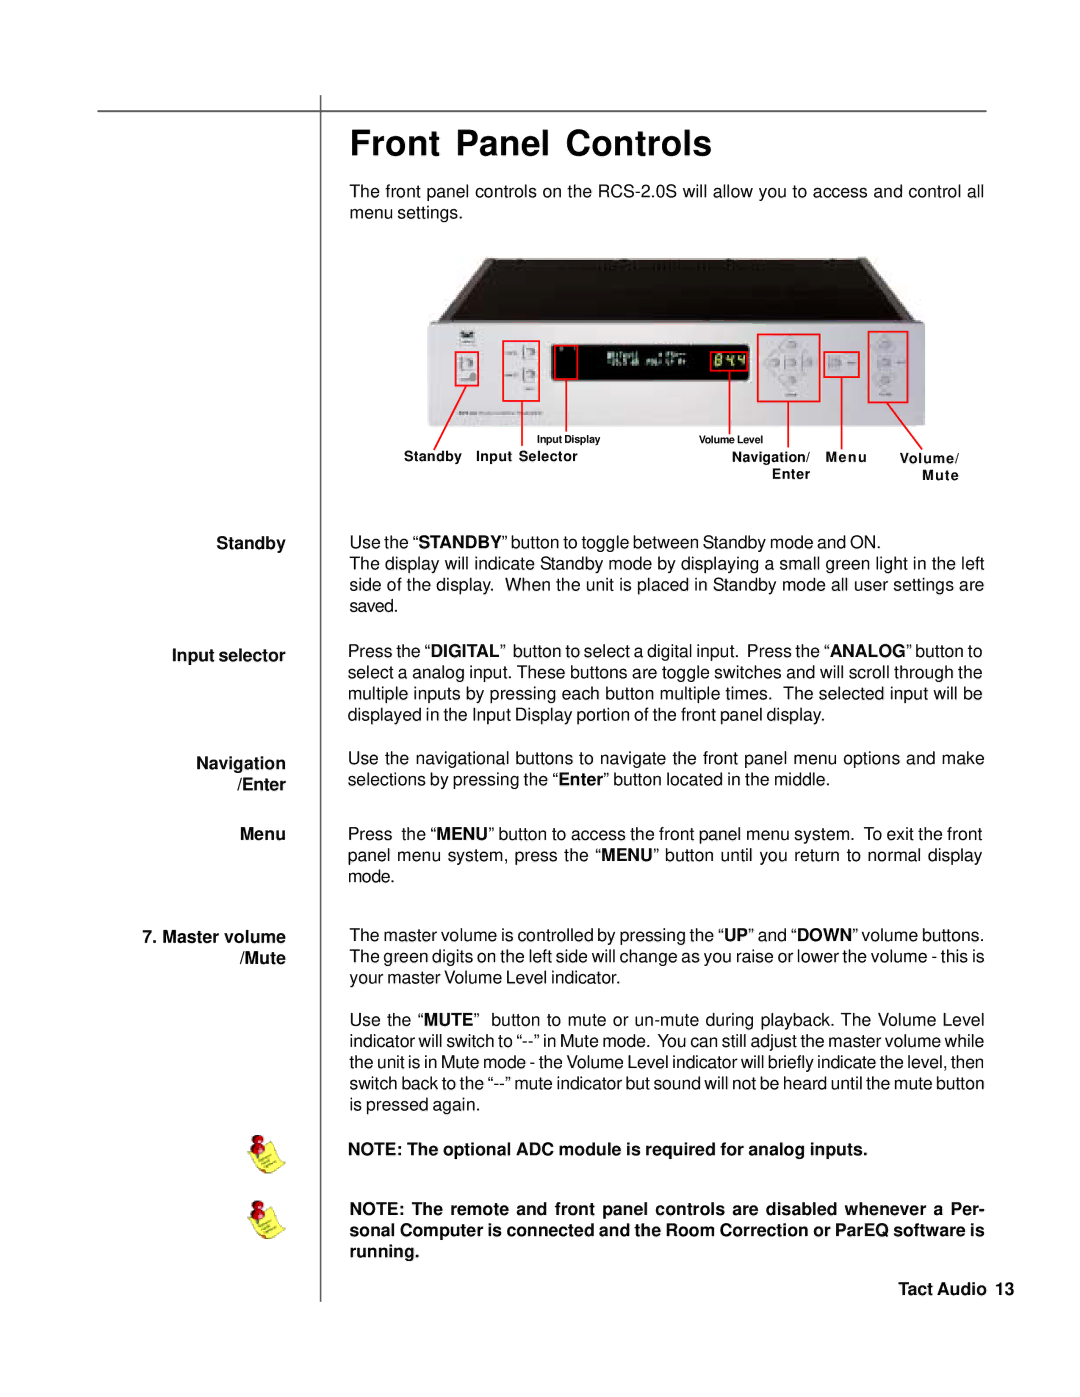
The front panel controls on the
|
|
|
|
|
|
|
|
|
|
|
|
|
|
|
|
|
|
|
|
|
|
|
|
|
|
|
|
|
|
|
|
|
|
|
|
|
|
|
|
|
|
|
|
|
|
|
|
|
|
|
|
|
|
|
|
|
|
|
|
|
|
|
|
|
|
|
|
|
|
|
|
|
|
|
|
|
|
|
|
|
|
|
|
|
|
|
|
|
|
|
|
|
| Input Display | Volume Level |
|
|
|
|
|
| ||||||
Standby Input Selector |
| Navigation/ Menu | Volume/ | ||||||||||||||
|
|
|
|
|
|
|
|
|
|
| Enter |
| Mute | ||||
Use the “STANDBY” button to toggle between Standby mode and ON.
The display will indicate Standby mode by displaying a small green light in the left side of the display. When the unit is placed in Standby mode all user settings are saved.
Press the “DIGITAL” button to select a digital input. Press the “ANALOG” button to select a analog input. These buttons are toggle switches and will scroll through the multiple inputs by pressing each button multiple times. The selected input will be displayed in the Input Display portion of the front panel display.
Use the navigational buttons to navigate the front panel menu options and make selections by pressing the “Enter” button located in the middle.
Press the “MENU” button to access the front panel menu system. To exit the front panel menu system, press the “MENU” button until you return to normal display mode.
The master volume is controlled by pressing the “UP” and “DOWN” volume buttons. The green digits on the left side will change as you raise or lower the volume - this is your master Volume Level indicator.
Use the “MUTE” button to mute or
NOTE: The optional ADC module is required for analog inputs.
NOTE: The remote and front panel controls are disabled whenever a Per- sonal Computer is connected and the Room Correction or ParEQ software is running.
