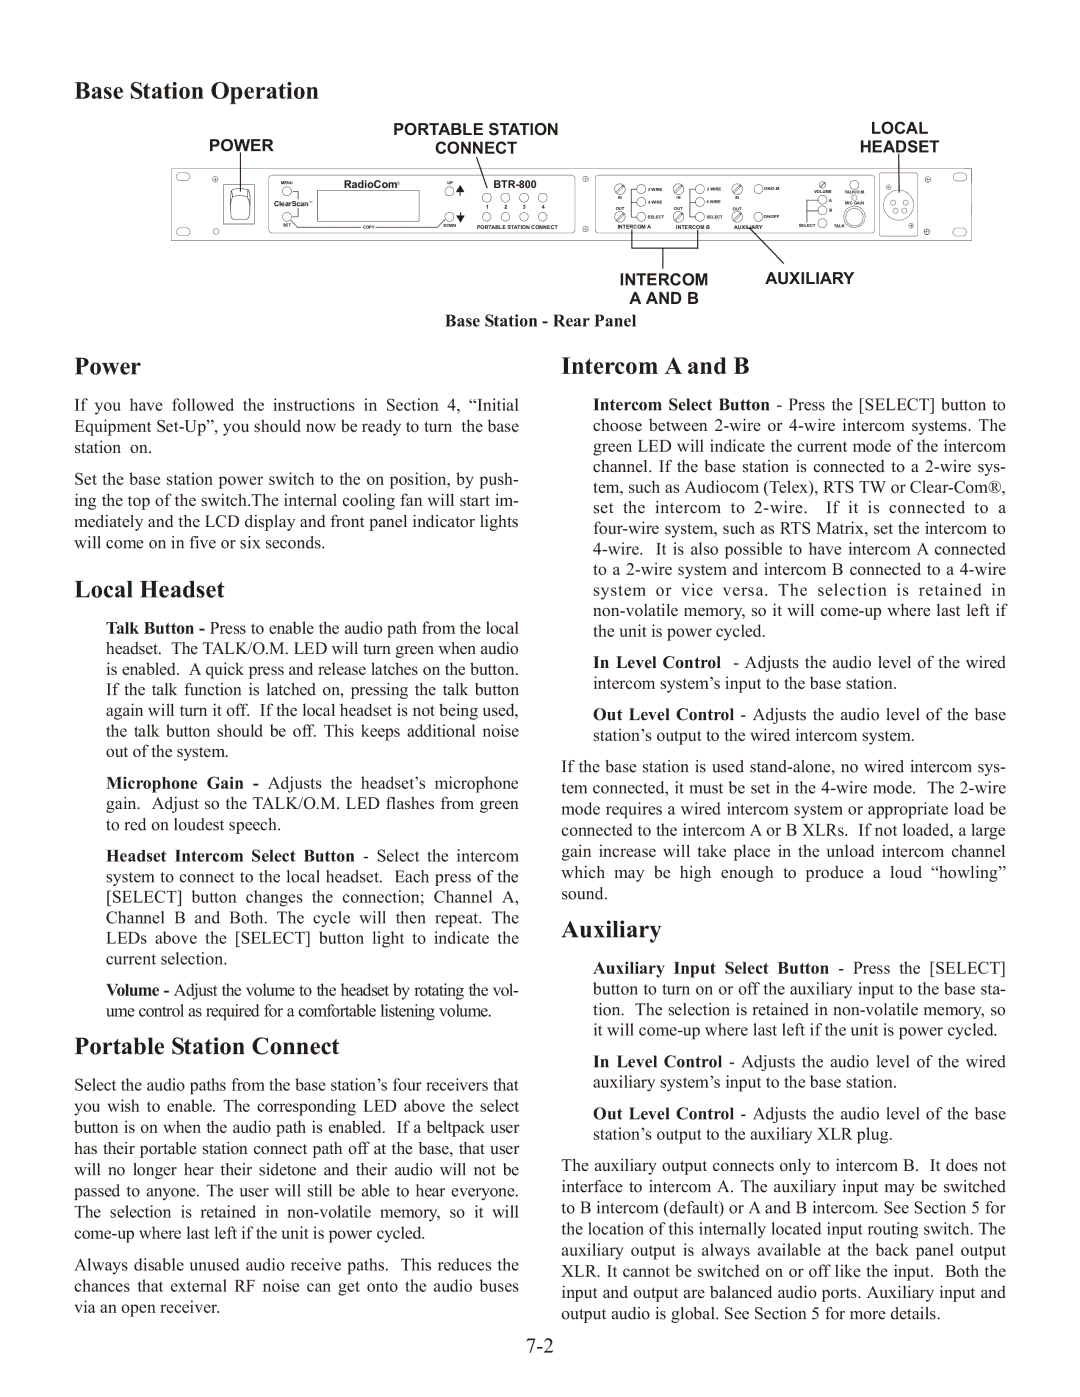
Base Station Operation
POWER
MENU
ClearScanTM
SET
PORTABLE STATION |
|
|
|
| LOCAL | ||
| CONNECT |
|
|
|
| HEADSET | |
RadioComä | UP |
| 2 WIRE | 2 WIRE |
| ON/O.M. | TALK/O.M. |
|
|
| IN | IN | IN | VOLUME | |
|
|
| A |
| |||
|
| 1 2 3 4 | 4 WIRE | 4 WIRE |
| MIC GAIN | |
|
| OUT | OUT | OUT | B |
| |
|
|
| SELECT | SELECT |
| ON/OFF |
|
COPY | DOWN | PORTABLE STATION CONNECT | INTERCOM A | INTERCOM B | AUXILIARY | SELECT | TALK |
INTERCOM AUXILIARY
A AND B
Base Station - Rear Panel
Power
If you have followed the instructions in Section 4, “Initial Equipment
Set the base station power switch to the on position, by push- ing the top of the switch.The internal cooling fan will start im- mediately and the LCD display and front panel indicator lights will come on in five or six seconds.
Local Headset
Talk Button - Press to enable the audio path from the local headset. The TALK/O.M. LED will turn green when audio is enabled. A quick press and release latches on the button. If the talk function is latched on, pressing the talk button again will turn it off. If the local headset is not being used, the talk button should be off. This keeps additional noise out of the system.
Microphone Gain - Adjusts the headset’s microphone gain. Adjust so the TALK/O.M. LED flashes from green to red on loudest speech.
Headset Intercom Select Button - Select the intercom system to connect to the local headset. Each press of the [SELECT] button changes the connection; Channel A, Channel B and Both. The cycle will then repeat. The LEDs above the [SELECT] button light to indicate the current selection.
Volume - Adjust the volume to the headset by rotating the vol- ume control as required for a comfortable listening volume.
Intercom A and B
Intercom Select Button - Press the [SELECT] button to choose between
In Level Control - Adjusts the audio level of the wired intercom system’s input to the base station.
Out Level Control - Adjusts the audio level of the base station’s output to the wired intercom system.
If the base station is used
Auxiliary
Auxiliary Input Select Button - Press the [SELECT] button to turn on or off the auxiliary input to the base sta- tion. The selection is retained in
Portable Station Connect
Select the audio paths from the base station’s four receivers that you wish to enable. The corresponding LED above the select button is on when the audio path is enabled. If a beltpack user has their portable station connect path off at the base, that user will no longer hear their sidetone and their audio will not be passed to anyone. The user will still be able to hear everyone. The selection is retained in
Always disable unused audio receive paths. This reduces the chances that external RF noise can get onto the audio buses via an open receiver.
In Level Control - Adjusts the audio level of the wired auxiliary system’s input to the base station.
Out Level Control - Adjusts the audio level of the base station’s output to the auxiliary XLR plug.
The auxiliary output connects only to intercom B. It does not interface to intercom A. The auxiliary input may be switched to B intercom (default) or A and B intercom. See Section 5 for the location of this internally located input routing switch. The auxiliary output is always available at the back panel output XLR. It cannot be switched on or off like the input. Both the input and output are balanced audio ports. Auxiliary input and output audio is global. See Section 5 for more details.