Beltpack Operation
| WIRELESS |
|
|
|
ON/OFF and TALK AROUND (WTA) | BATTERY CHECK | |||
VOLUME |
|
| ||
|
|
|
| |
CONTROL | Telex R | A | B |
|
| WTA | BAT/OM TALK | ||
|
|
| TALK | |
OFF |
|
| BUTTON | |
| SA |
|
| |
VOL |
| CHANNEL | TALK | |
|
|
| ||
STAGE ANNOUNCE AUDIO CHANNEL | ||||
(SA) | SELECT BUTTON | |||
MICROPHONE
GAIN
WIRELESS TALK AROUND (WTA)
STAGE ANNOUNCE (SA)
TR-825
SET |
| MENU |
MIC | PT | PT |
| TX | TALK |
|
|
| WTA |
| |
ON/OFF and |
|
|
|
| ON/OFF and |
VOLUME |
|
| SA |
| VOLUME |
CONTROL |
|
| OFF | VOL | CONTROL |
| VOL |
|
| BAT/OM | OFF |
|
|
|
| ||
| Telex |
| TALK | TALK |
|
| R | A | B |
| |
|
|
|
| ||
|
|
| TALK | TALK |
|
|
|
| BUTTON | BUTTON |
|
BATTERY CHECK
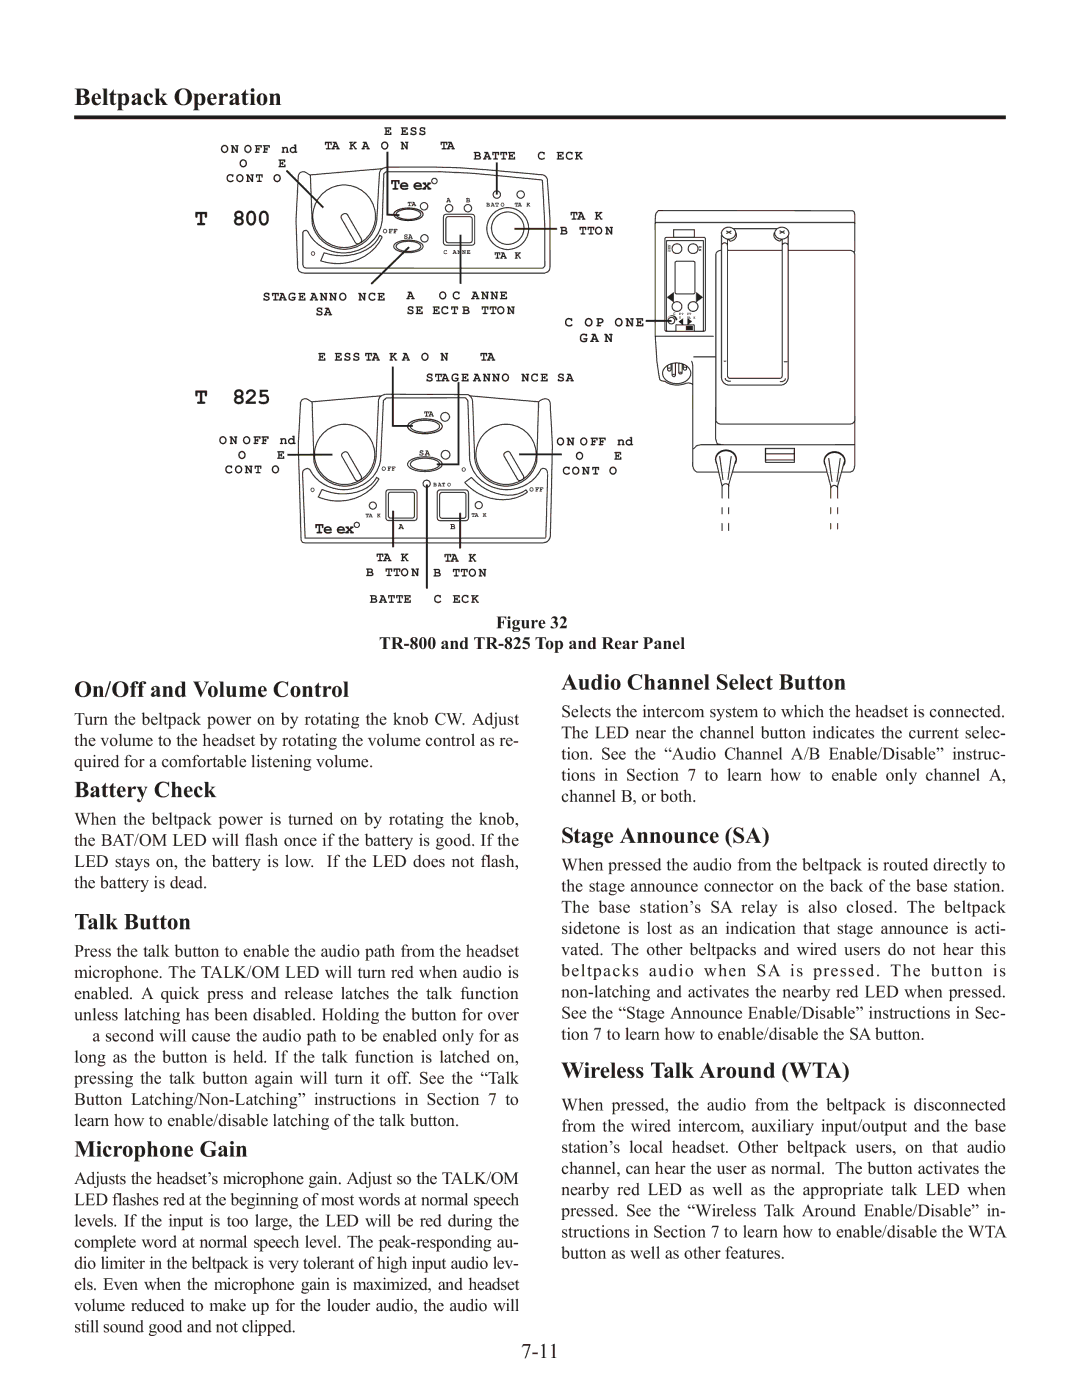
Figure 32
TR-800 and TR-825 Top and Rear Panel
On/Off and Volume Control
Turn the beltpack power on by rotating the knob CW. Adjust the volume to the headset by rotating the volume control as re- quired for a comfortable listening volume.
Battery Check
When the beltpack power is turned on by rotating the knob, the BAT/OM LED will flash once if the battery is good. If the LED stays on, the battery is low. If the LED does not flash, the battery is dead.
Talk Button
Press the talk button to enable the audio path from the headset microphone. The TALK/OM LED will turn red when audio is enabled. A quick press and release latches the talk function unless latching has been disabled. Holding the button for over
½a second will cause the audio path to be enabled only for as long as the button is held. If the talk function is latched on, pressing the talk button again will turn it off. See the “Talk Button
Microphone Gain
Adjusts the headset’s microphone gain. Adjust so the TALK/OM LED flashes red at the beginning of most words at normal speech levels. If the input is too large, the LED will be red during the complete word at normal speech level. The
Audio Channel Select Button
Selects the intercom system to which the headset is connected. The LED near the channel button indicates the current selec- tion. See the “Audio Channel A/B Enable/Disable” instruc- tions in Section 7 to learn how to enable only channel A, channel B, or both.
Stage Announce (SA)
When pressed the audio from the beltpack is routed directly to the stage announce connector on the back of the base station. The base station’s SA relay is also closed. The beltpack sidetone is lost as an indication that stage announce is acti- vated. The other beltpacks and wired users do not hear this beltpacks audio when SA is pressed. The button is
Wireless Talk Around (WTA)
When pressed, the audio from the beltpack is disconnected from the wired intercom, auxiliary input/output and the base station’s local headset. Other beltpack users, on that audio channel, can hear the user as normal. The button activates the nearby red LED as well as the appropriate talk LED when pressed. See the “Wireless Talk Around Enable/Disable” in- structions in Section 7 to learn how to enable/disable the WTA button as well as other features.