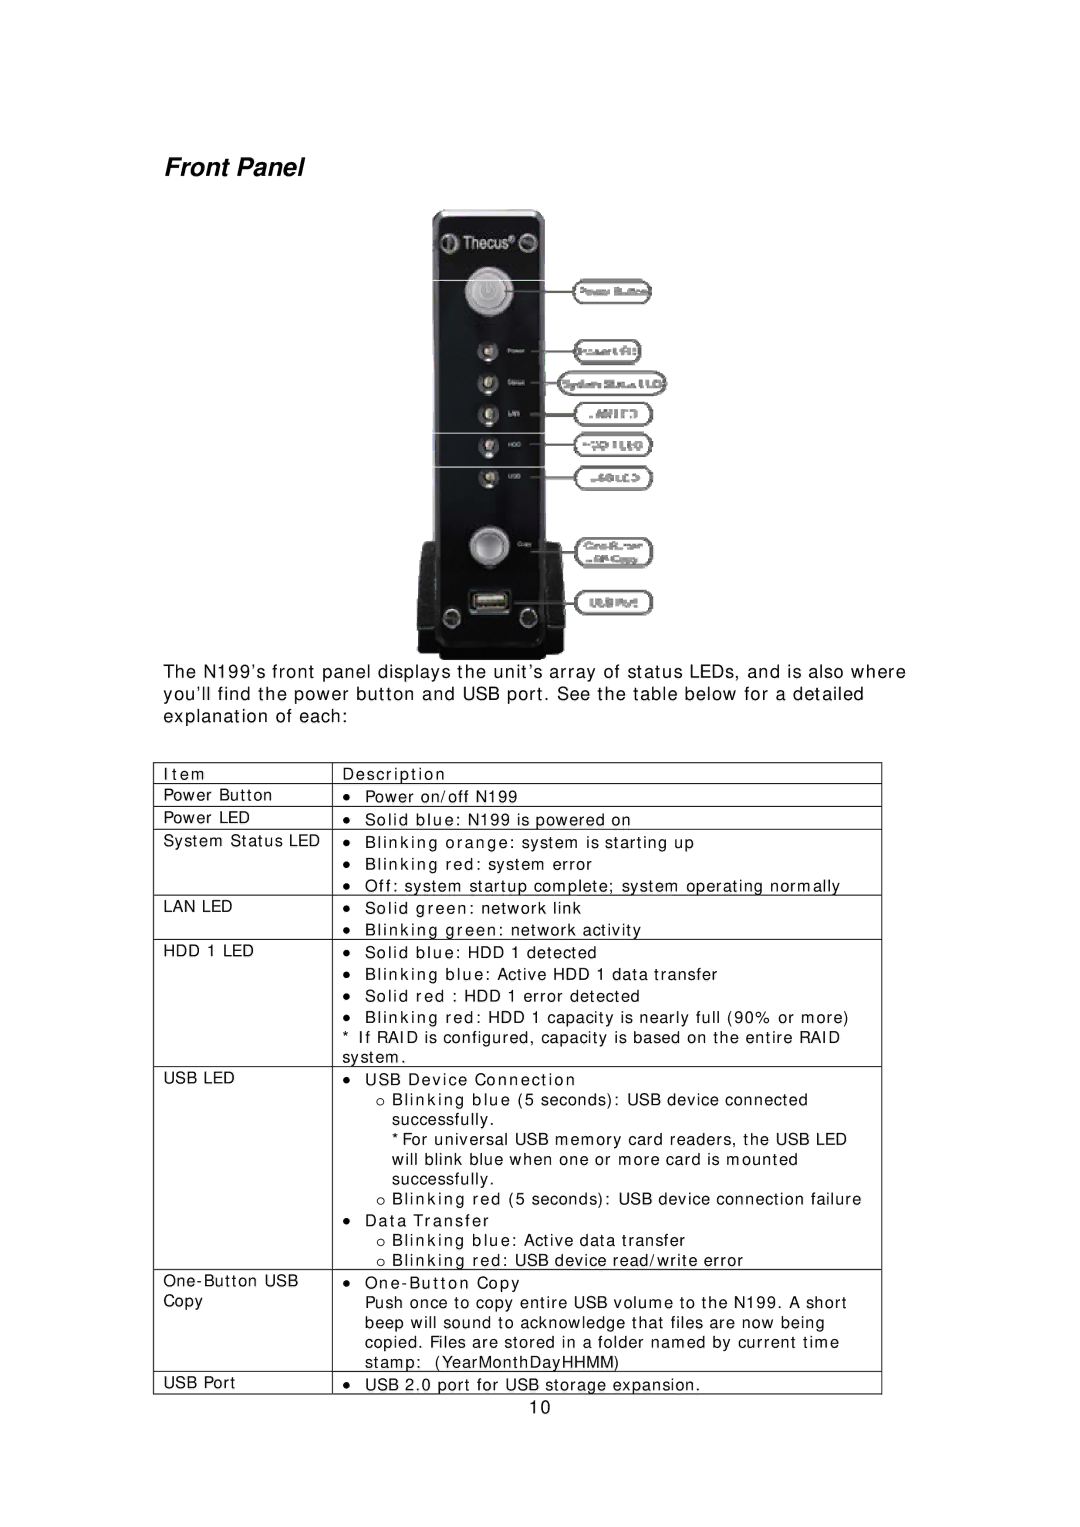
Front Panel
The N199’s front panel displays the unit’s array of status LEDs, and is also where you’ll find the power button and USB port. See the table below for a detailed explanation of each:
Item | Description | |
Power Button | • | Power on/off N199 |
Power LED | • Solid blue: N199 is powered on | |
System Status LED | • Blinking orange: system is starting up | |
| • Blinking red: system error | |
| • Off: system startup complete; system operating normally | |
LAN LED | • Solid green: network link | |
| • Blinking green: network activity | |
HDD 1 LED | • Solid blue: HDD 1 detected | |
| • Blinking blue: Active HDD 1 data transfer | |
| • Solid red : HDD 1 error detected | |
| • Blinking red: HDD 1 capacity is nearly full (90% or more) | |
| * If RAID is configured, capacity is based on the entire RAID | |
| system. | |
USB LED | • | USB Device Connection |
|
| o Blinking blue (5 seconds): USB device connected |
|
| successfully. |
|
| *For universal USB memory card readers, the USB LED |
|
| will blink blue when one or more card is mounted |
|
| successfully. |
| • | o Blinking red (5 seconds): USB device connection failure |
| Data Transfer | |
|
| o Blinking blue: Active data transfer |
|
| o Blinking red: USB device read/write error |
• |
| |
Copy |
| Push once to copy entire USB volume to the N199. A short |
|
| beep will sound to acknowledge that files are now being |
|
| copied. Files are stored in a folder named by current time |
|
| stamp: (YearMonthDayHHMM) |
USB Port | • USB 2.0 port for USB storage expansion. | |
|
| 10 |