All installations and services must be performed by qualified service personnel.
f.Open the inspection cover on the upper mounting plate above the burner.
g.Turn the disconnecting switch to “ON”.
h.Prime the pump to remove air in the oil supply line.
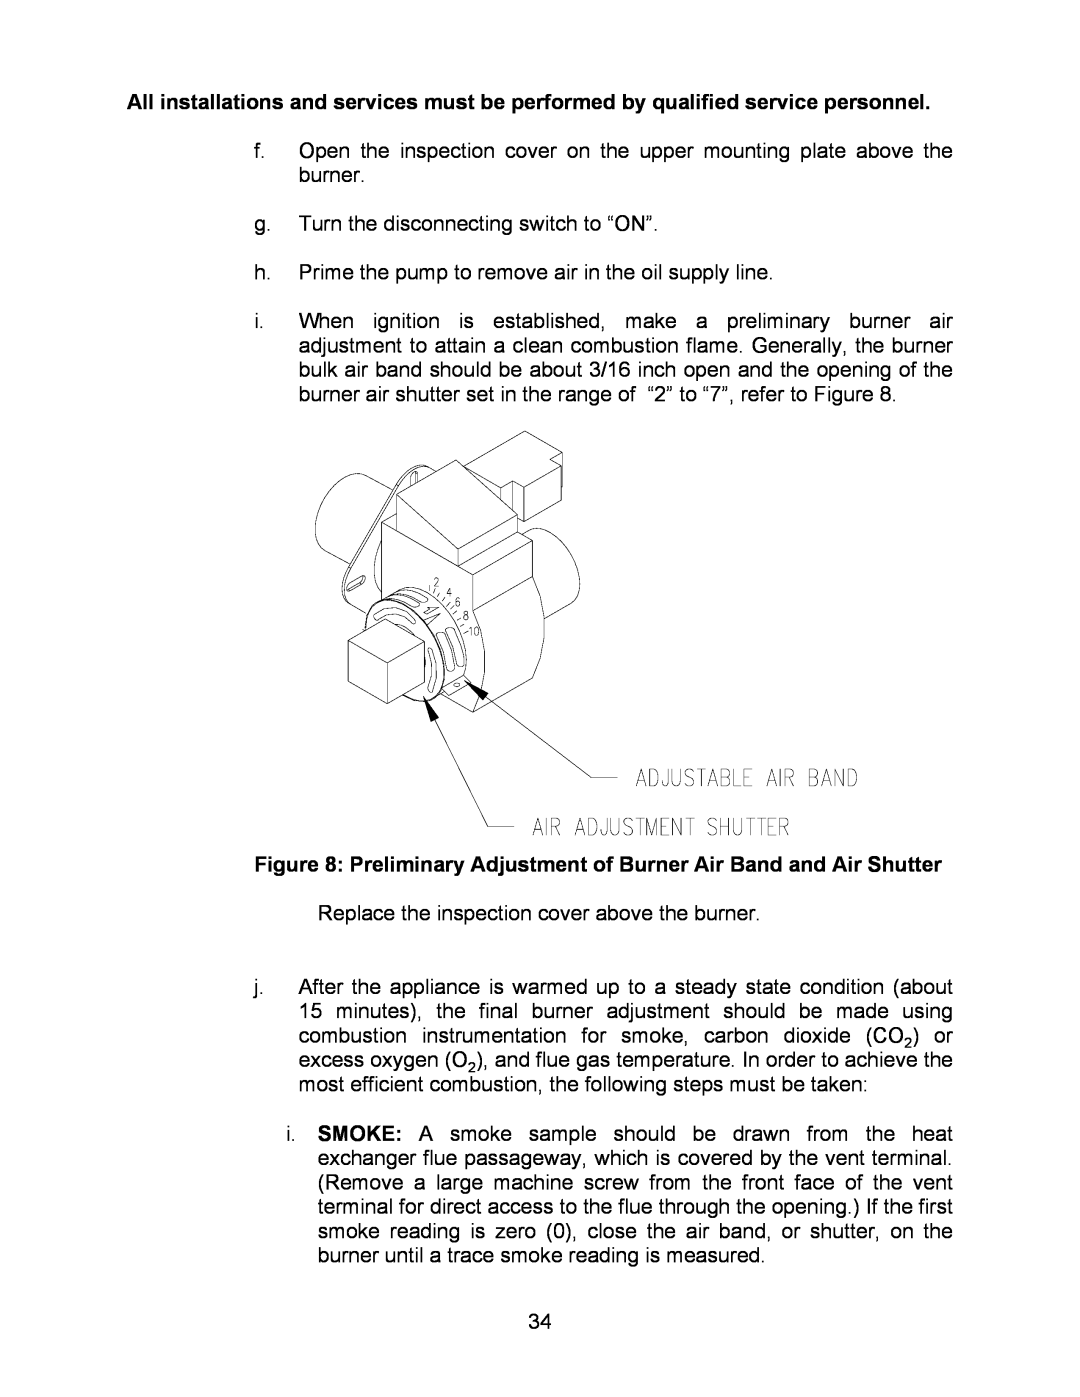
i.When ignition is established, make a preliminary burner air adjustment to attain a clean combustion flame. Generally, the burner bulk air band should be about 3/16 inch open and the opening of the burner air shutter set in the range of “2” to “7”, refer to Figure 8.
Figure 8: Preliminary Adjustment of Burner Air Band and Air Shutter
Replace the inspection cover above the burner.
j.After the appliance is warmed up to a steady state condition (about 15 minutes), the final burner adjustment should be made using combustion instrumentation for smoke, carbon dioxide (CO2) or excess oxygen (O2), and flue gas temperature. In order to achieve the most efficient combustion, the following steps must be taken:
i.SMOKE: A smoke sample should be drawn from the heat exchanger flue passageway, which is covered by the vent terminal. (Remove a large machine screw from the front face of the vent terminal for direct access to the flue through the opening.) If the first smoke reading is zero (0), close the air band, or shutter, on the burner until a trace smoke reading is measured.
34