All installations and services must be performed by qualified service personnel.
With access to the inside of the heat exchanger through the burner area, cleanout openings, and vent terminal connection, it is now possible to use a long, flexible wire brush and an industrial type vacuum cleaner to remove any soot
NOTICE: A one inch (outside diameter) vacuum cleaner hose will fit into the radiator.
To vacuum and brush the horizontal drum of the heat exchanger, enter the drum through the
2.Heat Exchanger Reassembly
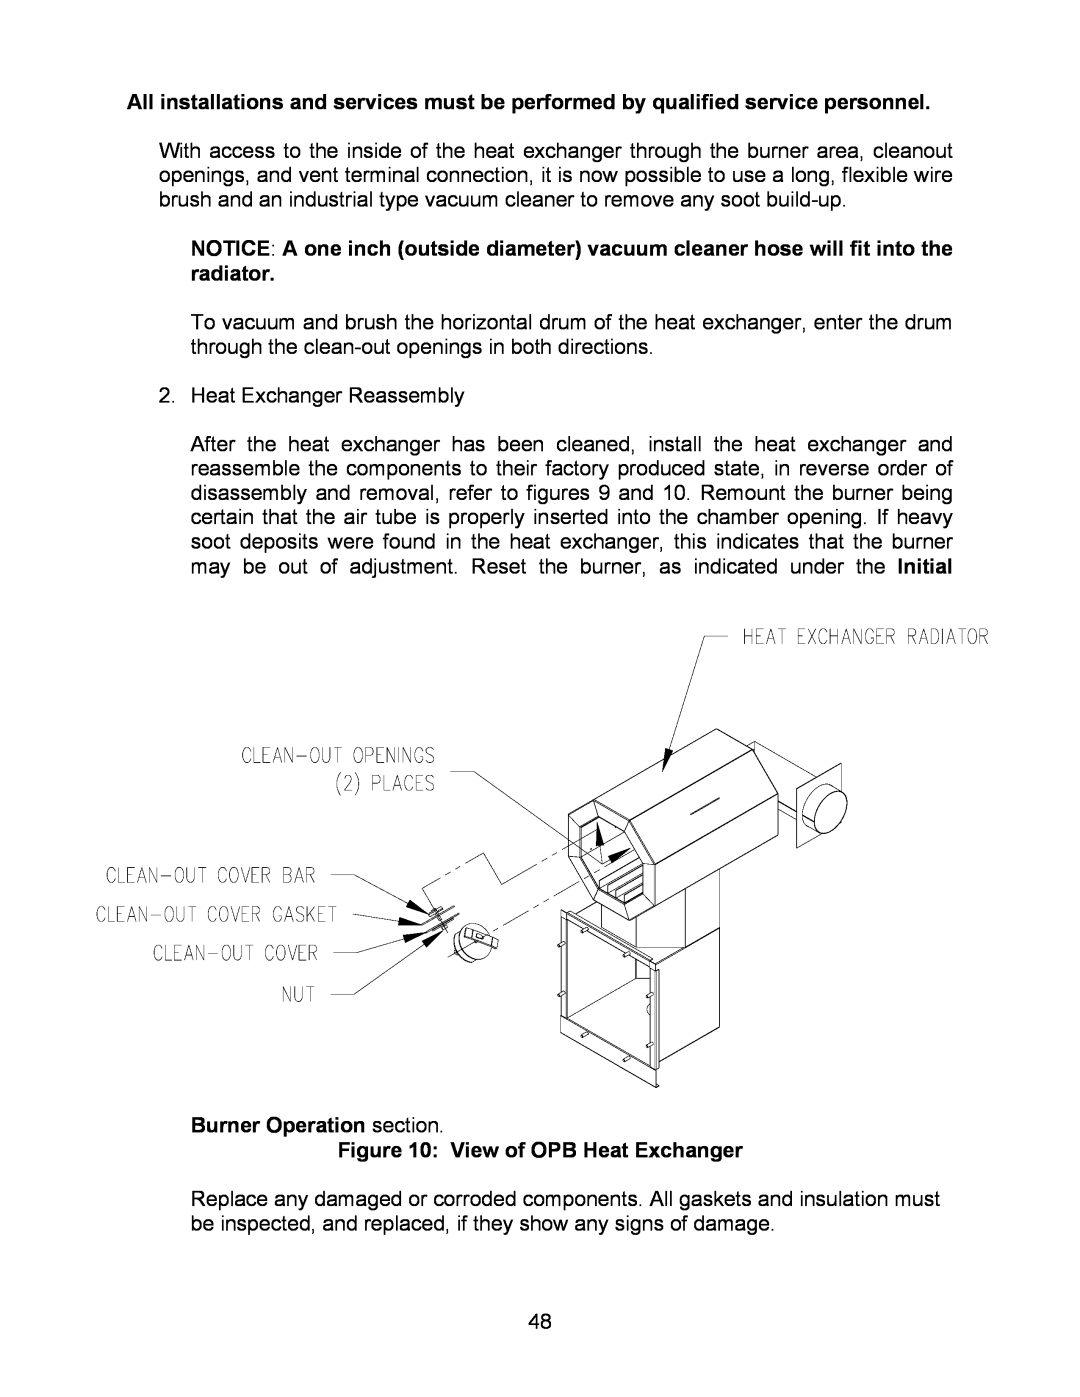
After the heat exchanger has been cleaned, install the heat exchanger and reassemble the components to their factory produced state, in reverse order of disassembly and removal, refer to figures 9 and 10. Remount the burner being certain that the air tube is properly inserted into the chamber opening. If heavy soot deposits were found in the heat exchanger, this indicates that the burner may be out of adjustment. Reset the burner, as indicated under the Initial
Burner Operation section.
Figure 10: View of OPB Heat Exchanger
Replace any damaged or corroded components. All gaskets and insulation must be inspected, and replaced, if they show any signs of damage.
48