(4) Message Broadcast Operation
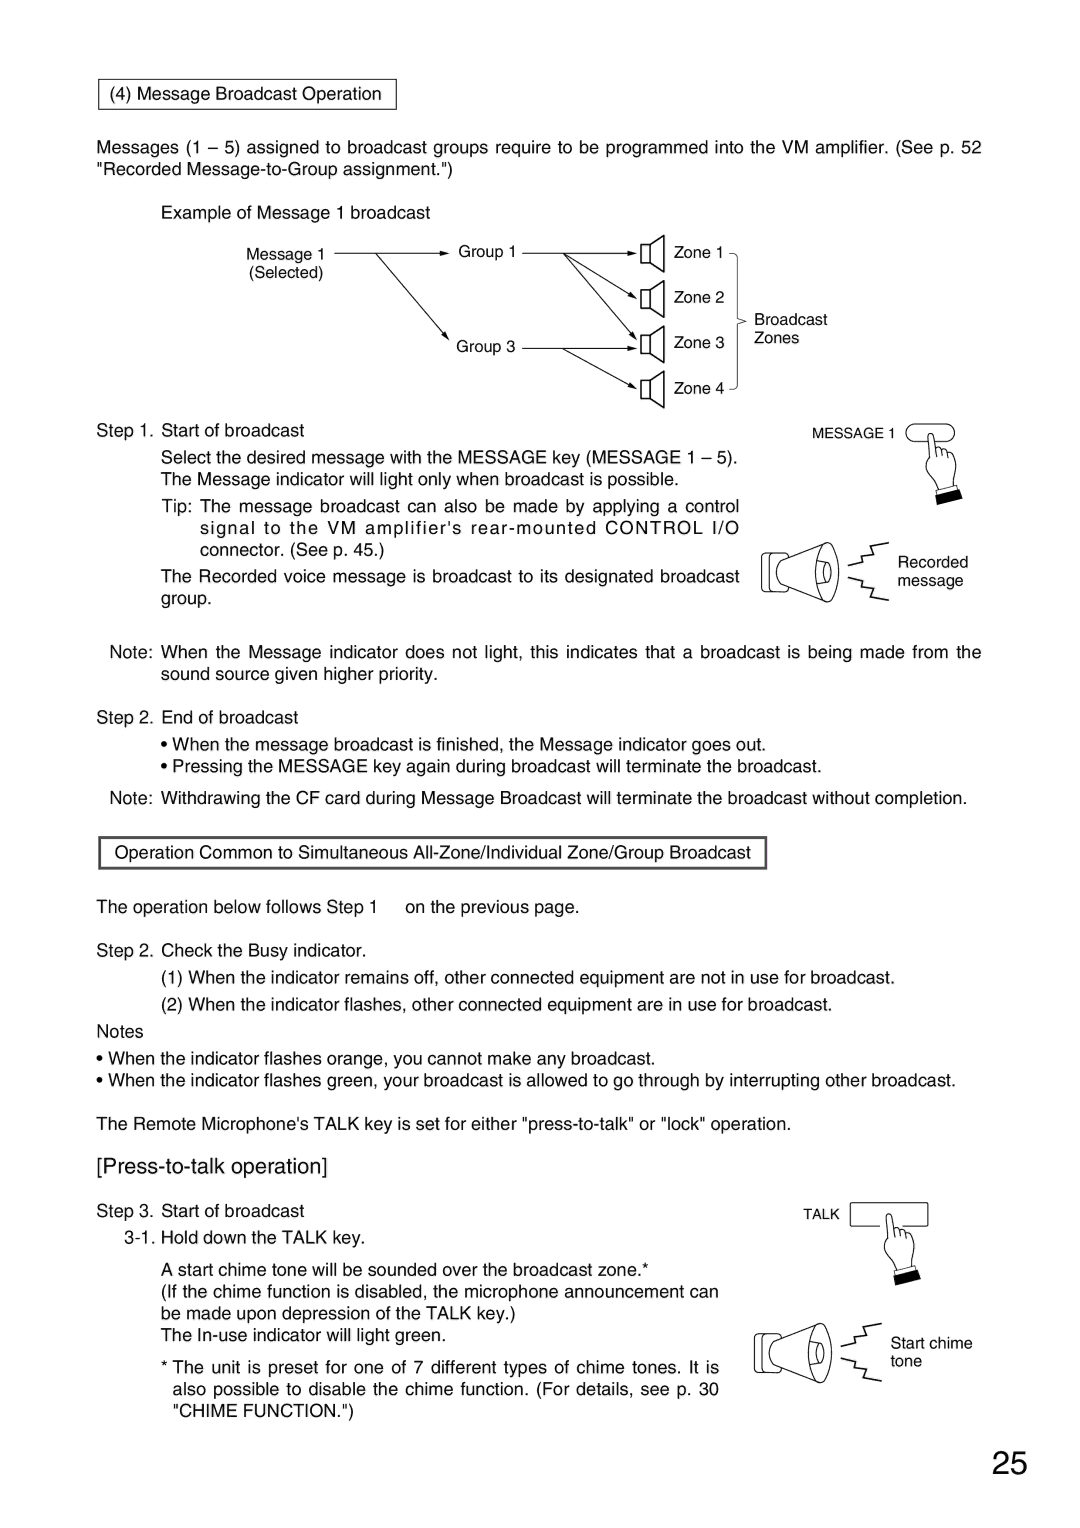
Messages (1 – 5) assigned to broadcast groups require to be programmed into the VM amplifier. (See p. 52 "Recorded
Example of Message 1 broadcast
Message 1 ![]() Group 1 (Selected)
Group 1 (Selected)
Group 3
Zone 1 |
|
Zone 2 |
|
| Broadcast |
Zone 3 | Zones |
| |
Zone 4 |
|
Step 1. Start of broadcast
Select the desired message with the MESSAGE key (MESSAGE 1 – 5). The Message indicator will light only when broadcast is possible.
Tip: The message broadcast can also be made by applying a control signal to the VM amplifier's
The Recorded voice message is broadcast to its designated broadcast group.
MESSAGE 1
![]() Recorded
Recorded ![]() message
message
Note: When the Message indicator does not light, this indicates that a broadcast is being made from the sound source given higher priority.
Step 2. End of broadcast
•When the message broadcast is finished, the Message indicator goes out.
•Pressing the MESSAGE key again during broadcast will terminate the broadcast.
Note: Withdrawing the CF card during Message Broadcast will terminate the broadcast without completion.
Operation Common to Simultaneous
The operation below follows Step 1 on the previous page.
Step 2. Check the Busy indicator.
(1)When the indicator remains off, other connected equipment are not in use for broadcast.
(2)When the indicator flashes, other connected equipment are in use for broadcast.
Notes
•When the indicator flashes orange, you cannot make any broadcast.
•When the indicator flashes green, your broadcast is allowed to go through by interrupting other broadcast.
The Remote Microphone's TALK key is set for either
[Press-to-talk operation]
Step 3. Start of broadcast
A start chime tone will be sounded over the broadcast zone.*
(If the chime function is disabled, the microphone announcement can be made upon depression of the TALK key.)
The
*The unit is preset for one of 7 different types of chime tones. It is also possible to disable the chime function. (For details, see p. 30 "CHIME FUNCTION.")
TALK
![]() Start chime
Start chime
![]() tone
tone
25
