16. MOUNTING AN OPTIONAL SV-200M SURVEILLANCE BOARD
Caution: Leave the following work to a qualified service technician.
Be sure to switch off the power before the work.
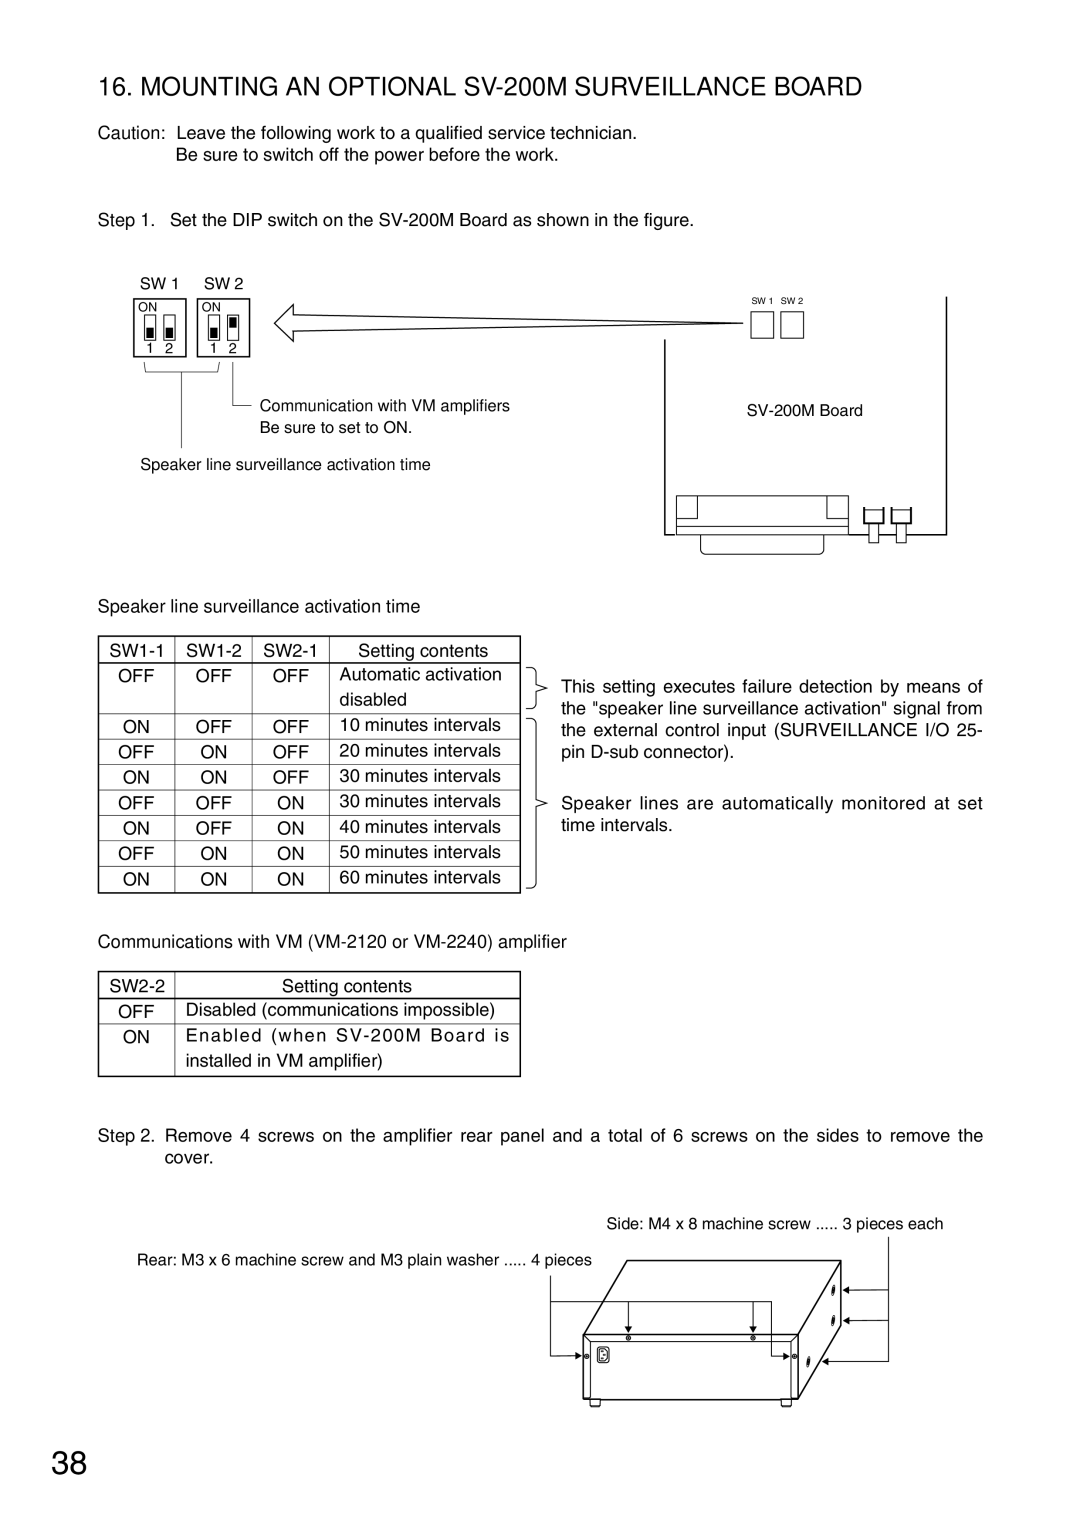
Step 1. Set the DIP switch on the
SW 1 |
| SW 2 | ||||||||||
ON |
|
|
|
| ON |
|
|
| ||||
|
|
|
|
|
|
|
|
|
|
| ||
|
|
|
|
|
|
|
|
|
|
|
|
|
|
|
|
|
|
|
|
|
|
|
|
|
|
1 | 2 |
| 1 | 2 | ||||||||
Communication with VM amplifiers
Be sure to set to ON.
SW 1 SW 2
Speaker line surveillance activation time
Speaker line surveillance activation time
Setting contents | |||
OFF | OFF | OFF | Automatic activation |
|
|
| disabled |
|
|
|
|
ON | OFF | OFF | 10 minutes intervals |
OFF | ON | OFF | 20 minutes intervals |
|
|
|
|
ON | ON | OFF | 30 minutes intervals |
|
|
|
|
OFF | OFF | ON | 30 minutes intervals |
ON | OFF | ON | 40 minutes intervals |
|
|
|
|
OFF | ON | ON | 50 minutes intervals |
|
|
|
|
ON | ON | ON | 60 minutes intervals |
|
|
|
|
This setting executes failure detection by means of the "speaker line surveillance activation" signal from the external control input (SURVEILLANCE I/O 25- pin
Speaker lines are automatically monitored at set time intervals.
Communications with VM (VM-2120 or VM-2240) amplifier
Setting contents | |
OFF | Disabled (communications impossible) |
ON | Enabled (when |
| installed in VM amplifier) |
|
|
Step 2. Remove 4 screws on the amplifier rear panel and a total of 6 screws on the sides to remove the cover.
Side: M4 x 8 machine screw | 3 pieces each |
Rear: M3 x 6 machine screw and M3 plain washer | 4 pieces |
| |||||||||
|
|
|
|
|
|
|
|
|
|
|
|
|
|
|
|
|
|
|
|
|
|
|
|
|
|
|
|
|
|
|
|
|
|
|
|
|
|
|
|
|
|
|
|
|
|
|
|
|
|
|
|
|
|
|
|
|
|
|
|
|
|
|
|
|
|
|
|
|
|
|
|
|
|
|
|
|
|
|
|
|
|
|
|
38
