2 SELECTION OF INSTALLATION PLACE
Opening a ceiling and installation of hanging bolts
<Treatment of ceiling>
The ceiling differs according to structure of building. For details, consult your constructor or interior finish contractor.
In the process after the ceiling board has been removed, it is important to reinforce ceiling foundation (frame) and to keep horizontal level of installed ceiling correctly in order to prevent vibration of ceiling board.
(1)Cut and remove the ceiling foundation.
(2)Reinforce the cut surface of ceiling foundation, and add ceiling foundation for fixing the end of ceiling board.
<Installation of hanging bolt>
Use M10 hanging bolts (4 pcs, to be local procure). Matching to the existing structure, set pitch according to size in the unit external view as shown below.
| New concrete slab | Steel flame structure | Existing concrete slab | ||
Install the bolts with insert brackets or anchor | Use existing angles or install new | Use a | |||
bolts. |
|
| support angles. |
| plugs, or a |
|
|
| Hanging bolt |
| |
|
| Rubber |
|
|
|
|
| Anchor bolt |
|
|
|
(Blade type | (Slide type | (Pipe hanging |
|
|
|
bracket) | bracket) | anchor bolt) | Hanging bolt | Support angle |
|
|
|
|
| ||
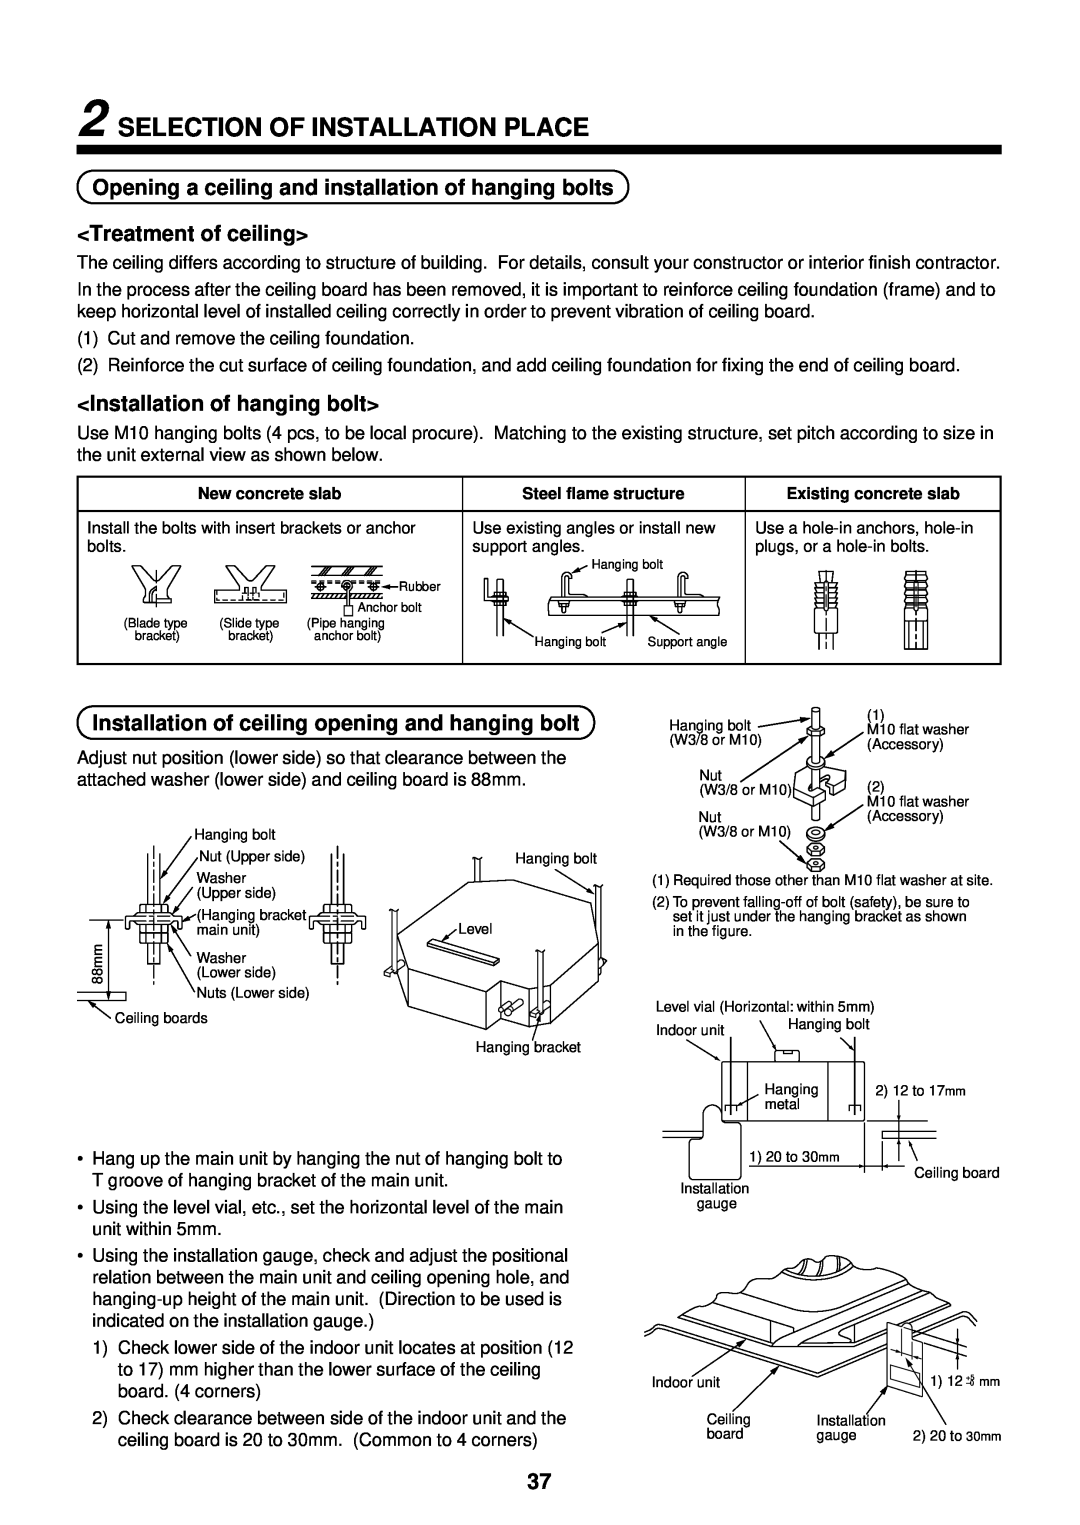
Installation of ceiling opening and hanging bolt
Adjust nut position (lower side) so that clearance between the attached washer (lower side) and ceiling board is 88mm.
| Hanging bolt |
|
| Nut (Upper side) | Hanging bolt |
| Washer |
|
| (Upper side) |
|
| (Hanging bracket | Level |
88mm | main unit) | |
Washer |
| |
| (Lower side) |
|
| Nuts (Lower side) |
|
| Ceiling boards |
|
|
| Hanging bracket |
•Hang up the main unit by hanging the nut of hanging bolt to T groove of hanging bracket of the main unit.
•Using the level vial, etc., set the horizontal level of the main unit within 5mm.
•Using the installation gauge, check and adjust the positional relation between the main unit and ceiling opening hole, and
1)Check lower side of the indoor unit locates at position (12 to 17) mm higher than the lower surface of the ceiling board. (4 corners)
2)Check clearance between side of the indoor unit and the
ceiling board is 20 to 30mm. (Common to 4 corners)
Hanging bolt | (1) |
M10 flat washer | |
(W3/8 or M10) | (Accessory) |
Nut | (2) |
(W3/8 or M10) | |
| M10 flat washer |
Nut | (Accessory) |
(W3/8 or M10) |
|
(1)Required those other than M10 flat washer at site.
(2)To prevent
Level vial (Horizontal: within 5mm)
Indoor unit | Hanging bolt |
|
|
| Hanging |
|
|
|
| 2) 12 to 17mm | ||||
|
| metal |
|
|
|
|
|
|
|
|
|
| 1) 20 to 30mm |
|
|
|
|
|
|
|
|
| |
|
|
|
|
|
|
|
|
|
| ||
|
|
|
|
|
|
|
| Ceiling board | |||
|
|
|
|
|
|
|
| ||||
|
|
|
|
|
|
|
| ||||
|
|
|
|
|
|
|
|
|
| ||
Installation |
|
|
|
|
|
| |||||
|
|
|
|
|
|
|
|
| |||
gauge |
|
|
|
|
|
|
|
|
| ||
Indoor unit |
| 1) 12 | +5 | mm |
| ||||
Ceiling | Installation |
|
|
|
board | gauge | 2) 20 to 30mm | ||
37