the video from the camera over the Internet. The router connects to the Internet over a series of numbered ports. The ports normally used by the camera are blocked from access over the Internet. Therefore, these ports need to be made accessible over the Internet. This is accomplished using the Virtual Server function on the router. The Virtual Server ports used by the camera must be opened through the router for remote access to your camera. Virtual Server is accessed by clicking on Forwarding→Virtual Server.
Follow these steps to configure your router’s Virtual Server settings.
To set up a virtual server entry:
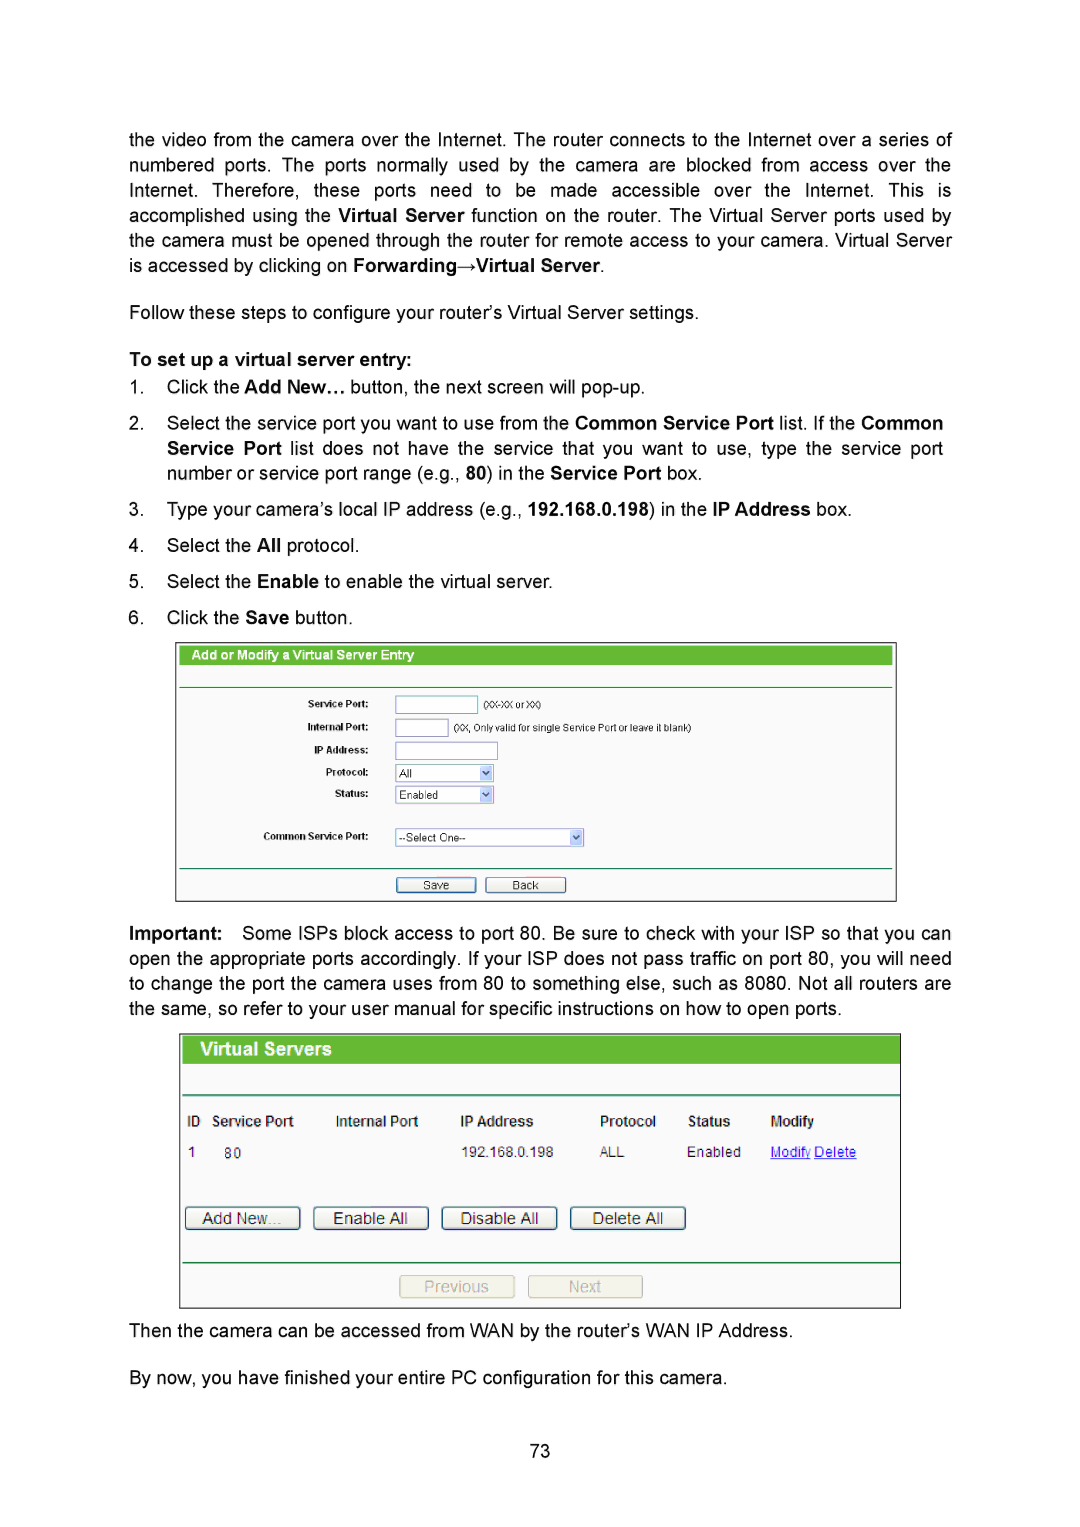
1.Click the Add New… button, the next screen will
2.Select the service port you want to use from the Common Service Port list. If the Common Service Port list does not have the service that you want to use, type the service port number or service port range (e.g., 80) in the Service Port box.
3.Type your camera’s local IP address (e.g., 192.168.0.198) in the IP Address box.
4.Select the All protocol.
5.Select the Enable to enable the virtual server.
6.Click the Save button.
Important: Some ISPs block access to port 80. Be sure to check with your ISP so that you can open the appropriate ports accordingly. If your ISP does not pass traffic on port 80, you will need to change the port the camera uses from 80 to something else, such as 8080. Not all routers are the same, so refer to your user manual for specific instructions on how to open ports.
Then the camera can be accessed from WAN by the router’s WAN IP Address.
By now, you have finished your entire PC configuration for this camera.
73
