Verbatim External Hard Drive NAS manual

Models: External Hard Drive NAS

1 44
Download 44 pages 44.97 Kb
Page 14
Image 14

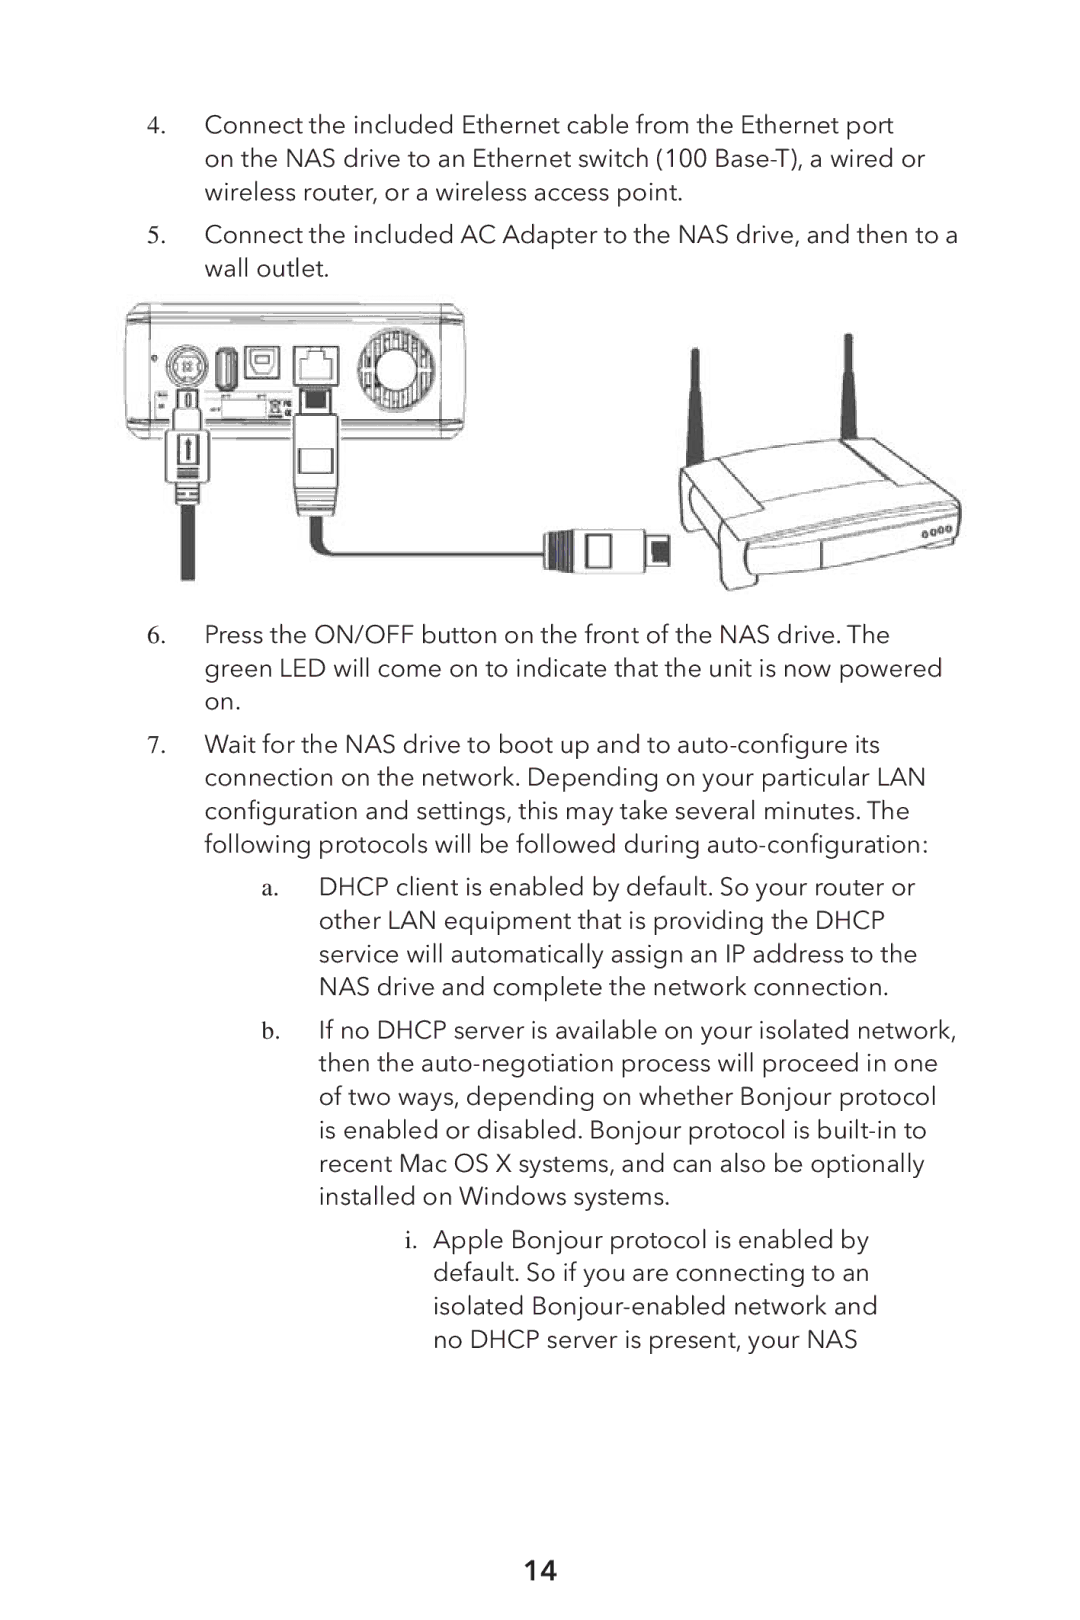
4.Connect the included Ethernet cable from the Ethernet port on the NAS drive to an Ethernet switch (100 Base-T), a wired or wireless router, or a wireless access point.

5. Connect the included AC Adapter to the NAS drive, and then to a wall outlet.

6.Press the ON/OFF button on the front of the NAS drive. The

green LED will come on to indicate that the unit is now powered on.

7.Wait for the NAS drive to boot up and to auto-configure its connection on the network. Depending on your particular LAN configuration and settings, this may take several minutes. The following protocols will be followed during auto-configuration:

a. DHCP client is enabled by default. So your router or other LAN equipment that is providing the DHCP service will automatically assign an IP address to the NAS drive and complete the network connection.

b.If no DHCP server is available on your isolated network, then the auto-negotiation process will proceed in one of two ways, depending on whether Bonjour protocol is enabled or disabled. Bonjour protocol is built-in to recent Mac OS X systems, and can also be optionally installed on Windows systems.

i.Apple Bonjour protocol is enabled by default. So if you are connecting to an isolated Bonjour-enabled network and no DHCP server is present, your NAS

14

Page 14
Image 14
Verbatim External Hard Drive NAS manual