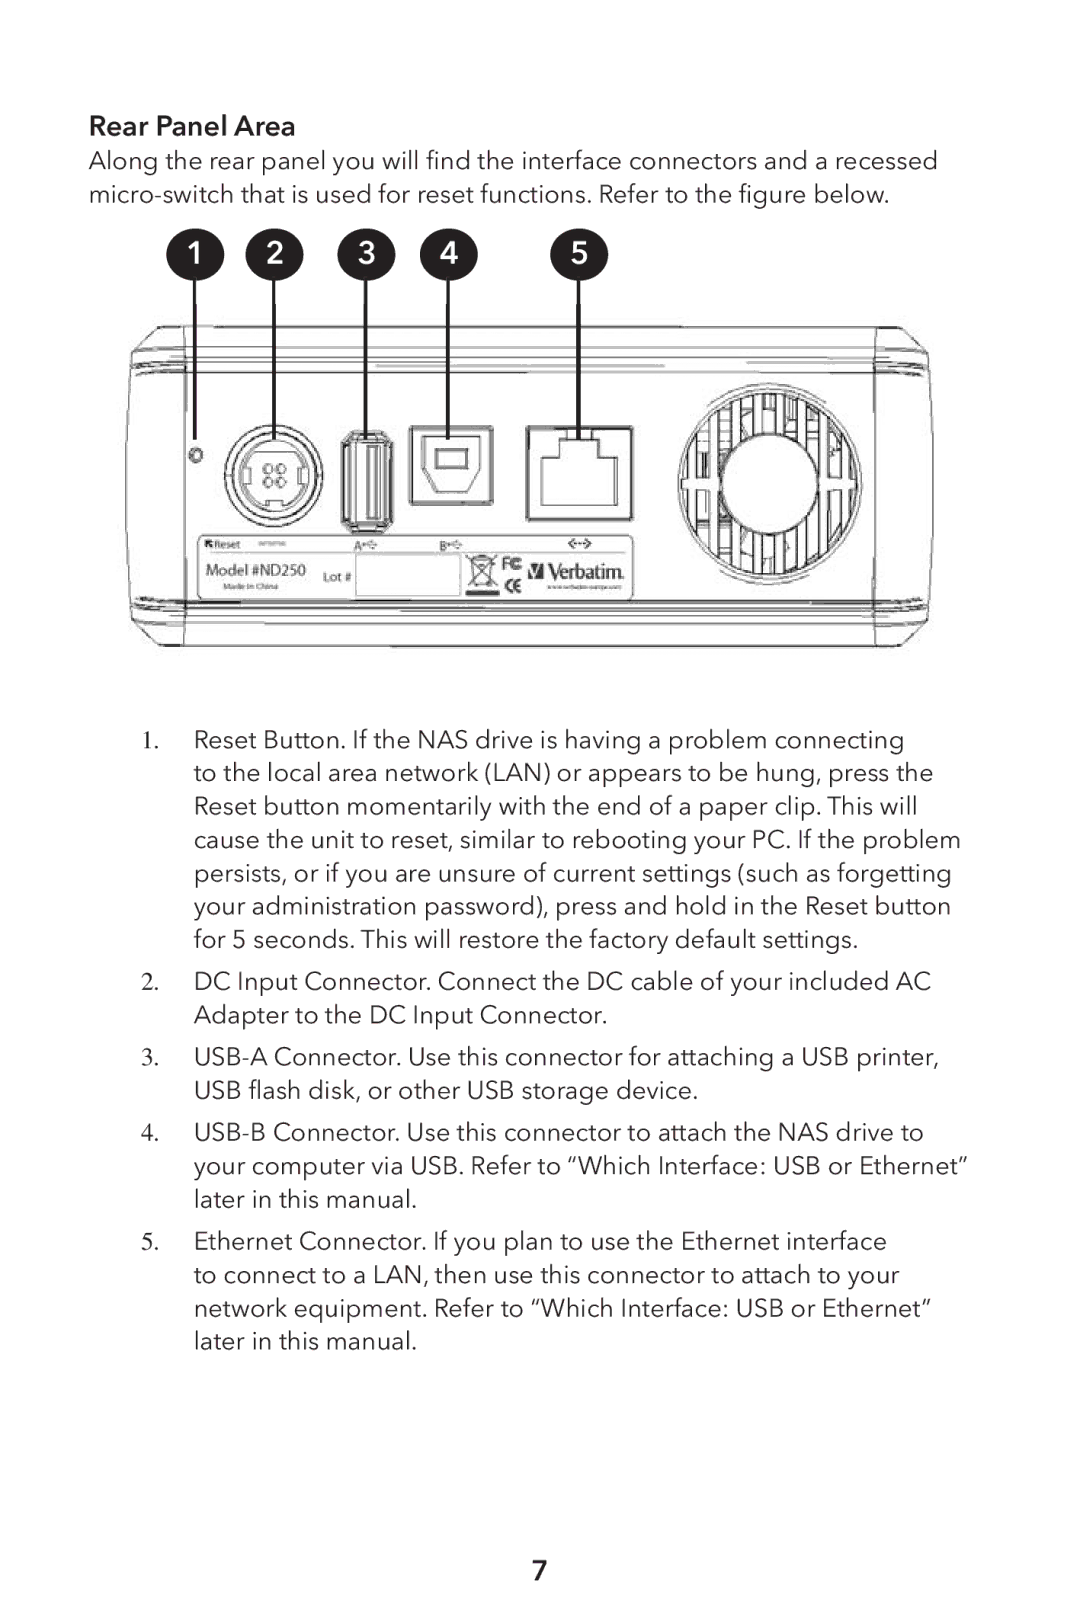
Rear Panel Area
Along the rear panel you will find the interface connectors and a recessed
1 | 2 | 3 | 4 | 5 |
1. Reset Button. If the NAS drive is having a problem connecting to the local area network (LAN) or appears to be hung, press the Reset button momentarily with the end of a paper clip. This will cause the unit to reset, similar to rebooting your PC. If the problem persists, or if you are unsure of current settings (such as forgetting your administration password), press and hold in the Reset button for 5 seconds. This will restore the factory default settings.
2.DC Input Connector. Connect the DC cable of your included AC Adapter to the DC Input Connector.
3.
4.
5.Ethernet Connector. If you plan to use the Ethernet interface to connect to a LAN, then use this connector to attach to your network equipment. Refer to “Which Interface: USB or Ethernet” later in this manual.
7