SHIELDING REPAIR | SERVICING TIRES SAFELY |
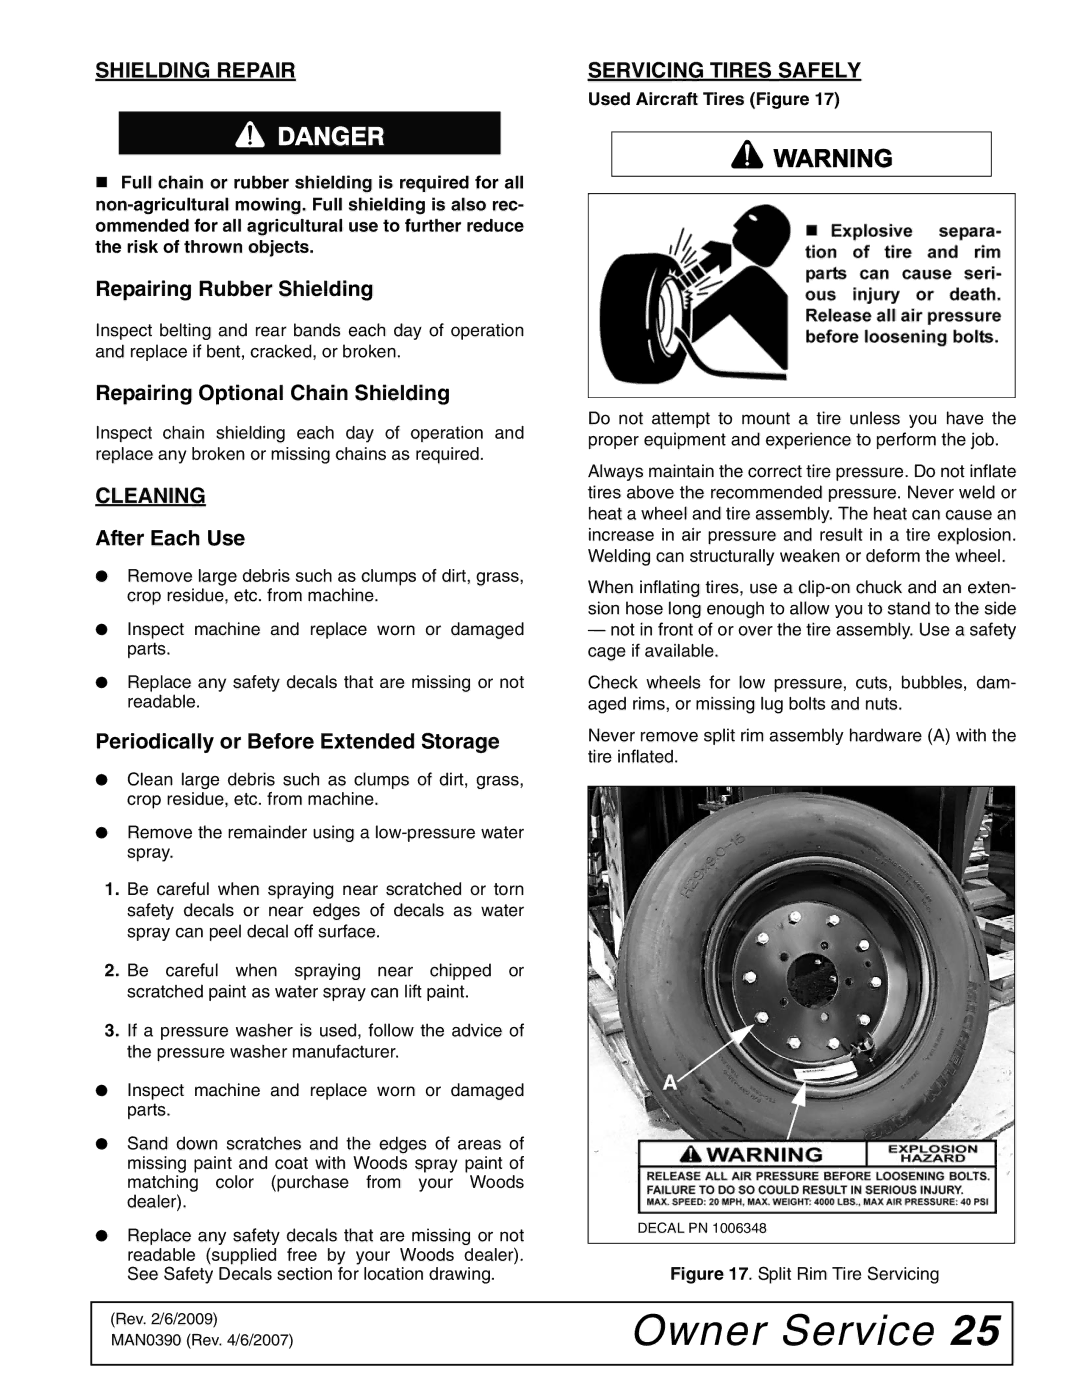
| Used Aircraft Tires (Figure 17) |
Full chain or rubber shielding is required for all
Repairing Rubber Shielding
Inspect belting and rear bands each day of operation and replace if bent, cracked, or broken.
Repairing Optional Chain Shielding
Inspect chain shielding each day of operation and replace any broken or missing chains as required.
CLEANING
After Each Use
●Remove large debris such as clumps of dirt, grass, crop residue, etc. from machine.
●Inspect machine and replace worn or damaged parts.
●Replace any safety decals that are missing or not readable.
Periodically or Before Extended Storage
●Clean large debris such as clumps of dirt, grass, crop residue, etc. from machine.
●Remove the remainder using a
1.Be careful when spraying near scratched or torn safety decals or near edges of decals as water spray can peel decal off surface.
2.Be careful when spraying near chipped or scratched paint as water spray can lift paint.
3.If a pressure washer is used, follow the advice of the pressure washer manufacturer.
●Inspect machine and replace worn or damaged parts.
●Sand down scratches and the edges of areas of missing paint and coat with Woods spray paint of matching color (purchase from your Woods dealer).
●Replace any safety decals that are missing or not readable (supplied free by your Woods dealer). See Safety Decals section for location drawing.
![]() WARNING
WARNING
Do not attempt to mount a tire unless you have the proper equipment and experience to perform the job.
Always maintain the correct tire pressure. Do not inflate tires above the recommended pressure. Never weld or heat a wheel and tire assembly. The heat can cause an increase in air pressure and result in a tire explosion. Welding can structurally weaken or deform the wheel.
When inflating tires, use a
—not in front of or over the tire assembly. Use a safety cage if available.
Check wheels for low pressure, cuts, bubbles, dam- aged rims, or missing lug bolts and nuts.
Never remove split rim assembly hardware (A) with the tire inflated.
A
DECAL PN 1006348
Figure 17. Split Rim Tire Servicing
(Rev. 2/6/2009) MAN0390 (Rev. 4/6/2007)