ADJUSTING SLIP CLUTCH
The slip clutch is designed to slip so that the gearbox and driveline are protected if the cutter strikes an obstruction. A new slip clutch or one that has been in storage over the winter may seize. Before operating the cutter, make sure it will slip by performing the fol- lowing operation:
1.Turn off tractor engine and remove key. Remove driveline from tractor PTO. Loosen six 10 mm cap screws (6) to remove all tension from Belleville spring plate (5).
2.Hold clutch hub (3) solid and turn shaft to make sure clutch slips.
3.If clutch does not slip freely, disassemble and clean the thrust plate faces (4), flange yoke (1), and clutch hub (3).
4.Reassemble clutch. Tighten Belleville spring (5) until it is against the thrust plate (4) of the clutch, and then back off each of the six nuts by two full revolutions. The gap between Belleville spring and thrust plate should be 1/8" as shown in Figure 15.
5.If a clutch continues to slip when the spring is compressed to 1/8", check friction discs (2) for
excessive wear. Discs are 1/8" when new. Replace discs after 1/16" wear. Minimum disc thickness is 1/16".
RUBBER DISK REPLACEMENT
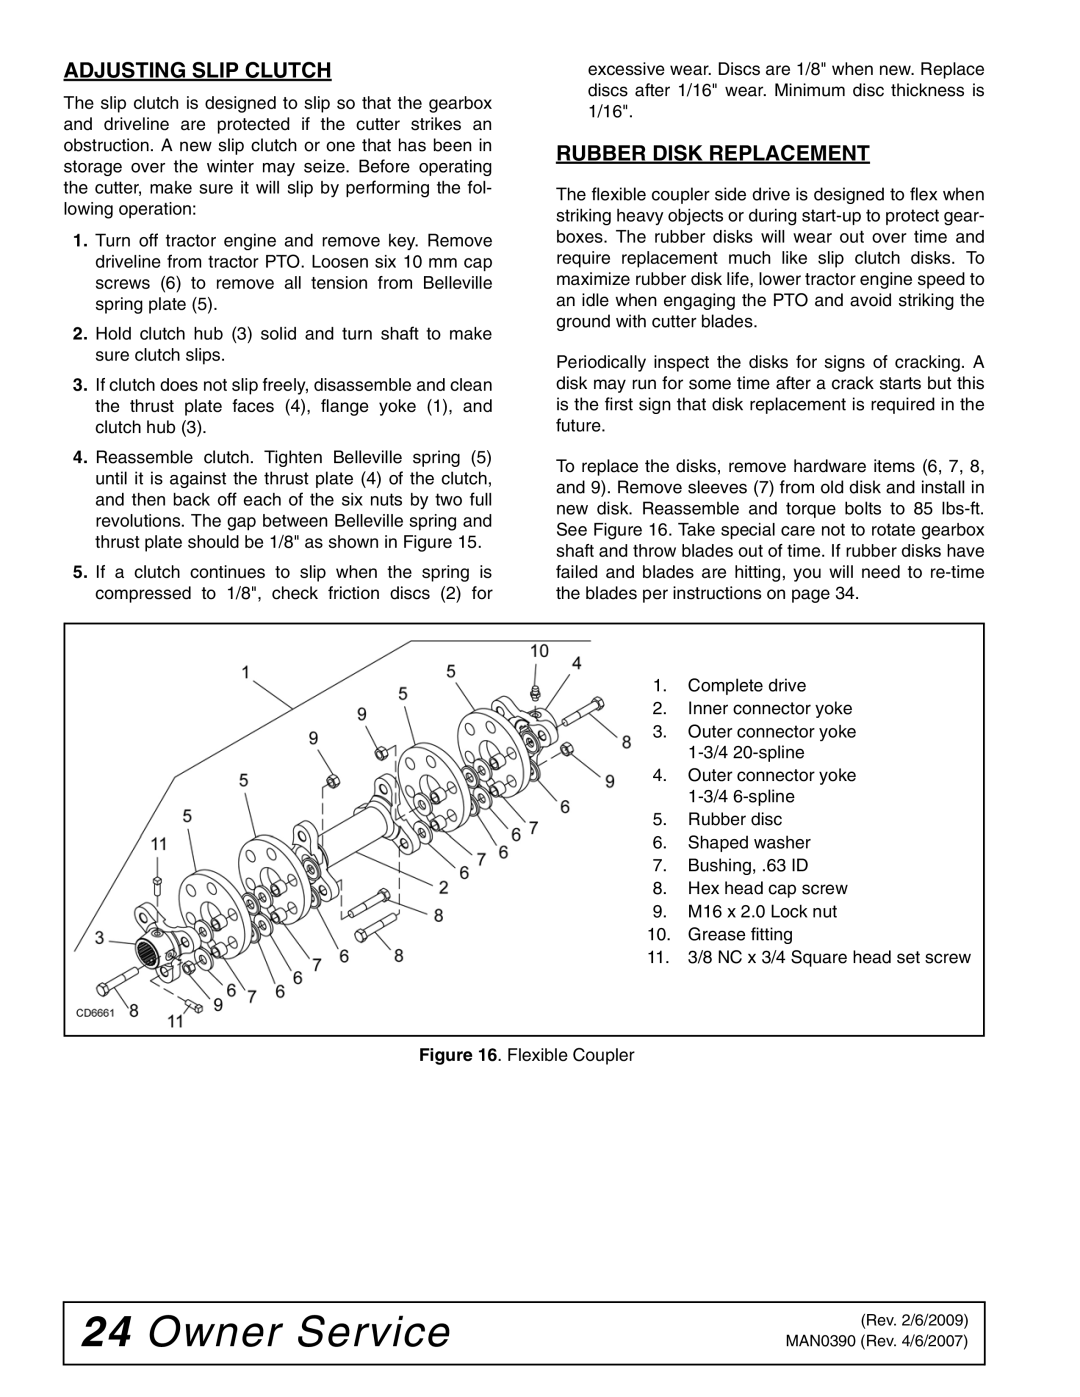
The flexible coupler side drive is designed to flex when striking heavy objects or during
Periodically inspect the disks for signs of cracking. A disk may run for some time after a crack starts but this is the first sign that disk replacement is required in the future.
To replace the disks, remove hardware items (6, 7, 8, and 9). Remove sleeves (7) from old disk and install in new disk. Reassemble and torque bolts to 85
1.Complete drive
2.Inner connector yoke
3.Outer connector yoke
4.Outer connector yoke
5.Rubber disc
6.Shaped washer
7.Bushing, .63 ID
8.Hex head cap screw
9.M16 x 2.0 Lock nut
10.Grease fitting
11.3/8 NC x 3/4 Square head set screw
Figure 16. Flexible Coupler
24 Owner Service
(Rev. 2/6/2009) MAN0390 (Rev. 4/6/2007)