Inverter/Charger Installation
Xanbus and AC Sync Cable
A Xanbus and AC sync cable is required for
Install these cables, routing it through the XW Conduit Box raceway, prior to making the AC and DC wiring connections. See Figure
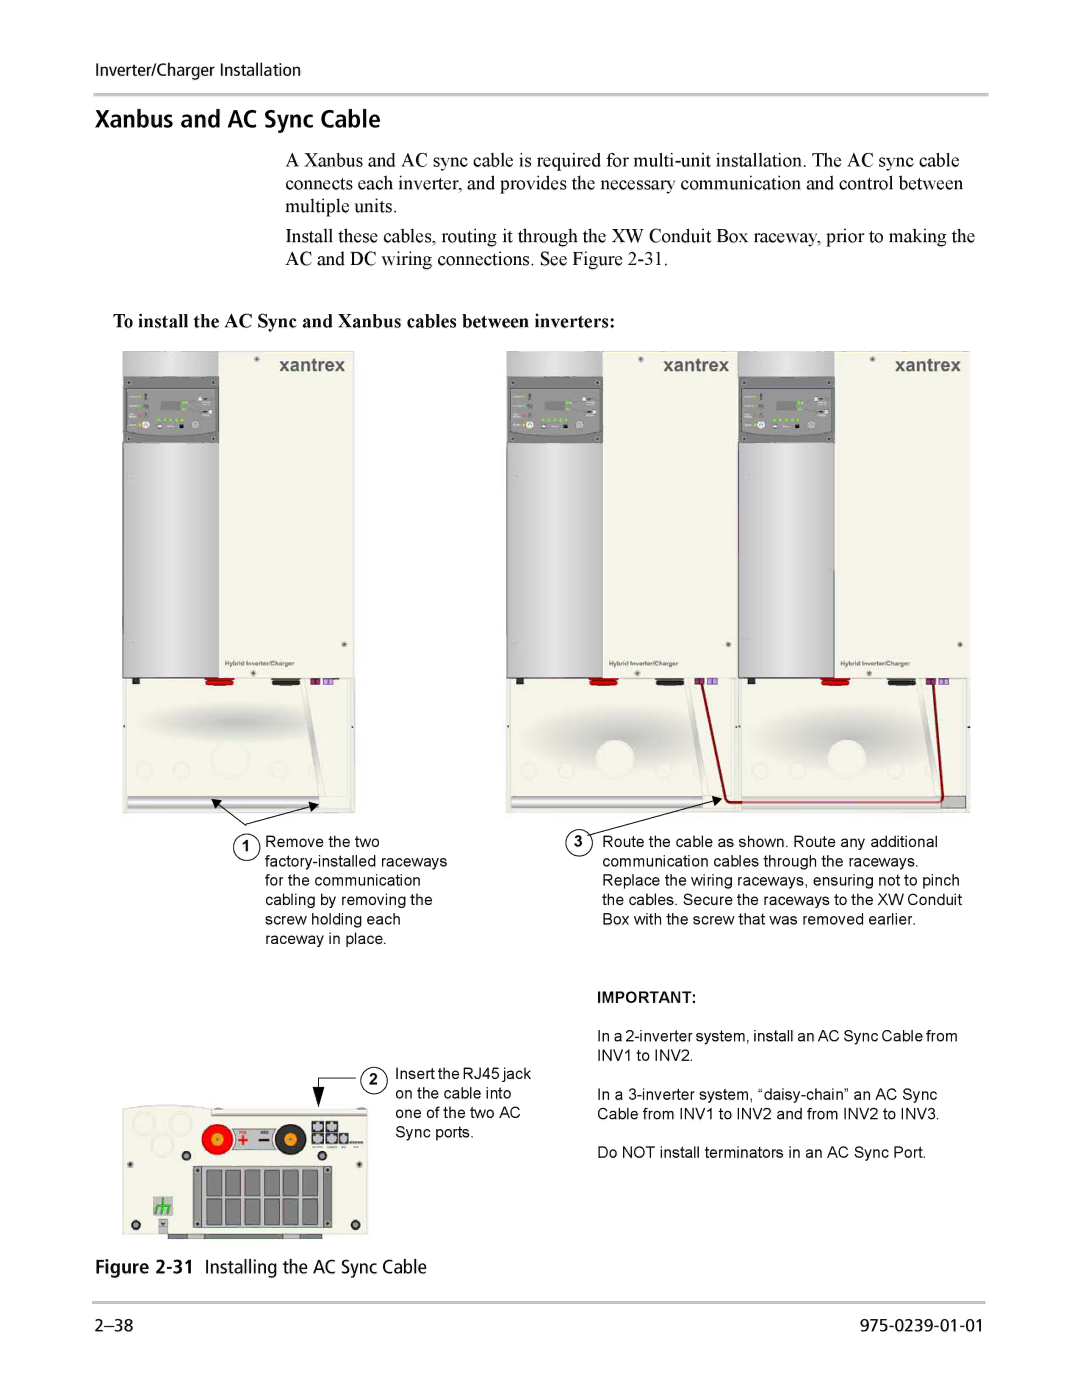
To install the AC Sync and Xanbus cables between inverters:
1Remove the two
2Insert the RJ45 jack ![]() on the cable into
on the cable into
one of the two AC Sync ports.
3Route the cable as shown. Route any additional communication cables through the raceways. Replace the wiring raceways, ensuring not to pinch the cables. Secure the raceways to the XW Conduit Box with the screw that was removed earlier.
IMPORTANT:
In a
In a
Do NOT install terminators in an AC Sync Port.