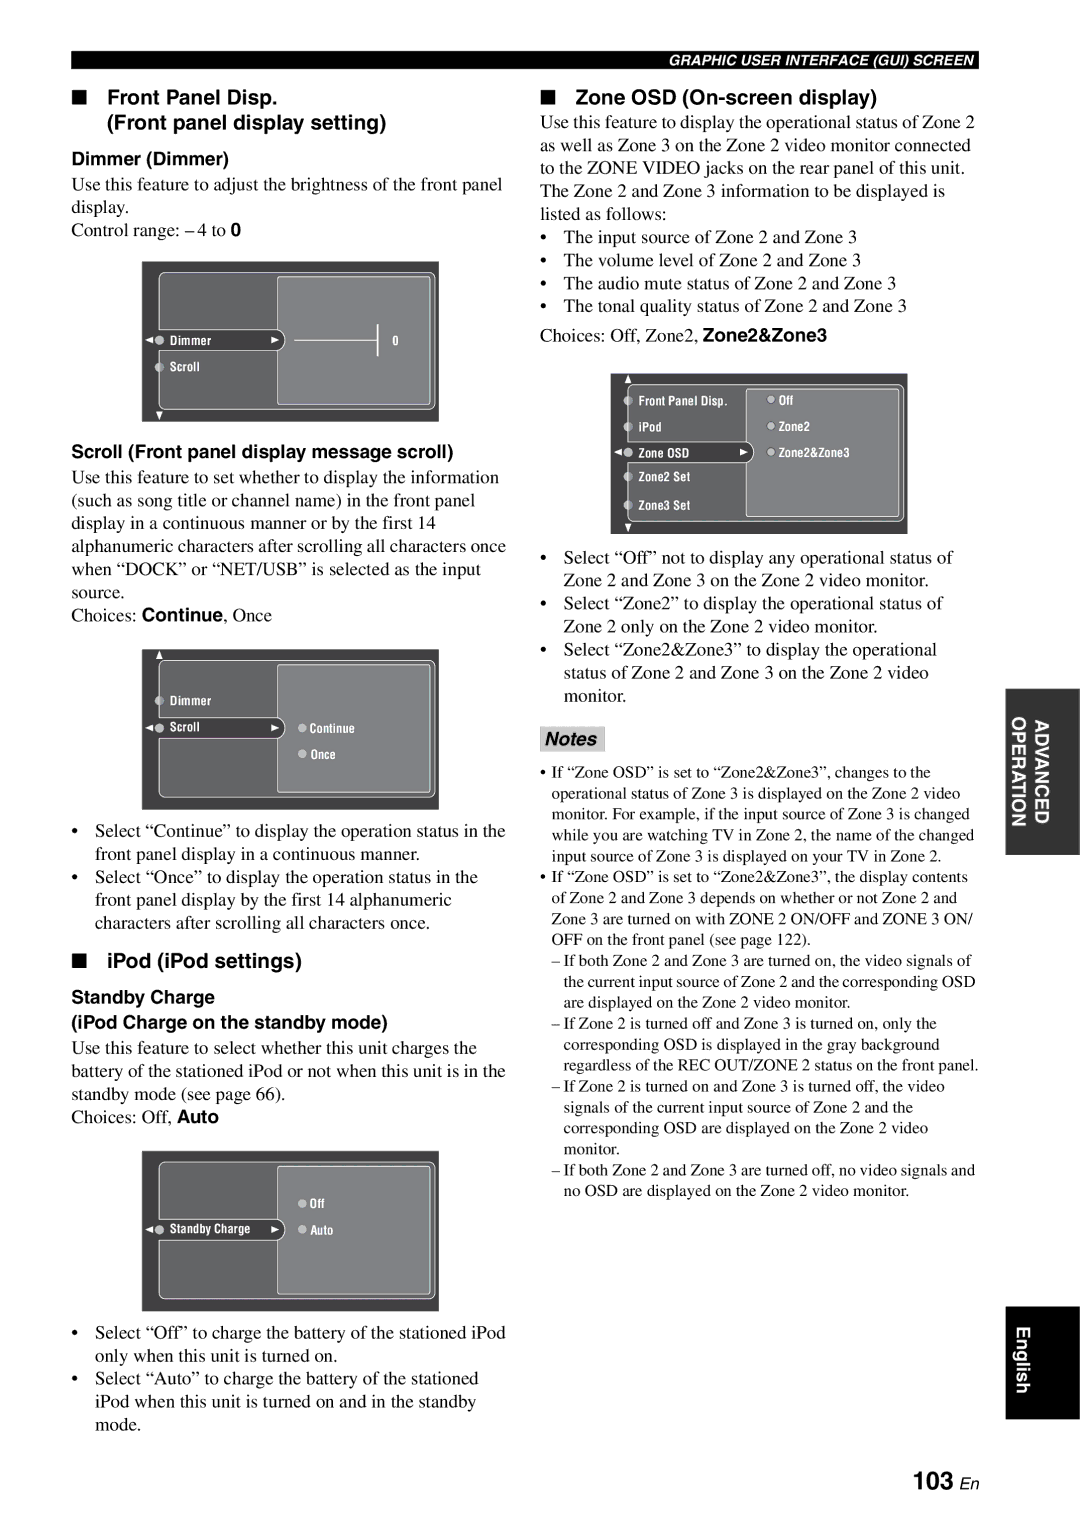
Front Panel Disp.

(Front panel display setting)

Dimmer (Dimmer)

Use this feature to adjust the brightness of the front panel display.

Control range: – 4 to 0

Dimmer

0

Scroll

Scroll (Front panel display message scroll)

Use this feature to set whether to display the information (such as song title or channel name) in the front panel display in a continuous manner or by the first 14 alphanumeric characters after scrolling all characters once when “DOCK” or “NET/USB” is selected as the input source.

Choices: Continue, Once

Dimmer

Scroll

Continue

Once

Select “Continue” to display the operation status in the front panel display in a continuous manner.

Select “Once” to display the operation status in the front panel display by the first 14 alphanumeric characters after scrolling all characters once.

iPod (iPod settings)

Standby Charge

(iPod Charge on the standby mode)

Use this feature to select whether this unit charges the battery of the stationed iPod or not when this unit is in the standby mode (see page 66).

Choices: Off, Auto

Off

Standby Charge

Auto

GRAPHIC USER INTERFACE (GUI) SCREEN

Zone OSD (On-screen display)

Use this feature to display the operational status of Zone 2 as well as Zone 3 on the Zone 2 video monitor connected to the ZONE VIDEO jacks on the rear panel of this unit.

The Zone 2 and Zone 3 information to be displayed is listed as follows:

The input source of Zone 2 and Zone 3

The volume level of Zone 2 and Zone 3

The audio mute status of Zone 2 and Zone 3

The tonal quality status of Zone 2 and Zone 3

Choices: Off, Zone2, Zone2&Zone3

Front Panel Disp.

Off

iPod

Zone2

Zone OSD

Zone2&Zone3

Zone2 Set


Zone3 Set


Select “Off” not to display any operational status of Zone 2 and Zone 3 on the Zone 2 video monitor.

Select “Zone2” to display the operational status of Zone 2 only on the Zone 2 video monitor.

Select “Zone2&Zone3” to display the operational status of Zone 2 and Zone 3 on the Zone 2 video monitor.

Notes

If “Zone OSD” is set to “Zone2&Zone3”, changes to the operational status of Zone 3 is displayed on the Zone 2 video monitor. For example, if the input source of Zone 3 is changed while you are watching TV in Zone 2, the name of the changed input source of Zone 3 is displayed on your TV in Zone 2.

If “Zone OSD” is set to “Zone2&Zone3”, the display contents of Zone 2 and Zone 3 depends on whether or not Zone 2 and Zone 3 are turned on with ZONE 2 ON/OFF and ZONE 3 ON/ OFF on the front panel (see page 122).

If both Zone 2 and Zone 3 are turned on, the video signals of the current input source of Zone 2 and the corresponding OSD are displayed on the Zone 2 video monitor.

If Zone 2 is turned off and Zone 3 is turned on, only the corresponding OSD is displayed in the gray background regardless of the REC OUT/ZONE 2 status on the front panel.

If Zone 2 is turned on and Zone 3 is turned off, the video signals of the current input source of Zone 2 and the corresponding OSD are displayed on the Zone 2 video monitor.

If both Zone 2 and Zone 3 are turned off, no video signals and no OSD are displayed on the Zone 2 video monitor.

OPERATION

ADVANCED


Select “Off” to charge the battery of the stationed iPod only when this unit is turned on.

Select “Auto” to charge the battery of the stationed iPod when this unit is turned on and in the standby mode.

English

103 En

Page 105
Image 105
Yamaha RX-V2700 103 En, Front Panel Disp Front panel display setting, IPod iPod settings, Zone OSD On-screen display

RX-V2700 specifications

The Yamaha RX-V2700 is a powerful and versatile AV receiver that is designed to deliver high-quality audio and video performance for home theater enthusiasts. With its robust features and advanced technologies, the RX-V2700 aims to enhance the overall entertainment experience.

One of the standout features of the RX-V2700 is its support for high-definition audio formats. It is equipped with decoding capabilities for Dolby TrueHD and DTS-HD Master Audio, which allows users to enjoy lossless audio quality from Blu-ray discs and other high-definition media. This, combined with a 7.1-channel surround sound system, creates an immersive listening experience that brings movies, music, and games to life.

The RX-V2700 also features YPAO (Yamaha Parametric room Acoustic Optimizer), a sophisticated room calibration technology. This system automatically analyzes the acoustics of the room and adjusts the settings of the receiver to achieve optimal sound performance. This ensures that users experience the best possible audio quality regardless of their room’s size or shape.

In terms of connectivity, the RX-V2700 provides a wide range of options. It includes multiple HDMI inputs, allowing users to connect various devices such as Blu-ray players, gaming consoles, and streaming devices. The receiver also supports HDMI version 1.3, which allows for higher bandwidth and additional features such as Deep Color and x.v.Color for enhanced video quality.

For video processing, the RX-V2700 is equipped with a high-quality video upscaling feature. It can upscale standard definition video sources to 1080p, ensuring that all content looks great on modern HD displays. The receiver also supports Picture-in-Picture functionality, enabling users to watch multiple sources simultaneously.

Another notable characteristic of the RX-V2700 is its sleek design, which fits seamlessly into any home entertainment setup. The front panel offers a user-friendly interface, making it easy to navigate through settings and options.

The Yamaha RX-V2700 stands out with its combination of advanced audio and video technologies, ensuring it can enhance any home theater setup. Whether for movie nights, music listening, or gaming sessions, the RX-V2700 delivers an impressive audio-visual performance that caters to the needs of discerning users. With its variety of features, it remains a popular choice for those seeking a comprehensive AV receiver solution.